JoJo's Bizarre Adventure: Eyes of Heaven

JoJo's Bizarre Adventure: Eyes of Heaven (ジョジョの奇妙な冒険 アイズオブヘブン, JoJo no Kimyō na Bōken Aizu Obu Hebun) is a tag team fighting game based on the JoJo's Bizarre Adventure franchise, developed by CyberConnect2 and published by Bandai Namco Entertainment exclusively for the PlayStation 3 and PlayStation 4.
The game features 52 playable characters (53 with first print bonus), ranging from Phantom Blood to JoJolion. It was announced as a sucessor to All-Star Battle in the January 15, 2015 issue of Famitsu and was presented at Jump Festa 2015. A demo was presented at Jump Festa 2015 with 7 characters: Joseph Joestar, Caesar Zeppeli, Rudol von Stroheim, Jotaro Kujo, Noriaki Kakyoin, Josuke Higashikata, and Diego Brando. It was released afterwards on PSN for PS4 only.[3]
The game was released on December 17, 2015 in Japan, June 28, 2016 in North America, and July 1, 2016 in Europe.[2]
Gameplay
Overview
Eyes of Heaven is a 3D action brawler, described as Stylish Tag JoJo Action (スタイリッシュタッグジョジョアクション, Sutairisshu Taggu JoJo Akushon), set in expansive arenas based on locations in the JoJo's Bizarre Adventure manga.
The format of the game involves four characters in a 2 vs 2 battle. Players pick a single character to control as well as a second character that may be controlled by either a CPU or a second human player if playing online to fight the enemy team. While the game allows for four players to battle each other in teams online, there is no local multiplayer.
Jotaro Kujo and his Part 4 self, Enrico Pucci and his New Moon form, and Diego Brando and Alternate Diego cannot team up with each other.
Basics
During a match, each team's goal is to deplete the enemy team's health gauges first before the end of the round. Characters have three health gauges which are depleted in succession until the character is "Retired", and removed from the fight. Offensively, the characters have access to basic attacks and their own special skills. For basic attacks, all characters have Normal Attacks used to string basic combos up to a maximum of five steps ending in a heavy-hitting finisher, although this number varies per-character. They also have a Powerful Attack used to knock opponents away or deliver specific finishers from Normal Attack combos, and a slow but unblockable Takedown Attack unleashed when Powerful Attack is held, delivering a red-flashing strike that crumples targets and leaves them open to follow-up attacks.
Special skills usually take the form of unique, powerful abilities such as larger scale attacks, projectiles, traps, etc. and inflict greater damage to opponents, but can also prepare/provide a number of advantages and bonuses when used. All special skills are subject to cooldowns during which a character cannot perform them again, though various buffs can increase cooldown speed. Many characters have one skill they can occasionally perform that has notably more potent effects or damage compared to others, but also a greater cooldown. Certain skills have cooldown gauges that also serve to display secondary elements, such as how many times a skill can be used before being placed on cooldown, and the length of an effect or enhanced state.
Defensively speaking, a player can either put up a guard that blocks attacks from the front to greatly reduce the damage taken and potentially counter, or dodge in any cardinal direction or in relation to a lock-on target with a fast but short Quickstep. Beyond evasion, Quickstepping may also be used to cancel out of attacks or certain skills in order to extend ground combos, or interrupt an unsafe maneuver. Jumping can be used similarly to cancel out of combos as well. Although putting up a guard is generally the fastest and safest defensive option and does not expend stamina, it has an innate durability indicated by the color of the guard gradually shifting from white to yellow to red. If too much guard damage is sustained in a short period of time, a Guard Break will occur, and the defender is left completely vulnerable for a few seconds and unable to act. Guards are also vulnerable to the aforementioned Takedown Attacks, which function as the game's equivalent to "throws".
All characters (except Alt. World Diego & N'Doul) possess the ability to Homing Dash, allowing them to charge forward or toward their lock-on targets in short high-speed bursts at the cost of stamina and quickly close distance. Upon making contact, the target will stagger as if hit by an attack, which combined with the ability to cancel out of Homing Dashes using Normal Attacks (known as "Homing Dash Attacks"), grant a relatively easy method of initiating combos. If not locked-on, Homing Dashes may also be used to escape danger and create distance.
Each time a character's health bar is depleted, it will "Break", and they are temporarily knocked down before being able to resume fighting, permanently preventing them from recovering health above that point. However, they are also granted temporary invincibility and therefore a moment to recover from being attacked, signified by a white glow around them. For some characters, special effects may trigger when they are at certain health levels.
Below the health gauge is a stamina gauge that displays how much a character can take action within a given period of time. Actions such as Quickstepping, Homing Dashing, jumping, and executing skills deplete stamina, and stamina is generally lost at a much faster rate than it is regenerated. Once empty, the stamina gauge will turn red and characters are unable to execute any actions aside from Normal and Powerful attacks, and guarding for a brief period until the gauge refills completely. Jump-canceling combos also depletes a very large portion of the stamina gauge, and holding a Homing Dash rapidly drains stamina beyond the initial cost in exchange for extending its distance. While stamina will slowly recover on its own, standing still also greatly increases the regeneration rate (though guarding will inversely reduce recovery rate). Certain passive skills on specific characters deplete stamina while active, and some even require a full gauge to even use. In all, the presence of stamina is both a deterrent for haphazard aggression and a means to limit a given character's ability to maintain an overbearing offensive, such as reckless Quickstepping or Homing Dashing.
Style Actions
All characters possess a Style Action, a singular special ability that predominantly acts as their main skill or unique gimmick, and is often representative of their Style and/or abilities as an individual fighter. For some characters, such as Rudol von Stroheim or Koichi Hirose, a Style Action takes the form of core abilities integral to their basic playstyle; For others such as Jotaro Kujo or Giorno Giovanna, their Style Actions may be limited-use, tremendously powerful abilities that accessorize or augment their skill set without being necessary for them to function. While all Style Actions have little commonality, as their roles and utility differ between the playable characters, they ultimately share the general trait of being important in how every fighter operates in combat when used to their full potential.
Advanced Mechanics
If a character is attacked from behind, it is registered as a Backstab, increasing the damage dealt to them. Similarly, if a character is interrupted with an attack while they themselves are attacking or in the middle of a combo, a Combo Breaker will occur and grant a bonus amount of Dual Heat Gauge to the offender.
Other abilities available to all characters are a Flash Burst and Flash Cancels, which are signified by a purple light and two smaller green lights by the player character's portrait, respectively. A Flash Burst will cause the character to pose with a 'burst' of light, breaking them out of enemy combos by granting them invincibility and sending attackers flying; Flash Cancels instantly cancel a character's attack, including special skills, in order to open up more opportunities to extend combos without consuming stamina. Whenever a Flash Burst or Flash Cancel is used, there is a long cooldown before they become available again.
The battle arena contains interactive items the characters can freely use for a number of goals. These include objects that can be thrown and/or trapped depending on the character and object size, and stage-specific gimmicks such as knocking enemies down onto spikes to deal bonus damage and resting at a café to replenish health. Among the stage object types are destructible red boxes containing temporary power-ups, such as attack and defense boosts, instantly nullifying any cooldowns to all abilities, and even Dual Combo and Dual Heat Attack charges.
Dual Heat Gauge
Both teams have a Dual Heat Gauge split into six sections that slowly fill when characters deal or take damage, use special skills and abilities, or perform other tasks such as destroying stage objects. When the Dual Heat Gauge is filled completely, it will cycle back to being empty but is subject to diminishing returns, taking longer to fill each time.
When one section of the gauge is filled, a team can activate a Dual Combo (デュアルコンボ, Dyuaru Konbo). Once activated both characters on a team stop and pose while calling for the other's assistance, entering a timed state where all stats are given a boost (attack damage, defense, movement speed, cooldown speed, etc) and the arena darkens. During a Dual Combo, the team can fill a special gauge by landing attacks on the enemy team before a timer runs out in order to perform a special cinematic Dual Combo Finish, further damaging a targeted opponent whilst restoring some health as a reward.
When three sections are filled, a team can then perform Dual Heat Attacks (デュアルヒートアタック, Dyuaru Hīto Attaku), causing the characters to pose before rushing forward, cloaked in a red aura. If the charging character successfully connects with an opponent, a special cinematic joint attack will initiate, dealing massive damage to the target opponent. Certain match-ups contain special animations and dialogue between two characters, mostly between allies or family members in the form of unique, fully animated and cinematic Dual Heat Attacks. However, these have no effect on gameplay aside from altering the angles and distance opponents are sent when struck by a DHA.
Soul Succession
When a member of a team is Retired, their partner will be powered up to balance the number disadvantage under a Soul Succession (also referred to as "Inherited Will" in some descriptions). Soul Successions grant the character in question an extra purple health bar that will slowly deplete over time. While that purple health bar exists, they are given drastic power-ups to movement speed, skill cooldown speed, and attack damage, as well as super armor when attacking. All unused Dual Combo charges are unavailable for the rest of the match, while charges of Dual Heat Attacks are converted into Soul Succession charges. However, in rare scenarios where both fighters are defeated at the exact same time, no Soul Succession will occur and the match will end immediately.
Exclusively in 2v2 online mode, when a player is Retired on either team, that character becomes a "Vision" who cannot receive or deal any further damage, and is only allowed access to one skill from their movelist and no other attacks. Whenever a Vision receives or lands an attack, the respective target is temporarily knocked down, allowing the Vision only to disrupt players on the enemy team.
Battle Styles
Like in All-Star Battle, characters are categorized by Battle Styles which change how each character plays in the game, as well as their different strengths and weaknesses. "Ripple User" (波紋使い, Hamon-tsukai), "Vampire" (吸血鬼, Kyūketsuki), "Mode" (
Also new in Eyes of Heaven is that characters that were previously classified in All-Star Battle as having one Battle Style but additionally displayed abilities of another are now classified as having two Battle Styles. For example, Old Joseph Joestar is now classed as both a Ripple user and a Stand user, while in the previous game he was only classified as a Stand user who happened to have Ripple-based abilities and attacks as well.
Cast

Kazuyuki Okitsu
N/A
N/A
N/A
N/A
N/A
N/A
N/A
N/A

Yoku Shioya
N/A
N/A
N/A
N/A
N/A
N/A
N/A
N/A

Takehito Koyasu
N/A
N/A
N/A
N/A
N/A
N/A
N/A
N/A

Yoji Ueda
N/A
N/A
N/A
N/A
N/A
N/A
N/A
N/A

Masashi Sugawara
N/A
N/A
N/A
N/A
N/A
N/A
N/A
N/A

Ayako Kawasumi
N/A
N/A
N/A
N/A
N/A
N/A
N/A
N/A

Taketora
N/A
N/A
N/A
N/A
N/A
N/A
N/A
N/A

Tamio Ohki
N/A
N/A
N/A
N/A
N/A
N/A
N/A
N/A

Hiroaki Tajiri
N/A
N/A
N/A
N/A
N/A
N/A
N/A
N/A

Itaru Yamamoto
N/A
N/A
N/A
N/A
N/A
N/A
N/A
N/A

Keiji Hirai
N/A
N/A
N/A
N/A
N/A
N/A
N/A
N/A

Masaru Suzuki
N/A
N/A
N/A
N/A
N/A
N/A
N/A
N/A

Tomokazu Sugita
N/A
N/A
N/A
N/A
N/A
N/A
N/A
N/A

Takuya Sato
N/A
N/A
N/A
N/A
N/A
N/A
N/A
N/A

Atsuko Tanaka
N/A
N/A
N/A
N/A
N/A
N/A
N/A
N/A

Atsushi Imaruoka
N/A
N/A
N/A
N/A
N/A
N/A
N/A
N/A

Akio Otsuka
N/A
N/A
N/A
N/A
N/A
N/A
N/A
N/A

Keiji Fujiwara
N/A
N/A
N/A
N/A
N/A
N/A
N/A
N/A

Kazuhiko Inoue
N/A
N/A
N/A
N/A
N/A
N/A
N/A
N/A

Kenji Nomura
N/A
N/A
N/A
N/A
N/A
N/A
N/A
N/A

Hidetoshi Nakamura
N/A
N/A
N/A
N/A
N/A
N/A
N/A
N/A

Yutaka Nakano
N/A
N/A
N/A
N/A
N/A
N/A
N/A
N/A

Daisuke Ono
N/A
N/A
N/A
N/A
N/A
N/A
N/A
N/A

Unsho Ishizuka
N/A
N/A
N/A
N/A
N/A
N/A
N/A
N/A

Kenta Miyake
N/A
N/A
N/A
N/A
N/A
N/A
N/A
N/A

Daisuke Hirakawa
N/A
N/A
N/A
N/A
N/A
N/A
N/A
N/A

Fuminori Komatsu
N/A
N/A
N/A
N/A
N/A
N/A
N/A
N/A

Misato Fukuen
N/A
N/A
N/A
N/A
N/A
N/A
N/A
N/A

Hidenobu Kiuchi
N/A
N/A
N/A
N/A
N/A
N/A
N/A
N/A

Kentaro Ito
N/A
N/A
N/A
N/A
N/A
N/A
N/A
N/A

Ayahi Takagaki
N/A
N/A
N/A
N/A
N/A
N/A
N/A
N/A

Sho Hayami
N/A
N/A
N/A
N/A
N/A
N/A
N/A
N/A

Takehito Koyasu
N/A
N/A
N/A
N/A
N/A
N/A
N/A
N/A

Katsumi Cho
N/A
N/A
N/A
N/A
N/A
N/A
N/A
N/A

Shinji Kawada
N/A
N/A
N/A
N/A
N/A
N/A
N/A
N/A

Takuya Kirimoto
N/A
N/A
N/A
N/A
N/A
N/A
N/A
N/A

Ikue Ohtani
N/A
N/A
N/A
N/A
N/A
N/A
N/A
N/A

Masaya Onosaka
N/A
N/A
N/A
N/A
N/A
N/A
N/A
N/A

Banjo Ginga
N/A
N/A
N/A
N/A
N/A
N/A
N/A
N/A

Junichi Suwabe
N/A
N/A
N/A
N/A
N/A
N/A
N/A
N/A

Wataru Hatano
N/A
N/A
N/A
N/A
N/A
N/A
N/A
N/A


Wataru Takagi
N/A
N/A
N/A
N/A
N/A
N/A
N/A
N/A

Hiroshi Kamiya
N/A
N/A
N/A
N/A
N/A
N/A
N/A
N/A

Kappei Yamaguchi
N/A
N/A
N/A
N/A
N/A
N/A
N/A
N/A

Chinatsu Akasaki
N/A
N/A
N/A
N/A
N/A
N/A
N/A
N/A

Daisuke Ono
N/A
N/A
N/A
N/A
N/A
N/A
N/A
N/A

Showtaro Morikubo
N/A
N/A
N/A
N/A
N/A
N/A
N/A
N/A

Rikiya Koyama
N/A
N/A
N/A
N/A
N/A
N/A
N/A
N/A

Rikiya Koyama
N/A
N/A
N/A
N/A
N/A
N/A
N/A
N/A

Tsutomu Kashiwakura
N/A
N/A
N/A
N/A
N/A
N/A
N/A
N/A

Ryō Hirohashi
N/A
N/A
N/A
N/A
N/A
N/A
N/A
N/A

Yuko Sato
N/A
N/A
N/A
N/A
N/A
N/A
N/A
N/A

Bin Shimada
N/A
N/A
N/A
N/A
N/A
N/A
N/A
N/A

Kazunari Tanaka
N/A
N/A
N/A
N/A
N/A
N/A
N/A
N/A

Taiki Matsuno
N/A
N/A
N/A
N/A
N/A
N/A
N/A
N/A

Daisuke Matsubara
N/A
N/A
N/A
N/A
N/A
N/A
N/A
N/A

Miho Hino
N/A
N/A
N/A
N/A
N/A
N/A
N/A
N/A

Makoto Naruse
N/A
N/A
N/A
N/A
N/A
N/A
N/A
N/A

Daisuke Namikawa
N/A
N/A
N/A
N/A
N/A
N/A
N/A
N/A

Misa Watanabe
N/A
N/A
N/A
N/A
N/A
N/A
N/A
N/A

Noriaki Sugiyama
N/A
N/A
N/A
N/A
N/A
N/A
N/A
N/A

Kenji Akabane
N/A
N/A
N/A
N/A
N/A
N/A
N/A
N/A

Asami Imai
N/A
N/A
N/A
N/A
N/A
N/A
N/A
N/A

Yuko Sanpei
N/A
N/A
N/A
N/A
N/A
N/A
N/A
N/A

Hisafumi Oda
N/A
N/A
N/A
N/A
N/A
N/A
N/A
N/A

Hisao Egawa
N/A
N/A
N/A
N/A
N/A
N/A
N/A
N/A

Nao Tohyama
N/A
N/A
N/A
N/A
N/A
N/A
N/A
N/A

Toshiyuki Morikawa
N/A
N/A
N/A
N/A
N/A
N/A
N/A
N/A

Taiten Kusunoki
N/A
N/A
N/A
N/A
N/A
N/A
N/A
N/A

Kazuya Nakai
N/A
N/A
N/A
N/A
N/A
N/A
N/A
N/A

Takuma Terashima
N/A
N/A
N/A
N/A
N/A
N/A
N/A
N/A

Shinya Fukumatsu
N/A
N/A
N/A
N/A
N/A
N/A
N/A
N/A

Kenji Nojima
N/A
N/A
N/A
N/A
N/A
N/A
N/A
N/A

Tatsuhisa Suzuki
N/A
N/A
N/A
N/A
N/A
N/A
N/A
N/A

Norihisa Mori
N/A
N/A
N/A
N/A
N/A
N/A
N/A
N/A

Akira Ishida
N/A
N/A
N/A
N/A
N/A
N/A
N/A
N/A

Takaya Kuroda
N/A
N/A
N/A
N/A
N/A
N/A
N/A
N/A

Naoya Uchida
N/A
N/A
N/A
N/A
N/A
N/A
N/A
N/A

Hiro Shimono
N/A
N/A
N/A
N/A
N/A
N/A
N/A
N/A

Miyuki Sawashiro
N/A
N/A
N/A
N/A
N/A
N/A
N/A
N/A

Chizu Yonemoto
N/A
N/A
N/A
N/A
N/A
N/A
N/A
N/A

Yuichi Nakamura
N/A
N/A
N/A
N/A
N/A
N/A
N/A
N/A

Toru Okawa
N/A
N/A
N/A
N/A
N/A
N/A
N/A
N/A

Jouji Nakata
N/A
N/A
N/A
N/A
N/A
N/A
N/A
N/A

Yasunori Masutani
N/A
N/A
N/A
N/A
N/A
N/A
N/A
N/A

Takako Honda
N/A
N/A
N/A
N/A
N/A
N/A
N/A
N/A

Junko Kitanishi
N/A
N/A
N/A
N/A
N/A
N/A
N/A
N/A

Daisuke Ono
N/A
N/A
N/A
N/A
N/A
N/A
N/A
N/A

Ryoko Shiraishi
N/A
N/A
N/A
N/A
N/A
N/A
N/A
N/A

Takehito Koyasu
N/A
N/A
N/A
N/A
N/A
N/A
N/A
N/A

Kosuke Toriumi
N/A
N/A
N/A
N/A
N/A
N/A
N/A
N/A

Takaya Hashi
N/A
N/A
N/A
N/A
N/A
N/A
N/A
N/A

Tamotsu Nishiwaki
N/A
N/A
N/A
N/A
N/A
N/A
N/A
N/A

Akeno Watanabe
N/A
N/A
N/A
N/A
N/A
N/A
N/A
N/A

Takashi Kondo
N/A
N/A
N/A
N/A
N/A
N/A
N/A
N/A


Shin-ichiro Miki
N/A
N/A
N/A
N/A
N/A
N/A
N/A
N/A

Takehito Koyasu
N/A
N/A
N/A
N/A
N/A
N/A
N/A
N/A

Takehito Koyasu
N/A
N/A
N/A
N/A
N/A
N/A
N/A
N/A

Yasuyuki Kase
N/A
N/A
N/A
N/A
N/A
N/A
N/A
N/A

Hirofumi Nojima
N/A
N/A
N/A
N/A
N/A
N/A
N/A
N/A

Mitsuru Ogata
N/A
N/A
N/A
N/A
N/A
N/A
N/A
N/A

Hoko Kuwashima
N/A
N/A
N/A
N/A
N/A
N/A
N/A
N/A

Yasuhiko Kawazu
N/A
N/A
N/A
N/A
N/A
N/A
N/A
N/A

Kazuhiro Yamaji
N/A
N/A
N/A
N/A
N/A
N/A
N/A
N/A

Megumi Toyoguchi
N/A
N/A
N/A
N/A
N/A
N/A
N/A
N/A

Hiroko Yasumoto
N/A
N/A
N/A
N/A
N/A
N/A
N/A
N/A

Ken Narita
N/A
N/A
N/A
N/A
N/A
N/A
N/A
N/A

Taku Yashiro
N/A
N/A
N/A
N/A
N/A
N/A
N/A
N/A

Mitsuaki Madono
N/A
N/A
N/A
N/A
N/A
N/A
N/A
N/A

Hiroaki Miura
N/A
N/A
N/A
N/A
N/A
N/A
N/A
N/A

Eri Kitamura
N/A
N/A
N/A
N/A
N/A
N/A
N/A
N/A

Jurota Kosugi
N/A
N/A
N/A
N/A
N/A
N/A
N/A
N/A

Saori Hayami
N/A
N/A
N/A
N/A
N/A
N/A
N/A
N/A

Yuka Iguchi
N/A
N/A
N/A
N/A
N/A
N/A
N/A
N/A

Masaya Matsukaze
N/A
N/A
N/A
N/A
N/A
N/A
N/A
N/A

Takehito Koyasu
N/A
N/A
N/A
N/A
N/A
N/A
N/A
N/A

Sota Arai
N/A
N/A
N/A
N/A
N/A
N/A
N/A
N/A
Kanehira Yamamoto
N/A
N/A
N/A
N/A
N/A
N/A
N/A
N/A
Satoshi Tsuruoka
N/A
N/A
N/A
N/A
N/A
N/A
N/A
N/A
Sayaka Hirao
N/A
N/A
N/A
N/A
N/A
N/A
N/A
N/A
Shunsuke Kanie
N/A
N/A
N/A
N/A
N/A
N/A
N/A
N/A
Toru Okawa
N/A
N/A
N/A
N/A
N/A
N/A
N/A
N/A
Story Mode
The game features an original storyline supervised by Hirohiko Araki[4] and centers around a major timeline and universal interference within the JoJo universe affecting characters across all arcs, as well as the Saint's Corpse Parts.
The Story Mode includes a level system and ability tree for each character, and each playable character levels up using XP earned from Story Mode battles and missions, up to Lv. 50. Characters are originally available within the Story Mode with an incomplete set of techniques and lowered stats. These parameters can be unlocked by fighting with them and using the point rewards gained from levels to unlock a technique or improve the character's various stats in the tree. Stats such as health and attack strength automatically grow upon a character leveling up, and require no points.
Aside from recovering skills and abilities that were otherwise already available to the character as part of their core moveset, the ability tree also features upgrades granting exclusive enhancements not available in the standard Free Battle. Among these upgrades are reducing stamina consumption, reducing the cooldown on Flash Bursts and Flash Cancels, and increasing the effectiveness and duration of abilities beyond their normal limit. As a result, playable characters are functionally inferior to their Free Battle counterparts at Lv. 1, but eventually grow to surpass them in all areas when the tree is complete.
Chapter 1: Stardust Crusaders (スターダストクルセイダース, Sutādasuto Kuruseidāsu)
The story begins in the year 1988, in Egypt. Jotaro Kujo battles the invincible vampire DIO, newly empowered by the blood of the late Joseph Joestar. Though DIO blinds Jotaro with his own blood, Jotaro shatters DIO's Stand, The World, destroying the vampire's head and putting a definite end to his menace. The following night, Jotaro discovers and burns a diary left behind by DIO, fearing a deeper meaning behind its contents. The three survivors (including Joseph, revived via a blood transfusion from DIO's corpse) make their way to the city's airport, where Polnareff parts ways with the two Joestars to return to his home country of France. As Jotaro and Joseph turn to begin their own trip home to Japan, they are suddenly stopped by a young Robert E. O. Speedwagon. At the same time, Jean Pierre Polnareff rushes to their side, claiming to have been attacked on the plane before takeoff. The three subsequently encounter the thought-to-be-deceased Muhammad Avdol and Iggy, who meet the group with hostility, claiming that they were sent by "him."
The combatants leave the airport to avoid endangering civilians and, after a battle on the rooftops of Cairo, the two assailants are incapacitated. Immediately afterwards, the group is attacked by Noriaki Kakyoin and N'Doul, who were also thought to have died. After they are both defeated, N'Doul manages to escape, but Speedwagon uses a part of a mysterious Saint's Corpse to restore Kakyoin's sanity. Speedwagon explains that the Saint's Corpse Part in his possession has led him through time in search of an unknown danger that is causing strange phenomena and slowly destroying the space-time continuum. The Joestar Group agrees to help the Englishman gather the remaining eight parts of the Saint's Corpse. The group quickly finds the Corpse's torso nearby, which is entrusted to Jotaro for safekeeping. Speedwagon then guides the heroes through a light rift, a passage filled with light that connects time periods and parallel worlds.
Chapter 2: Vento Aureo (黄金の風, Ōgon no Kaze)
Jotaro and Speedwagon appear at the Colosseum in Italy, 2001, where Guido Mista, Trish Una, and Giorno Giovanna have just defeated Diavolo. However, after Mista and Trish suddenly disappear, Giorno is attacked by Bruno Bucciarati, whose body and soul were both killed in the battle with Diavolo. Though Bucciarati is quickly fended off when Jotaro arrives on the scene, he and Giorno are then challenged by Narancia Ghirga and Pannacotta Fugo. Fugo disappears after his defeat, but Jotaro is able to restore Narancia using the Corpse's torso. Giorno's group and Jotaro trail Bucciarati to the Naples Train Station, where they meet with their allies. Bucciarati ambuses the group alongside Vanilla Ice, who Polnareff is certain was disintegrated by the sun's light. Both assassins escape, but Giorno finds and secures the Corpse's head. With Bucciarati gone, Trish and Mista free themselves from Sticky Fingers's zippers as the group prepares to enter another light rift, using Coco Jumbo's Stand to avoid being scattered when crossing through the rifts. What remains of Team Bucciarati recognizes Polnareff as the man in the turtle, but their reactions only confuse the Frenchman further. As the heroes enter the rift, a revived Diavolo watches from afar, having entered the service of "that man."
Chapter 3: Diamond is Unbreakable (ダイヤモンドは砕けない, Daiyamondo wa Kudakenai)
Jotaro and Joseph arrive at Morioh in the year 1999. Joseph recognizes the town, but quickly changes the subject and walks off when Jotaro questions him. Soon after, Josuke Higashikata and Koichi Hirose find Jotaro, but are soon attacked by Okuyasu Nijimura and Rohan Kishibe. After their defeat, Jotaro uses Star Platinum's time stop to prevent Rohan from escaping and successfully restores him. Okuyasu escapes, despite Josuke's best efforts to give chase. The group later converges at Boyoyoing Cape, where Josuke glimpses a group of Harvest's units and attempts to gather the rest, remembering the death of their user Shigekiyo Yangu at the hands of Yoshikage Kira. One group escapes and returns to Shigechi, who confronts Josuke and Jotaro alongside Akira Otoishi. After being defeated, both enemies escape. Jotaro finally forces Joseph to explain his relation to a confused Josuke inside Mr.President. Rohan and Koichi join Jotaro, but Yukako Yamagishi attacks the two, only to be defeated and disappear like the other enemies. Jotaro is suddenly confronted by Enya the Hag, who sends a group of corpses under her control to attack the group. Though the puppeteered corpses are defeated, Enya extols "his" virtues and "his" power to "overwrite" his enemies before disappearing. With the coast clear, Jotaro finds the Corpse's left arm and entrusts Josuke with it. Joseph then emerges from the turtle, revealing a camera he found inside. Via Joseph's Hermit Purple, the group finally glimpses their true enemy: the photo reveals none other than DIO himself, despite his certain death at Jotaro's hands.
Chapter 4: Phantom Blood (ファントムブラッド, Fantomu Buraddo)
The heroes' next stop is inside the Joestar Mansion in 1889. Speedwagon reveals that the mansion had suddenly reappeared after Jonathan Joestar's battle with Dio Brando, teeming with zombies. Jonathan took it upon himself to fight off the horde of zombies, but asked Speedwagon to find allies to aid their struggle. Jotaro and Speedwagon find a wounded Jonathan, as well as the era's Dio. The two Joestars fight through the horde, forcing Dio to take matters into his own hands—all four of them, as he has struck an uneasy alliance with Diego Brando. With Jonathan temporarily unable to fight, Jotaro and Speedwagon defeat the two Dios, who swear revenge as they flee. Jonathan recovers, but he and Jotaro are confronted by Mariah and Will Anthonio Zeppeli, the latter having been revived and corrupted by the strange phenomenon. Jonathan and Jotaro manage to defeat Zeppeli and Mariah, who escape. As Jonathan collapses from exhaustion, Speedwagon returns the Corpse's eyes to him and accompanies him into the turtle.
Chapter 5: Battle Tendency (戦闘潮流, Sentō Chōryū)
Jotaro and Joseph arrive at Air Supplena Island in 1939, where the two meet Caesar Anthonio Zeppeli training alongside Joseph's younger self. Suddenly, Lisa Lisa and Rudol von Stroheim assault the two Ripple users. Stroheim flees after his defeat, but Jotaro succeeds in restoring Lisa Lisa, though she remains unconscious. As Caesar takes his master inside to rest, the two Josephs become acquainted with each other, despite the younger's disbelief in the group's time traveling abilities. Hol Horse then confronts Jotaro in search of the Saint's Corpse, but is defeated and disappears. As the younger Joseph explains the situation to Caesar, Esidisi, Wamuu and Kars suddenly appear, having tracked down the Red Stone of Aja. Despite sending vampires after Joseph and Caesar, Kars is eventually forced to grant Esidisi and Wamuu permission to battle the two Ripple users. The two heroes manage to overcome not only Esidisi and Wamuu, but Kars as well, though their Ripple is unable to destroy the Pillar Men. Lisa Lisa appears and announces her intent to fight off the Pillar Men, despite both Josephs knowing that she has not yet fully recovered. Despite Lisa Lisa's courage and Caesar's yearning to take revenge for his and Joseph's ancestors, the older Joseph calms the team and successfully bluffs Kars by claiming that the Red Stone of Aja is protected by a time bomb. The Pillar Men give Joseph and Caesar six days to prepare for their final battle before departing. The older Joseph then brings the group inside the turtle, where he explains the situation fully. Jotaro recovers the Corpse's ears and gives them to the younger Joseph.
Chapter 6: Stone Ocean (ストーンオーシャン, Sutōn Ōshan)
The first thing Jotaro notices is the floor to his left: he has arrived in 2011 at Kennedy Space Center, currently under the influence of C-MOON's gravitational pull. Jotaro then spots Jolyne Cujoh and Emporio Alnino, who believe Ermes Costello and Narciso Anasui's betrayal of the two to be part of Enrico Pucci's newfound power. The two are both relieved upon seeing Jotaro alive and well, but Jolyne is caught off guard by his younger age. Jotaro joins Jolyne in fighting Ermes and Anasui, and manages to restore both. Anasui becomes jealous of Jotaro's proximity to Jolyne until she properly introduces her father, surprising even Jotaro himself. Sick of explanations by this point, Jotaro orders Ermes, Anasui and Emporio into the turtle to hear the older Joseph's explanation. Before Jolyne can join them, she and Jotaro are attacked by a phenomenon-possessed Weather Report, who escapes following his defeat. Finally, Pucci himself appears before Jotaro and Jolyne, accompanied by Pet Shop. Pucci explains that "his friend" has shown him a greater truth than the path to Heaven he once sought, and that it is this truth he now strives to achieve. Despite Pucci's unsuccessful attack on the father-daughter duo, he announces his intent to guide the people of the world to eternal bliss through the true path to Heaven, which he dubs the "Eyes of Heaven." As he and Pet Shop depart, Pucci warns Jotaro that, once his group gathers the entire Saint's Corpse, "his friend" will draw open the curtains to Heaven himself.
After finding the Corpse's right arm and entrusting it to Jolyne, the group returns to Morioh to receive Rohan's report on the mysterious phenomena, unaware that Funny Valentine has witnessed the battle from afar. When Jotaro finds himself unable to exit Morioh through the light rift, Speedwagon observes that the rift is only permitting certain individuals to pass through it. At that moment, Jonathan and Josuke's Corpse parts resonate, revealing them to be the individuals currently permitted into the rift. As the rest of the group stays behind in Morioh, Jolyne decides to go for a walk and soon stumbles into a gambler at Morioh's Cafe Deux Magots. The gambler coerces Jolyne into betting her soul on a coin flip; just as Jotaro recognizes the gambler as his old foe Daniel J. D'Arby, Jolyne loses the bet and has her soul taken by Osiris. Jotaro then examines D'Arby's coin, which, naturally, has tails on both sides. Determined not to be humiliated again, D'Arby has come independently of "his" orders to challenge Jotaro to a poker game, with both his and Jolyne's souls on the line. Jotaro comes out on top, and D'Arby is forced to return Jolyne's soul to her body. Before disappearing, D'Arby warns Jotaro that "his" power is not to be trifled with. Jotaro deduces from Enya and Pucci's earlier clues that the true enemy's power has something to do with "overwriting the truth."
Chapter 7: Steel Ball Run (スティール・ボール・ラン, Sutīru Bōru Ran)
Jonathan finds himself alone on the Philadelphia Coastline in the 1890 of an alternate timeline. Jonathan notices Johnny Joestar near the Corpse's legs, awaiting Funny Valentine's return and final attack. Valentine appears before Johnny, but reveals that the infinite rotation placed upon him by Tusk has disappeared completely. Valentine explains that someone has interrupted their fight, and asks the two Jonathans to continue gathering the Saint's Corpse, warning that the true battle will begin once the Corpse is gathered. Johnny then notices that the Corpse's legs have disappeared. Though Jonathan uses his Ripple to heal Slow Dancer's wounded leg, Johnny accuses the Englishman of stealing the Corpse part, but calms down when Jonathan shows him his own part of the Corpse. After hearing Jonathan's explanation, Johnny agrees to help Jonathan, as they share the goal of collecting the completed Saint's Corpse.
The two depart through the light rift to a village in the Rocky Mountains, where they are forced to hide from a prowling dinosaur. Johnny is bewildered, having seen Diego die with his own two eyes. Diego himself soon appears and commands the dinosaurs to attack the two Jonathans, who handily defend themselves against the pack. Dio joins Diego once more, declaring that he himself will be the one to kill Jonathan; Diego offers no objection, holding a grudge himself against Johnny. The two Dios are defeated and leave, but Valentine suddenly reappears alongside a phenomenon-possessed Gyro Zeppeli. Despite Johnny's refusal to believe what he sees, Valentine urges the jockey to fight him and demonstrate his Stand's full potential. The two Joestars emerge victorious, but Gyro escapes before they can restore him. Valentine praises Johnny's potential, but notes that Giorno's power may also stand a chance against "him." As Valentine leaves, Jonathan finds the Corpse's legs, which are entrusted to Johnny. Johnny laments the loss of his closest friend, but Jonathan reassures him that, with the Corpse Parts, they may be able to fight off the strange phenomena and save Gyro.
Chapter 8: JoJolion (ジョジョリオン, JoJorion)
Meanwhile, Josuke is sent to the Higashikata House in the alternate universe's Morioh of the year 2011. In the distance, Josuke overhears an argument between Joshu Higashikata and an amnesiac also named Josuke Higashikata. Josuke 8 suddenly sees an abnormal purple energy swirling behind Joshu, and the energy soon engulfs him. Recognizing the phenomena, Josuke 4 springs into action and attempts to explain the situation to Josuke 8. Joshu stands up, the corruption only fueling his resentment, but the two Josukes quickly defeat him despite their mutual lack of familiarity with Joshu's Nut King Call. Josuke 4 restores Joshu with his Saint's Corpse Part, but knocks him down again when he becomes confrontational, excusing his actions to the other Josuke by claiming that the restoration hadn't taken effect yet. Josuke 8 recognizes the Corpse part, which aids Josuke 4 in his explanation. Josuke 8 agrees to lend his help, but Josuke 4 feels as though the two are being watched. Their "pursuers" reveal themselves as two versions of the original timeline's Yoshikage Kira, the latter impersonating Kosaku Kawajiri. The two Kiras reveal that they had come on their own seeking peaceful lives, resenting Josuke's sudden reappearance. The Josukes fight and triumph over the Kiras, who disappear in disappointment. After they leave, Joshu wakes up, unable to remember what happened. Josuke 4 finds the Corpse's heart nearby and gives it to Josuke 8. Before the two Josukes return to Morioh, Joshu decides that he also wants to tag along.
Chapter 9: Wicked Star (凶星, Kyōsei)
Back in the original universe's Morioh, Jonathan reappears with Johnny, shortly followed by Josuke 4, Josuke 8, and Joshu. Speedwagon then assembles the Joestars to review their progress. Realizing that the final part of the Corpse is missing, the group ponders its location. Suddenly, Enya reappears and taunts the Joestars, proclaiming that "he" has already seized the Corpse's spine. Though she is defeated once again, Enya triumphantly announces to the heavens that the Joestars have collected eight parts of the Saint's Corpse before disappearing. Suddenly, everything begins to tremble as the reality around the group disappears into a celestial ocean. A figure approaches the group, proclaiming that their Corpse parts have reacted to the Corpse's spine and brought them to "the foundation of the world." The one speaking to them finally reveals himself: it is none other than DIO, though he bears a radically different appearance from his 1988 counterpart.
Johnny charges forward, hoping that defeating DIO will bring Gyro back, but DIO's new Stand, The World Over Heaven, easily repels his attack. Before DIO can counterattack, Giorno blocks with Gold Experience Requiem, but finds it has no effect on DIO; Jotaro lands a blow with Star Platinum, but by simply placing a hand over the wound DIO heals it completely. The World Over Heaven pummels Johnny, Jotaro and Giorno, knocking all three away. DIO then uses the Corpse's spine to draw the other Corpse Parts to him, absorbing them into himself and amplifying his power even further. Before DIO can eliminate the Joestars, however, light rifts appear at their feet. As his enemies escape, DIO realizes that he is missing one Corpse part: the torso, which remains in Jotaro's possession. DIO, declaring Jotaro his greatest threat and the Joestar Family's last hope, asks Enya to give the Corpse parts to his underlings and have them pursue Jotaro's group. As Enya sets out, DIO looks forward to his possession of the completed Saint's Corpse and the total extinction of the Joestar family.
Chapter 10: Dead Man Gambling (遺体を賭けたゲーム, Itai o Kaketa Gēmu, lit. The Corpse-Gambling Game)
The Joestars escape to Air Supplena Island, in disbelief that even Johnny and Giorno's infinite abilities stood no chance against DIO. Suddenly, Valentine reappears and challenges Jotaro to a fight, hoping to witness the power of Star Platinum. By doing so, Valentine realizes that Star Platinum and The World are the same type of Stand, even after their evolution, explaining why DIO was unable to take Jotaro's part of the Corpse. Valentine explains his story to the group: his initial goal was to gather the Saint's Corpse, but after Johnny attacked him with the infinite rotation, he was forced to use Dirty Deeds Done Dirt Cheap to escape through several parallel worlds. In one of these, Valentine found, DIO succeeded in defeating the Joestars and evolving his Stand to its full potential, conquering reality itself. Realizing that the world he ruled was only one of many, this Heaven-Attained DIO decided to invade the original universe and conquer it. Valentine finally confesses that he wishes to defeat DIO, who poses a direct threat to his country; he merely pretended to be loyal to DIO while seeking someone who could defeat him. Even Valentine himself is unaware of the secret behind The World Over Heaven's power, which he believes is the key to allowing Jotaro to defeat him. Valentine concludes by demonstrating that two of the same object from different worlds cannot co-exist, being forced to violently merge together and disappear; though the DIO of the main timeline is defeated, Valentine reminds Jotaro about the vampire's remains before he departs.
Though Johnny continues to distrust Valentine, the Joestars reaffirm their will to fight DIO. Jotaro finds four good reasons to continue fighting: to retrieve the Saint's Corpse, to bring back the allies DIO has been manipulating, to find out the secret to DIO's ability... and because he is getting tired of DIO. Despite the odds being turned against them, the group successfully recovers four of the Corpse parts they have lost and restore Okuyasu, Stroheim, Will and Gyro Zeppeli, Bucciarati, and Yukako. Jotaro recovers one of the parts from D'Arby, who also reveals that DIO requires souls to complete his Stand's true ability, of which Pucci alone knows. Jotaro then returns to the Cairo of 1988, where he finds the bracelets of the original universe's DIO. Remembering Valentine's advice, Jotaro takes the bracelets in hopes that they might prove useful.
Meanwhile, at the Joestar Mansion, Pucci informs DIO of the Joestar group's progress. DIO remains confident, however, believing that the Corpse parts are simply a means to an end. What is truly important, DIO states, are the 36 sinners' souls he seeks. The "criminals" who turned their backs on Heaven are influenced by the Joestar bloodline, and may eventually stand against him; thus, DIO must absorb these sinners' souls to achieve his ambition of conquering the world. Pucci then informs DIO that Valentine is among the sinners, and DIO promises to deal with him. As DIO begins to leave, Pucci asks him to let him defeat those whose souls are not worth sacrificing, which DIO grants. Now alone in the mansion, Pucci prays for deliverance from those who would hinder his and DIO's way to Heaven.
Chapter 11: The Man Who Desired Heaven (天国を望んだ男, Tengoku o Nozonda Otoko)
The Joestar group continues collecting the remaining pieces of the Corpse. At Boyoyoing Cape, Josuke 4 and Okuyasu defeat and restore Shigechi and Otoishi, and Jotaro collects the Corpse's head. The group then visits the Colosseum, where Diavolo challenges Giorno in order to retain his pride as an emperor. After the former boss is defeated, he surrenders the Corpse's legs and departs. The group defeats Dio and Diego once more at Air Supplena Island before finally battling and restoring Avdol and Iggy. Meanwhile, Valentine emerges in Cairo. Despite the president desperately fleeing through multiple parallel worlds, DIO effortlessly appears before Valentine and confronts him regarding his plans. Valentine declares that all of his actions have been in the name of justice before engaging DIO, who simply uses The World Over Heaven to erase him from existence. Jotaro and Jolyne follow the last Corpse part to the Joestar Mansion, where Pucci awaits him. Pucci, aware of what Jotaro is about to ask, states that there is nothing they can do against DIO's power, and that those foolish enough to oppose him will face Heaven's judgement. The priest sends a horde of zombies after the two, but they are quickly wiped out.
The priest, preparing to face the Kujos directly, praises their location as a place of destiny, the place where DIO's path to Heaven began. Pucci claims that DIO has shown him his destiny: a higher path to Heaven to walk on and to guide people toward, the "Eyes of Heaven" that he believes will save mankind. Jotaro and Jolyne engage in battle with the priest, eventually defeating him completely. A defeated Pucci, knowing that the older Joseph can use Hermit Purple to extract DIO's secret from his memories, moves toward the railing of the mansion's second floor. Indeed, Pucci feels a strange tranquility, as DIO draws closer to his ultimate goal: the souls of the 36 sinners he requires are none other than those of the expanded Joestar group. Under normal conditions, a person can only bear one soul; Pucci admits to wondering what would happen if one could absorb the power of multiple souls, and to having wanted to witness the heights DIO would reach. Declaring his love for DIO one final time, Pucci throws himself from the second floor and impales himself on the Statue of the Goddess of Love, ending his life and preventing the group from uncovering DIO's weakness. Even with this setback, Jotaro retrieves the eyes of the Saint's Corpse.
Chapter 12: The World Over Heaven (ザー・ワールド・オーバーヘブン, Zā Wārudo Ōbā Hebun)
The group finally returns to Egypt to confront Heaven-Attained DIO. Jotaro and Johnny face DIO in battle, where he demonstrates his power over space and time, including the power to turn his enemies against themselves. Despite all odds, the two seemingly defeat him, only for DIO to immediately heal his wounds. DIO additionally reveals that he discreetly marked Coco Jumbo with The World Over Heaven during the battle, thus obtaining power over all of those inside the turtle. As Jotaro and Jolyne stay behind to battle DIO once more, the other Joestars and Speedwagon use the light rifts to track down and restore their allies. However, Giorno realizes too late that DIO's true plan was to separate the Joestars and their allies from Jotaro and Jolyne, allowing him to overwrite the group and absorb their souls at full power, along with the complete Saint's Corpse. DIO, who now holds the power to rewrite the universe itself to his liking, strikes Jotaro decisively and proclaims his complete victory... and yet Jotaro remains standing. To the surprise of both DIO and Jolyne, Star Platinum has evolved into Star Platinum Over Heaven and countered DIO's ability, being the same type of Stand as DIO's. With their hope reinforced, the Kujos make one final stand against DIO.
Despite his defeat, DIO simply heals his wounds once more before killing Jolyne and absorbing her soul. DIO approaches a wounded Jotaro and prepares to finally eradicate the Joestar family for good. At the last moment, Jotaro remembers Valentine's advice and reveals the original DIO's bracelets, which fuse with Heaven-Attained DIO's bracelets and destroy his hands, putting The World Over Heaven's ability out of commission. Though DIO blinds Jotaro with his own blood, Jotaro finishes DIO with one final barrage, destroying him completely and putting a definite end to his menace. The souls DIO has absorbed leave his body as Jotaro's view is engulfed by light.
Jotaro finds himself in Cairo, at the moment after he burned DIO's diary. Joseph and Polnareff catch up to him, informing him that Avdol, Iggy, and Kakyoin are resting in the hospital. The three make their way to the city's airport, where Polnareff parts ways with the two Joestars to stay behind and take care of his friends. As they leave for Japan, Jotaro and Joseph promise to return to Egypt one day once their friends fully recover. As the game draws to a close, it is revealed that the Joestars and their friends in other eras have survived as well, a brighter timeline having come about despite all of the hardships they have faced.
In the year 1999, Koichi encounters an incredibly tall man in his home town of Morioh, accompanied by his young daughter. The man had decided to bring her along, supposedly because she refused to stop crying until he caved in. After the girl runs off to look at a turtle, the tall man asks Koichi about the location of a certain Josuke Higashikata...
Characters


Stages
Stages are designed as large, dynamic 3D environments with varying altitudes. Much like All-Star Battle, most contain gimmicks, hazards, and situation finishes. When a certain Situation Finish is performed on the correct character on the corresponding stage, a colored manga panel is displayed.

Joestar Mansion (ジョースター邸, Jōsutā-tei)
- Stage Gimmick 1: Zombies may grab any combatant near a broken window, inflicting damage and leaving the victim open to attacks.
- Stage Gimmick 2: Throughout the match, fire will slowly break out within the mansion, inflicting gradual damage on those caught in the blaze.
- Situation Finish: The defeated combatant is thrown onto the statue of the goddess of love, recreating Dio's first defeat.

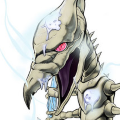
Air Supplena Island (エア・サプレーナ島, Ea Sapurēna-tō)
- Stage Gimmick: The spikes on the stage inflict gradual damage to all combatants except Ripple users (while they have Ripple Gauge remaining) and immortal characters (vampires and Pillar Men). If a combatant is knocked onto the spikes, they will take considerable damage.

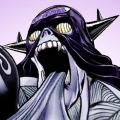
Nightmare World (
- Stage Gimmick: Death Thirteen occasionally appears and attacks the players. The Stand has a health bar of its own, and can thus be attacked and temporarily banished by combatants.

Cairo Rooftops (カイロ市街屋上, Kairo Shigai Okujō): Cairo
- Stage Gimmick: If a combatant is knocked into the neon "AIR" sign, each letter of the sign will independently malfunction and fall forward, dealing additional damage to the victim and anybody underneath.
- Situation Finish: The defeated combatant is sent crashing into a water tower, recreating Kakyoin's death scene. If Kakyoin himself is the combatant in question, the manga panel showing his death appears, and his body remains for the rest of the match.

Morioh (杜王町, Moriō-cho)
- Stage Gimmick 1: Certain characters may ride Rohan's motorcycle and perform offensive maneuvers on it, allowing for surprise attacks and quick traversal of the map. The bike can otherwise be picked up and thrown as an explosive, inflicting heavy damage and setting the target area on fire.
- Stage Gimmick 2: Café Deux Magots serves an espresso or other refreshment to any combatant who stops by at the glowing table, restoring their health.
- Situation Finish: The last defeated combatant finds themselves in Ghost Girl's Alley, where the hands of the dead drag them off into the unknown, recreating Yoshikage Kira's final defeat.

Boyoyoing Cape (ボヨヨン岬, Boyoyon Misaki): Morioh
- Stage Gimmick 1: Combatants that fall off the cliff are bounced across the stage to safety by Echoes ACT2's onomatopoeia, similarly to how Koichi saved Yukako.
- Stage Gimmick 2: Bouncing onomatopoeia created by Echoes ACT2 can bounce combatants to various locations around the stage.
- Stage Gimmick 3: Sizzling onomatopoeia created by Echoes ACT2 can damage and knock back combatants who touch it, potentially into other onomatopoeia. They will also attract Kira's Sheer Heart Attack if it strays too close.

Naples Station (ネアポリス駅, Neaporisu Eki): Naples
- Stage Gimmick 1: Prosciutto will occasionally patrol the area, attacking anyone who comes near him with The Grateful Dead. Prosciutto's presence also slows all mortal combatants down to a walk due to his Stand's aging ability. Ice trays found scattered around the stage can nullify the aging effect. Prosciutto has a health bar of his own, and can be attacked and defeated by combatants.
- Stage Gimmick 2: Once Prosciutto is defeated, Pesci will occasionally exit the train and attempt to snare combatants with Beach Boy. Any combatant caught by Pesci's hook will be left vulnerable to opponents and may eventually be slammed into the side of the train.

Colosseum (コロッセオ, Korosseo): Rome
- Stage Gimmick 1: Mr.President's key can be found somewhere within the stage. Any combatant who picks it up can enter the wandering Coco Jumbo, restoring their health and healing any status ailments.
- Stage Gimmick 2: Chariot Requiem occasionally appears and causes any who enter its range to fall asleep, leaving them vulnerable to attacks. Requiem's accompanying light source will linger behind a random combatant, frequently switching between combatants. Destroying the light source will temporarily banish Requiem.

Green Dolphin Street Prison (G.D.st 刑務所, Gurīn Dorufin Sutorīto Keimusho)
- Stage Gimmick 1: Money can be found scattered across the stage. If a combatant gathers enough money, they can pay Gwess to have Goo Goo Dolls shrink their opponents. Shrunken characters take more damage, move slower, and are unable to attack or guard, but are able to enter grates throughout the map in order to teleport and escape attackers.
- Stage Gimmick 2: Emporio frequently appears in various trash cans around the stage and offers his hand, allowing combatants to teleport between trash cans via Burning Down the House.
- Stage Gimmick 3: Limp Bizkit occasionally summons an invisible zombie alligator onto the stage, attacking anyone in its way. The alligator has its own health bar and can be defeated.

Cape Canaveral (ケープ・カナベラル, Kēpu Kanaberaru): Kennedy Space Center
- Stage Gimmick: After some time has passed, the gravity of the stage shifts, turning the stage sideways and completely changing the playable area.

Rocky Mountains Village (ロッキー山脈麓の村, Rokkī-sanmyaku Fumoto no Mura)
- Stage Gimmick: Dinosaurs created by Scary Monsters roam the stage and may attack combatants. They have their own health bars and can be defeated with ease.

Higashikata House (東方家, Higashikata-ke): Morioh
- Stage Gimmick: Tsurugi occasionally opens the hatch to the house's basement and allows a combatant to rest there, restoring their health and healing any status ailments.
- Cairo Overpass:
The overpass where Jotaro Kujo defeats DIO. A section of the bridge is destroyed, and an overturned oil tanker blocks the other side. The stage serves as the backdrop for the first battle in Story Mode, but is otherwise inaccessible. - Cairo Streets and Cairo Airport appear in cutscenes during the game's Story Mode. These locations cannot be selected or used as battlegrounds.
- Philadelphia Coastline appears in cutscenes during the game's Story Mode. This location cannot be selected or used as a battleground.
- Cairo Overpass (Over Heaven Space):
The overpass where Jotaro Kujo defeats DIO in the original universe. Heaven-Attained DIO transports this overpass into Over Heaven Space for his final battle against Jotaro and Jolyne. Having been ripped from its proper universe, portions of the road are torn off and suspended in midair as platforms. The stage serves as the backdrop for the final battle in Story Mode, but is otherwise inaccessible. - An empty variation of Over Heaven Space appears in cutscenes during the game's Story Mode. This location cannot be selected or used as a battleground.
Trophies


Credits
Seizo Nakata
Yosuke Nakashima
Mitsutaka Sakamoto (Character Modelling)
Koichi Umeda (Character Animator)
Kimitaka Matsuda (UI)
Soundtrack
The game's soundtrack was composed by Chikayo Fukuda.
Unused Content
All-Star Battle Sequel
- The game may have originally been intended to be a sequel to All-Star Battle, as a few unused files in the game's data and the main folder directory for sound effects and music are titled "ASB2" and "All-Star Battle Project".
- DIO's original Great Heat Attack from ASB with his road roller model was left intact, as well as files for his GHA's unique interaction with Jotaro despite the attack no longer appearing in Eyes of Heaven.
- Some characters have new voices recorded for Stand Clashes (Rush Mode) which was featured in ASB, but is not a feature in Eyes of Heaven.

- All characters have unused cut-in reactions of them looking shocked. These appeared in ASB after Joseph's "Next you're going to say..." counter-taunts, but this technique is not in EoH.
- The streets of Cairo was going to be an additional playable stage like the stage featured in ASB, rather than only the rooftops of buildings in Cairo. The Philadelphia Coastline from ASB is also mentioned in the files, but only appears in Story Mode.
Characters, Costumes, and Stages
- An interview details the process that went into deciding what characters to feature in the game, with the developer saying that there were 160 characters put up for consideration and the list was gradually narrowed down to the 52 that made it into the game.[5]
- Leone Abbacchio made it into beta testing, but there were difficulties in making Moody Blues viable in gameplay, particularly with how they planned on making it replay other characters' attacks. His model remains in the game and he appears in an image in the credits of the story mode.
- Ringo Roadagain, Tarkus, Bruford, various denizens of Morioh, and others were also considered as characters.
- Prosciutto has a separate model in the same folder as playable characters in addition to the model that appears in the Naples Station stage, suggesting that he might have been intended to be playable.
- The Inspector from Phantom Blood appeared in the background of the Joestar Mansion stage in the second demo. He would run around the stage and could be attacked, but would not die. He was removed from the stage in the full game, but his model remains in the game's files.
- King Nothing and Yotsuyu Yagiyama from JoJolion have unused models and unused panels similar to stage gimmicks in the Higashikata House stage, hinting at a possible scrapped stage gimmick involving their encounter in the Norisuke Higashikata, Tsurugi Higashikata, and Yotsuyu Yagiyama (Story Arc). Yotsuyu has an unused animation where he releases chestnuts and another one where he is damaged.
- Part 6 Jotaro has several unused voice clips and interactions with other characters within the game's data, suggesting he was intended to either be an alternate costume for Part 4 Jotaro or a separate character altogether. There is also an unused image of his shocked face which all the other characters have, including Tequila Joseph and Weather Report (Wes Bluemarine).[6] In the actual game, he only appears in an image in the credits. Unlike Abbacchio, his model is not included in the game's data.
- The special Heritage for the Future outfits for Jotaro and Polnareff from All-Star Battle were not included. In ASB, their filenames were "3jtr51" and "3pln21". In the data of Eyes of Heaven, the filenames for the new costumes for Jotaro and Polnareff do not replace these numbers but come after them. For example, after "3pln11", the next outfit for Polnareff is "3pln31" rather than "3pln21".
- Similarly, Pannacotta Fugo's outfit from Purple Haze Feedback was removed in Eyes of Heaven. It was previously named "5fgo11", but the costumes in EoH skip from "5fgo01" (regular) to "5fgo21" (new costume of his younger appearance).
- All characters have voices for GoGoGo Finishers recorded despite the mechanic only appearing in the first and second demos of the game for a small number of characters, before being removed in the full game.
- Several unique voice lines of characters reacting to their partner getting Retired in battle are included in the files, but only a few can be heard in the game.[7]
- A few generic battle intros and unique interactions for some characters were not used.
- Costumes up to "Special Costume O" were listed. The character with the highest amount of costumes in game is Jolyne, who only has up to "Special Costume H".
- There is a model for an Ogre Street stage from Phantom Blood.
Modes and Gameplay
- There are voice files of the narrator saying "2P Wins", "3P Wins", and "4P Wins", suggesting that either a free-for-all mode and-or local multiplayer was planned. A glitch in the second demo activated split screen with proper tracking of the characters as well.
- Customize mode was going to have a section for Visions, which suggests the player may have been able to choose the skill they are permitted to use as a Vision, or customise it visually in some way (this is also possibly a leftover from ASB or something similar, which also had a feature named "Visions" present in its campaign mode). The player may have also been able to customize the battle interface and BGM.
- It would have been possible to select the song that plays for each character.
- The BGM section lists "Stand Original Story" and "Anime Theme Songs".
Localization
- Stroheim's default outfit in the Japanese version is the Nazi uniform, with the cyborg costume being an alternate outfit. In Western releases, the Nazi uniform is completely removed, and the cyborg costume serves as his only outfit.[8]
- Lisa Lisa is incorrectly listed as being born in 1988 in one of her Glossary entries, despite actually being born around 1888.
- In Jean Pierre Polnareff's Ability Tree, one upgrade description incorrectly claims to extend the duration of the "Hermit Purple!" special, rather than the "Off comes the Armor!" special.
- In the Support Item shop, the "A burning rock is falling from the sky and heading straight toward me..." item, which has the effect of nullifying the extra damage received from Combo Breakers, has the incorrect description of "Earn 2x JoJo Points after the battle." This effect actually belongs to the "I'm in the prime of my life right now! Ehee hee!" item.
Trivia

- The game's cover is a homage to the cover of the seventeenth volume of the series. Moreover, several character postures directly reference artwork and other famous drawings by Araki.
- CyberConnect2's CEO, Hiroshi Matsuyama, stated the game will have no paid DLC or microtransactions after the criticism of All-Star Battle's Campaign Mode.[4]
- Joseph has a model without Caesar's headband for story mode, but it is not usable in any other modes.
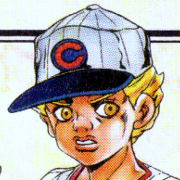
- In the Japanese version of the game, Emporio's Chicago Cubs shirt has the iconic bear replaced with a gorilla. Meanwhile, in the international release, any reference to the baseball team was removed.
References
- ↑ JoJo’s Bizarre Adventure: Eyes of Heaven launches June 28 in the Americas
- ↑ 2.0 2.1 BANDAI NAMCO Europe's tweet
- ↑ JoJo’s Bizarre Adventure: Eyes of Heaven demo hits PS4 in Japan
- ↑ 4.0 4.1 Ultra Jump August 2015
- ↑ Ultra Jump 2016 Issue 1: Interview with Hiroshi Matsuyama
- ↑ Unused Part 6 Jotaro Content
- ↑ Partner Death Interactions (& Unused Voices)
- ↑ https://www.youtube.com/watch?v=zZtCvrNpkPA


