Famicom Jump: Hero Retsuden
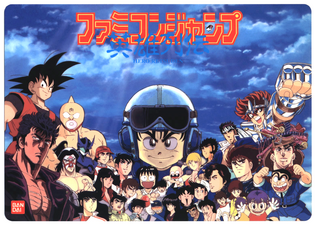
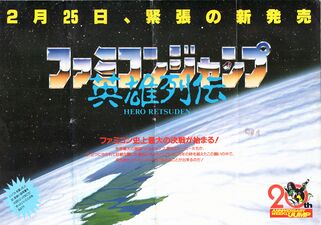
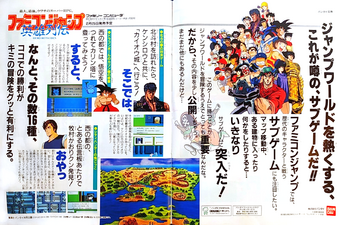
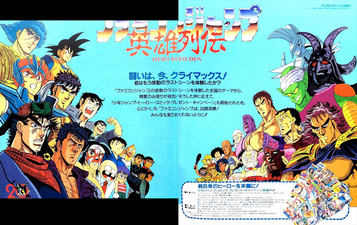
Famicom Jump: Hero Retsuden (ファミコンジャンプ 英雄列伝, Famikon Janpu Hīrō Retsuden, lit. "Famicom Jump: Heroes History") is an action role-playing game produced by Bandai in 1989 for the Family Computer. Created to commemorate Weekly Shonen Jump's 20th anniversary, the game is a crossover of 33 different Shonen Jump titles, including JoJo's Bizarre Adventure.
Summary
Basic Information
Famicom Jump: Hero Retsuden is an action RPG with seventeen playable characters. Players walk around a world map where they will either encounter various enemies scattered around who will immediately attack them, or friendly characters who provide information. During battle, the "A" button punches or physically attacks an enemy while "B" throws a projectile. Projectiles take time to recharge before they can be launched again, but they will never run out. Enemies can be either "melee" type or "projectile" type, meaning they either only attack with their fists or attack with projectiles respectively. Several characters will join the player's party throughout the course of the game, but only one party member can fight at a time. The fighter can be selected in the menu by ordering them to be in the front of the party.
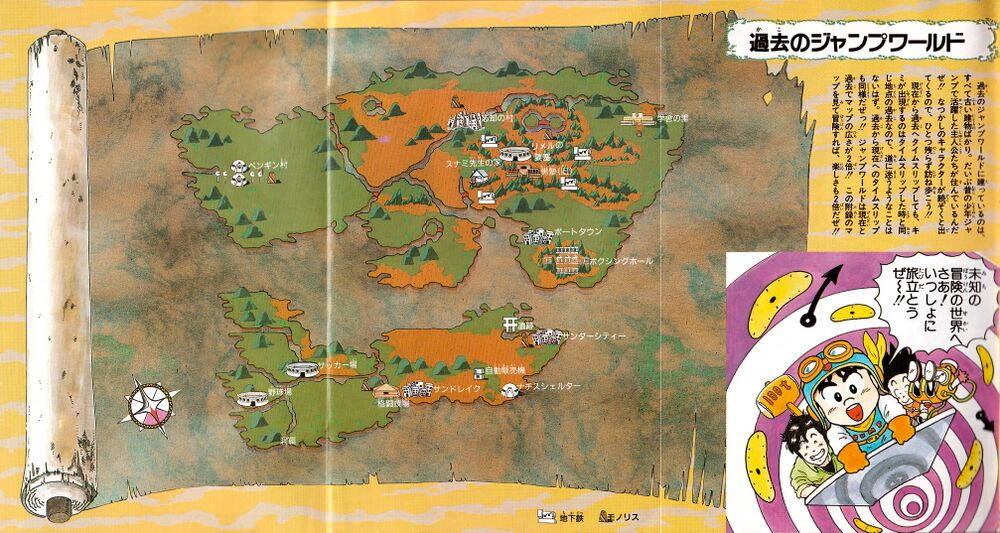
The world map is divided into five areas, and the characters that join the player's party can only stay in the area that they were found in. Moreover, the game includes two different eras using a time machine. Characters recruited in the past or present can only stay in their respective eras. The goal of the game is to recruit all of the sixteen heroes and then defeat the final bosses of each series. However, it is possible to beat the game even without recruiting everyone. Players can save their progress by going to monoliths around the map which generate a 40-character password. Entering that password on the "Continue" option in the menu will load their progress.
Life, Effort, and Spirit

A character's "Life" is represented by hearts, indicating the remaining health of the character. "Effort" is displayed as a series of plus signs (+), functioning similarly to an experience level. It increases every five enemy defeats. This value has no apparent significance during most of the game but becomes important at the very end. A high "Effort" level for all party members is beneficial during the final stages. Characters can gain a significant increase in their Effort Level by finding special items or defeating enemy bosses.
The main character has a "Spirit Meter," displayed as a sliding scale from an angel face on the left to a devil face on the right. The meter gradually moves toward the devil side while walking around the map and shifts significantly to the right if a friendly character is killed. The only way to move the meter back toward the "good" side is by reading Weekly Shonen Jump magazines, which can be purchased in certain stores. On rare occasions, some enemies may drop a Shonen Jump magazine upon defeat. The status of the spirit meter appears to have minimal impact on gameplay. However, attacks seem to deal less damage during the final battle if the spirit meter is on the evil side.
Towns
Most towns contain a store, marked by a sign with the number "1." These stores sell consumable items and, in some cases, key items required to progress the story. Some towns also feature a store with a "Bandai" sign. Restaurants are marked by a sign with a knife and fork, where party members can fully restore their health for a fee. Towns also contain various unmarked doors. Barricaded doors cannot be entered, but some normal doors may be accessible. Entering certain doors is sometimes required to trigger story events or obtain key items.
Dragon Balls

When using the Dragon Radar, it scans the area for Dragon Balls, marking nearby ones with a dot on the radar. By moving in the indicated direction and re-scanning, players can determine their proximity to the Dragon Ball. It is automatically collected upon walking over it. There are seven Dragon Balls scattered across the world map. Collecting all seven grants the Dragon Ball item. Using this item summons Shenron, who revives any deceased party members.
Boss Battles and Minigames
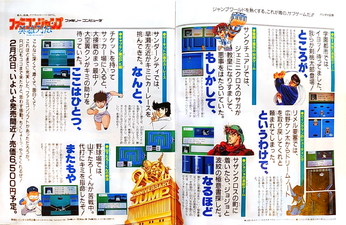
The game features a variety of boss battles and minigames, incorporating elements of boxing games, fighting games, and shoot 'em up gameplay. Boss battles often take inspiration from different action genres.
Boxing/Fighting Game-Style Battles
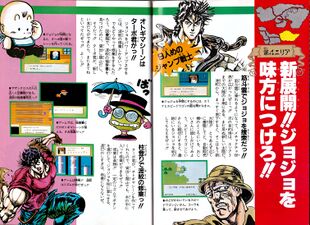
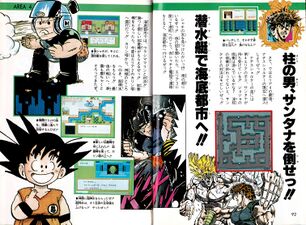
The first area's boss battle features a fighting game-style battle between Kenshiro and Kaioh from Fist of the North Star, where the player can either block Kaioh's attacks or punch him. There is also a minigame of Ryuji and Kiku's mitt-hitting training from Put it All in the Ring. The third area presents a boss battle between Seiya and Saga from Saint Seiya, where attacks and defenses are divided into upper, middle, and lower positions. The fourth area's boss battle pits Joseph Joestar against Santana, requiring rapid button presses upon landing an attack to send out Ripple energy. If not enough Ripple is stored, Joseph's attacks are absorbed, and damage is taken.
Shoot 'em Up Battles
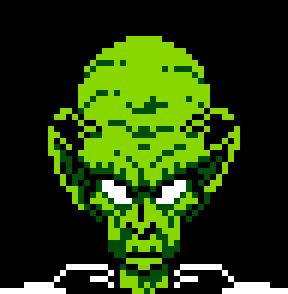
Some boss battles resemble vertical-scrolling shoot 'em up encounters. In the second area, Goku from Dragon Ball and Ryo Saeba from City Hunter battle Commander Red in a Battle Jacket, while another battle features Wingman against Emperor Rimel. The fifth area culminates in a final confrontation between the player and King Piccolo.
Other Minigames

Several areas also feature unique minigames. In a Dragon Ball–themed challenge, players must catch Karin in a whack-a-mole-style game where he appears in one of three locations. Sakigake!! Otokojuku features a Helmet Seal Stamp battle, another whack-a-mole-style game, though diagonal inputs are disabled. Recruiting Ryo from City Hunter is a game where Kaori tries to catch him. Other games include: a race against Hayase (Circuit Wolf); the Hell Climb Pillar, requiring precise timing (Battle Tendency); a submarine mission based on Akashachi's ship (Fist of the North Star); a penalty kick shootout (Captain Tsubasa); a ninth-inning baseball showdown, where a walk-off home run must be hit, though failure is required at least once to obtain a necessary item (Taro Yamashita, Umisora High's Baseball Club Member); and a juggling match between Taiyo Nagai and Yumi Kawamura (Kick-Off). The final battle takes place in a turn-based command-selection format.
Plot Summary
The player takes on the role of a young boy, whose default name is "Hashimoto" (はしもと), or Hash for short. It is a quiet evening in Hashimoto's home. While reading Weekly Shonen Jump, the magazine suddenly starts to blink. Grabbed by a mysterious force, he is suddenly pulled inside the magazine. King Piccolo from Dragon Ball is about to conquer Jump World, and Hashimoto's mission is to gather many brave heroes. A dragon named "Gyao" (ギャオ) hands him a Dragon Radar, some cash, and the Rocket Punch technique of Mazinger Z, advising him to find the seven Dragon Balls and ask for Shenron's help to revive slain allies.
Area 1

Near Hokuto Village, Rin is captured by Kaioh and kept in a locked room in his castle. When Hashimoto goes to Fortuneteller Baba's palace, she offers to tell him where one of the heroes is, but only if she is paid 60,000 zeni first. If Hashimoto doesn't have enough money, he will have to fight Baba's warriors, Buffaloman and Neptuneman. After successfully beating them, Hashimoto is informed that one of the heroes is in the east. He finds Nukesaku in that location, who immediately joins the party. Inside a house, Yamcha informs Hashimoto that Kenshiro will be his friend, giving a hint that he should go to Kenshiro's "grave" at 22JT ("Jump Time"). When Hashimoto goes to Kenshiro's fake grave at the designated time, Kenshiro arrives and joins him. Along with his new party members, Hashimoto infiltrates Kaioh's palace, but they are stopped by Hyoh. When Hyoh is defeated, he hands over the key to Rin's room. Kenshiro then challenges Kaioh and is praised upon defeating him, though Kaioh warns that King Piccolo is more powerful. The group successfully rescues Rin in the next room, who informs Hashimoto that there are more allies that will come to his aid in West City.
Area 2
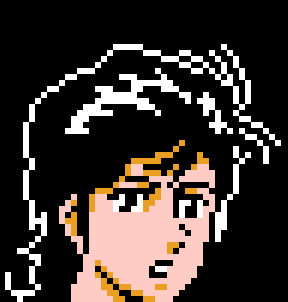
Hashimoto crosses the bridge to the west, while Kenshiro and Nukesaku stay behind. He finds Son Goku, who is looking for the Nyoibo (Power Pole) he lost. Hashimoto then enters West City alone, where Saeko Nogami tells him that Ryo Saeba will help if he is called for, but warns that he's a bit of a pervert. Hash then goes to Capsule Corporation, where Bulma suddenly puts him into a time machine she finished creating, sending him back to the past. Now in Penguin Village, Hashimoto heads to the Norimaki Residence where Senbei informs him that Dr. Mashirito stole his blueprints for Mr. Time. Worse, Arale has no energy to help him. In another house, Madoka Ayukawa says that she's traveling too, but her purpose is different than Hashimoto's. Hash finds Hitomi Kisugi in the Cat's Eye café, who gives him a red chalk to call for Ryo Saeba. She warns Hash to watch out for his partner, Kaori. Hash enters the corner store to purchase a canteen. He leaves Penguin Village and finds a nearby spring, where he fills up the canteen, turning it into Robovitan A.

Arale replenishes her fuel with the drink and joins Hash to retrieve the blueprints from the evil scientist. They arrive at his lab after traveling through the forest, where Mashirito summons Caramel Man 007 to fight for him. After Hash and Arale defeat him, Obotchaman comes out, but he refuses to be violent with Arale and gives them the blueprints for Mr. Time (if Arale is not with Hashimoto then he defeats Obotchaman alone). Arale and Hash head back to Senbei, who successfully creates Mr. Time in one go. In exchange, he asks them to give a love potion to Midori Yamabuki. The two head to the school and give Midori the potion as a gift. The potion ends up working and she marries Senbei. When entering their house again, Midori informs them that their baby is coming soon. Hash also makes a stop at the Bandai Store to purchase some toys that may be of use later.

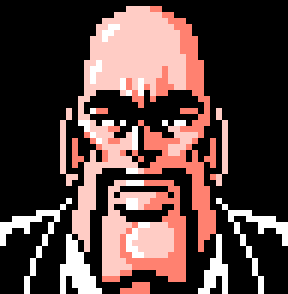
Hash leaves Arale behind and uses Mr. Time to return to the present. Back in West City, Kaori finds Hash and tells him that she knows where Ryo is and that he's picking up girls. While Kaori chases Ryo with hammers, Hash ends up catching Ryo, who agrees to join his team. The two head over to Karin Tower, where Upa tells them they must climb it, but it is impossible for normal people. They defeat Tao Pai Pai who is nearby, retrieving the Nyoibo that he stole from Goku. After Ryo and Hash find Goku and return the pole to him, he joins their party. They climb Karin Tower and catch him as part of training, receiving Holy Water to power themselves up. Together, they then infiltrate the Red Ribbon Army's base, which is a labyrinth with three floors and swarming with soldiers. On the final floor, they are confronted by Commander Red, who is angry with them for getting in his way in collecting the Dragon Balls. Using a Battle Jacket robot, he shoots at Goku and Ryo along with his soldiers. Goku and Ryo defeat them, but Goku's Nyoibo ends up breaking. Captain Gyao informs them that King Piccolo is still inside his castle, and that they will need to fly there. Goku wishes that he still had Muten Roshi's Kinto'un, a flying cloud.
Area 3
Hashimoto leaves Goku and Ryo to travel to the past again. Journeying east across the bridge next to Hokuto Village, Hash enters a house where Sunami gives him a Metal Badge, which he claims is good for a funny guy. This item powers up Nukesaku. Continuing South, Hash arrives at Motohashi Station, and takes the train to Sand Door. Walking to the northeast, he reaches the Academy City. Miku Ogawa tells Hash that Rimel stole Aoi Yume's Dream Note and that Kenta Hirono is on his way to Rimel's fortress to get it back. Hash meets various students around the area, including Rei Ichido, Yui Kawa, Ranko Kotobuki, and Mitsuko "Jubei" Yagyu. Rei and Yui mention how Kiyoshi Shusse and Soichiro Hara are both perverts, whereas Ranko is looking for Soichiro. Jubei informs Hash about how the Dream Note can make dreams come true. Inside the school, a student tells Hash that the Kaiser Knuckle can make anyone more powerful, and that Ryuji Takane has one but they need two. Hash would have to go to a boxing hall that is in the southern mountains to get the other one.
Hashimoto jumps forward to the present and finds Kenichi Kokuho and Yukie Kokuho. Yukie wishes that Momotaro Tsurugi would stand up to fight Piccolo. Kenichi tells Hash that Momo is a good friend of his and very strong. Hash finds Momo inside the school, who challenges him to a Stamp and Helmet Game. Heihachi Edajima rises from various holes, and Hashimoto has to get a higher score than Momo by stamping Edajima's head more times. Momo can block the stamping attempt by putting a helmet on Edajima. They swap roles once Hash's turn is over, and Hash ends up scoring more points, so Momo joins his team.

The two head to Port Town, where they find Erina Joestar. Erina requests that if they ever meet her grandson JoJo, then to tell him that she's doing well. Andromeda Shun gives them advice to give kids gifts. They coincidentally find a kid in front of a house and decide to give him a toy. The boy thanks them and lets them know that Pegasus Seiya is inside. He's interested in helping them fight Piccolo, but first they have to save Saori Kido from Gemini Saga. Before heading to Saga's Temple, Hash goes back in time to get some training and retrieve the Kaiser Knuckle he was told about. In Port Town, Hikaru Hiyama asks Hash to stop Madoka and Kiku Takane from fighting since Madoka thought Kiku was bullying her even though Kiku was helping her. Hash tells Madoka and she apologizes for the misunderstanding. He also explains the situation to Kiku, who decides to train Hash in boxing so he can fight Piccolo. Hash then makes his way to the boxing hall, where Ryuji tells him that he'll get Zeus's Kaiser Knuckle if he wins. Zeus wants the Kaiser Knuckle to rule the world, but Hash defeats him and takes his Kaiser Knuckle to power up Momo.

Hash takes the train to Sakigake and returns to the present to reunite with Momo and Seiya. The group takes on a gauntlet of fighters: Raiden, Hien, Gekko, and Date. After defeating them all, they are granted admission to the Otokojuku school. Edajima tells them to search for Mankichi Togawa. Hash has to return to the past world again to find Mankichi, but he doesn't want to join Hash until his dream comes true. Thus, Hashimoto has to go defeat Rimel at his fortress and retrieve the Dream Note. Kenta tells Hash to transform into Wing-Man and fight Rimel, who has become Piccolo's minion. Wing-Man successfully defeats Rimel and then the fortress blows up. With the Dream Note now in Hash's possession, Mankichi joins the team so they could make dreams real together. However, Mankichi's journey has to wait as Hash needs to return to the present and rescue Saori.

Hashimoto, Momotaro, and Seiya travel to the Sanctuary. They are confronted by an enemy on each floor: Aquarius Camus, Capricorn Shura, Cancer Deathmask, and Pisces Aphrodite. Camus believes that only true Saints wear Gold Cloths, Shura says that he will cut down everything with his Excalibur, Deathmask threatens to send them to Yomotsu Hirasaka (the boundary between the world of the living and the Underworld), and Aphrodite believes that none of them can escape her Piranha Rose technique. Nonetheless, they are all defeated and the group reaches Gemini Saga. Saga's good personality is glad they arrived and is about to tell them where Athena (Saori) is, but his evil personality interrupts and fights them. Seiya defeats him, but he is still alive. When they rescue Saori, she tells them to go to Port Town and use the phone.
The group follows Saori's advice and is called by Muten Roshi on the phone, who sends Kuririn over to them. Kuririn takes them to the Kame House where Roshi lives. Roshi promises to give them his Kinto'un cloud in exchange for an ecchi video. Thus, Hashimoto has to return to the past world to find a video Roshi would like. He takes a detour to Penguin Village and enters Senbei's house, where he is greeted by Senbei and Midori's new baby, Turbo Norimaki. Turbo created a Reality Machine which converts Hash's Toy Cloth into an actual Cloth to power up Seiya. Hash then heads over to the Academy Village and finds the pervert Soichiro, who gives Hash the ecchi video. Hash returns to the present and calls Kuririn again to take him to Roshi. Roshi enjoys the video and gives the group Kinto'un as promised.
Area 4

Hashimoto uses Kinto'un to fly to the south. At East Hill, he is confronted by the bird demon Halphas, who declares that East Hill is under control of the Pazuzu Sect. By defeating him, Hashimoto rescues Ruriko Kikoku, who thanks him for saving her. Ruriko introduces Hash to Reiki Kikoku, who also thanks him for helping Ruriko and joins his team to defeat the Devil Siders. The two of them head to a nearby store, purchasing a baseball ticket for later. At the Ruins, they find Joseph Joestar, but he tells them to leave since he's busy. Traveling further south, the pair finds a vending machine with Robert E. O. Speedwagon beside it. Speedwagon is extremely thirsty and asks for a drink, so they buy him a cola. As thanks, he informs them about the nearby library containing the Secret Ripple Manual and that the ruins have text in an ancient Indian language. Going back to the ruins, Joseph joins the party so they could fight Santana together.
Before confronting the Devil Siders and Santana, Hash makes some detours to recruit more allies. Flying to the west to Area 5, Hash pushes a rock by a waterfall and enters a cave, where he finds Gyojin Dainichirin. Gyojin tells him to defeat Lilith before Pazuzu, or else Pazuzu would keep reviving. Entering the Fighting Arena, Momotaroh greets Hash and is confident that Kinnikuman will be of great help to Hashimoto's team. Traveling back to Southern Cross in Area 4, Hash, Reiki, and Joseph defeat Lilith and then Pazuzu in the town. Hash visits the same town in the past and meets Kankichi Ryotsu, who gives him a cooking ingredient and asks if he can make something with it in exchange for something good. Back in East Hill, Shachi's friend tells Hash to make a call to Port Town to meet with Akashachi. Hash heads to the restaurant and meets Ajihei the cook, who turns the chicken leg Ryotsu gave him into a delicious meal.

Before delivering the meal to Ryotsu, Hash checks the nearby Ruins, which Isamu is examining. Reading the text in the Ruins, Isamu learns that the Pillar Men are weak to sunlight and sought after the Red Stone of Aja to combat this. Not wanting to let them get the Aja, Isamu joins Hash. Hash delivers the meal to Ryotsu, who thanks him by giving him a .44 Magnum, though asks that Hash doesn't tell his chief. Hash and Isamu then travel to the Nazi Shelter, where they find the cop Joji Kano. The .44 Magnum belonged to him, so he joins Hash's team once he gets the gun back. Finally, Hash returns to the present and enters the Nazi Shelter again with Joseph and Reiki. Santana declares that anyone who stands in his way will die, but Joseph ends up defeating him.
Hashimoto goes back to the past and finds Sakon Hayase in East Hill, who challenges Hashimoto to a race in exchange for the Red Stone of Aja. Yuya Fubuki lends his car to Hash, warning that Hayase is fast. Hashimoto ends up losing, but finds Jun Kazami, who tunes up his car. They have a rematch and Hashimoto wins the race, earning the Red Stone of Aja which powers up Joseph. Next, they need to acquire the Secret Ripple Manual that Speedwagon mentioned. Hashimoto flies over to Penguin Village, where Turbo gives him a Fairy Tale Machine.

Returning to the present, Hashimoto enters the library with Joseph at Southern Cross, and finds the book in the middle aisle. Suddenly, the Fairy Tale Machine activates and puts Joseph inside the book. He is forced to train by doing the Hell Climb Pillar test, using his Ripple to stick to the pillar and steadily manage his breathing to climb while avoiding the oil spewing out. Upon reaching the top, Captain Gyao declares that he mastered the Ripple.
Hashimoto calls Akashachi and boards his submarine, avoiding several underwater mines during the journey. Once they cross the sea, Hashimoto is confronted by Marin Urashima, who shows that he has a Nyoibo. He challenges Hashimoto to take it from him if he wants it. Hashimoto defeats him, and Gyao tells him to hurry to Karin Tower with the new Nyoibo. However, there are still a few allies left for Hash to recruit in the fifth area before taking on King Piccolo.
Area 5
Hashimoto uses the soccer ticket he purchased earlier at the Soccer Field. Tsubasa Ozora asks for his help, as they're on the penalty shot match in their game. After scoring more than the rival team, Tsubasa praises Hash's soccer skills and joins him. South of the field is the cave by the waterfall where Hashimoto found Gyojin earlier. This time, he travels to the past, and finds Jotaro Nanjo there instead. Nanjo gives Hashimoto a baseball bat, which Hash wonders whether it's the Spirit Bat. Up north a bit in in the present is the Baseball Stadium, where Taro Yamashita is up to bat on the 9th inning. When Taro hits the ball using the bat from Nanjo, the bat suddenly breaks. Hash goes back to Nanjo in the past, who proclaims that since Hash has awakened his soul, the real Spirit Bat now belongs to him. Returning to the present and buying another baseball ticket, Hash goes back to the stadium. Using the real Spirit Bat, Taro successfully hits a home run, announcing that he'll beat Piccolo to be the best.
Hashimoto buys one more soccer ticket and baseball ticket then travels to the past again. At the Soccer Field, he meets Taiyo Nagai and Yumi Kawamura. They show him a soccer ball which they claim is their treasure, but if Hashimoto can beat them by kicking a ball and having it stay in the air for long enough, then he can have it. Hash bounces the ball on his head 20 times and beats them, earning the ball which is a sign of their friendship. Next, Hashimoto goes to the Baseball Stadium again and recruits Kyuichi Uno, who is surprised to see the Spirit Bat. Finally, Hashimoto recruits his final ally by going to the Fighting Arena, where Kinnikuman joins him and gives him a Gold Mask.

With all sixteen heroes by his side, Hashimoto and his party finally travel to Karin Tower. Hash stretches out the Nyoibo, letting him access God's Shrine. God praises them for growing stronger and gives them Sacred Water to drink, growing their power further. Fully prepared to take on King Piccolo, the group heads to King Castle, consisting of a long labyrinth with four floors. In the end, they finally reach King Piccolo's room, who announces that he'll destroy the cocky child. Hashimoto defeats him nonetheless, but Piccolo declares that he cannot die. Gyao congratulates Hashimoto for saving Jump World, until suddenly, the Monolith reveals that the real battle begins now. King Piccolo had a rebel army consisting of thirteen members, who all await Hashimoto now. They will only truly win when they crush the army.
Rebel Army

The thirteen members in King Piccolo's rebel army are Jaki Daigoin, Dr. Mashirito, Super Phoenix, Kyushiro Toge, Gino Hernandez, Lyell, Lacenaire, Bearded Godzilla, Esidisi, Akakabuto, Gemini Saga, Raoh, and Majunior. The heroes have one-on-one matches against all of them, in that order.
The heroes successfully defeat all of them, saving Jump World. However, the Monolith announces that the world's woes will never end, and that they should always continue to work together.
Characters
Playable
(Hashimoto)

Non-Playable
Enemies/Bosses


Supporting Characters


JoJo Characters
- Joseph Joestar: Joseph (Part 2) is one of the sixteen heroes who joins the player's party. He can be recruited by going to the Ruins in Area 4 after buying Speedwagon a cola. He has two attacks: the short-range "Ripple Punch" and the long-range "Clacker Volley." Visiting the library in Area 4's Southern Cross while having Turbo Norimaki's Fairy Tale Machine will trigger the "Hell Climb Pillar" minigame, allowing Joseph to master the Ripple once it is cleared. He receives another powerup from the Red Stone of Aja by clearing a racing minigame in Indie Town.
- Santana: The boss of Area 4. The player fights him as Joseph in a one-on-one fighting game-style battle utilizing the Ripple. The Santana fight is unique compared to other fights in the game, as he absorbs regular attacks. After punching him with the "B" button, the player has to mash "A" to charge the Ripple into the punch, otherwise Joseph takes damage instead.
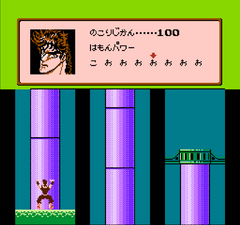
- Esidisi: One of the thirteen rivals who challenges the player's party during the RPG-like final battle. His attacks are "Heat Mode" and "Blazing King's Giant Wheel" and his special ability "It's not faaaaair!" boosts his attack power by 1.5 once his health is below 100.
- Erina Joestar: Appears in Area 3 at the port town. She asks the player to tell Joseph that she is doing well.
- Robert E. O. Speedwagon: Appears in Area 4, next to a vending machine. The player can buy him a cola and he informs them about the Secret Ripple Manual in the library.
Other JoJo Cameos
- Red Stone of Aja: Received as a prize in Indie Town after winning in the racing minigame. Joseph gets powered up after it is won.
- Nazi Shelter: It is either accessible in the Past World or present. In the past, the cop Joji Kano is there, where you give him his .44 Magnum. In the present, it is the final section of Area 4, where the player fights Santana with Joseph in their party.
Locations

List of Works
- Father's Soul (父の魂, Chichi no Tamashī) (August 1968)
- The Ideal Boy's Gang Leader (男一匹ガキ大将, Otoko Ippiki Gaki Taishō) (November 1968)
- Shameless School (ハレンチ学園, Harenchi Gakuen) (December 1968)
- Dr. Toilet (トイレット博士, Toilet-Hakase) (June 1970)
- Boy of the Wilderness Isamu (荒野の少年イサム, Kōya no Shōnen Isamu) (September 1971)
- Team Astro (アストロ球団, Asutoro Kyūdan) (August 1972)
- Ajihei the Cook (包丁人味平, Hōchōnin Ajihei) (June 1973)
- The Circuit Wolf (サーキットの狼, Sākitto no Ōkami) (December 1974)
- Doberman Cop (ドーベルマン刑事, Dōberuman Deka) (August 1975)
- KochiKame: Tokyo Beat Cops (こちら葛飾区亀有公園前派出所, Kochira Katsushika-ku Kameari Kōen Mae Hashutsujo) (September 1976)
- Put It All in the Ring (リングにかけろ, Ringu ni Kakero) (January 1977)
- Kinnikuman (キン肉マン, lit. Muscle Man) (May 1979)
- Dr. Slump (Dr.スランプ, Dokutā Suranpu) (February 1980)
- High School! Kimengumi (ハイスクール!奇面組, Hai Sukūru! Kimengumi, lit. High School! Funny-Face Club) (October 1980)
- Captain Tsubasa (キャプテン翼, Kyaputen Tsubasa) (March 1981)
- CAT'S♥EYE (キャッツ♥アイ, Kyattsu Ai) (June 1981)
- Kick Off (キックオフ, Kikku Ofu) (January 1982)
- Leave it to Mecha-Doc (よろしくメカドック, Yoroshiku Meka Dokku) (October 1982)
- Wing-Man (ウイングマン, Uinguman) (January 1983)
- Shape Up Ran (シェイプアップ乱, Sheipu Appu Ran) (May 1983)
- Fist of the North Star (北斗の拳, Hokuto no Ken) (September 1983)
- Silver Fang: The Shooting Star Gin (銀牙 -流れ星 銀-, Ginga: Nagareboshi Gin) (December 1983)
- Kimagure Orange Road (きまぐれオレンジ☆ロード, Kimagure Orenji Rōdo, lit. Capricious Orange Road) (March 1984)
- Miraculous Tonchinkan (ついでにとんちんかん, Tsuide ni Tonchinkan) (November 1984)
- Dragon Ball (ドラゴンボール, Doragon Bōru) (November 1984)
- City Hunter (シティーハンター, Shitī Hantā) (February 1985)
- Sakigake!! Otokojuku (魁!!男塾, lit. Charge!! Men's Private School) (April 1985)
- Saint Seiya (
聖闘士星矢 , Seinto Seiya) (December 1985) - Taro Yamashita, Umisora High's Baseball Club Member (県立海空高校野球部員山下たろーくん, Kenritsu Umisora Kōkō Yakyūbuin Tarō-kun) (September 1986)
- JoJo's Bizarre Adventure (ジョジョの奇妙な冒険, JoJo no Kimyō na Bōken) (December 1986)
- The Burning Wild Man (燃える! お兄さん, Moeru! Onii-san, lit. Burning Older Brother) (May 1987)
- God Sider (ゴッドサイダー, Goddo Saidā) (May 1987)
- The Momotaroh (September 1987)
Interview

Gallery
-
 Logo
Logo -
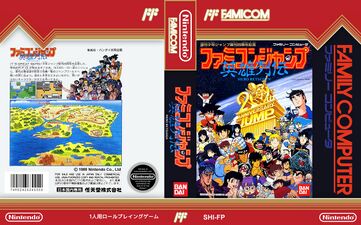 Covers
 -
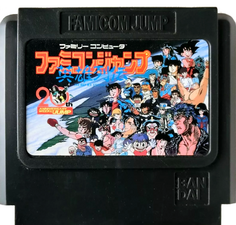 Cartridge
 -
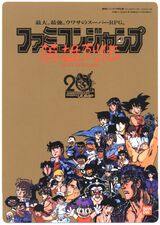
 Desk Pad
 -
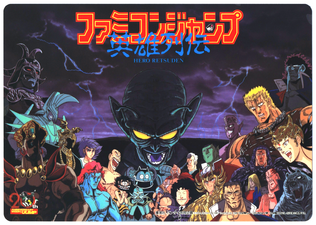 Desk Pad (Villains)
 -
 Alternate Desk Pad
 -
 Back of Alternate Desk Pad
 -
 Flyer
Flyer -
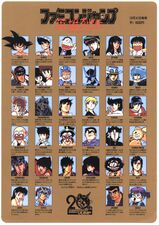
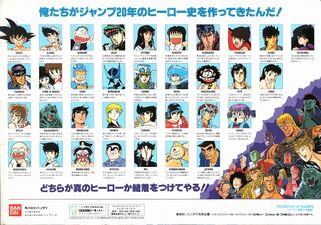 List of characters on back of flyer
 -
 Flyer
Flyer -
 Flyer
Flyer -
 Flyer
Flyer -
 Present Campaign Flyer
 -
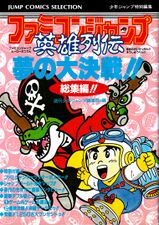 Strategy Guide
 -
 Strategy Guide Comment
 -
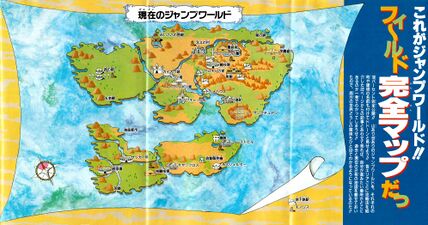 World Map
 -
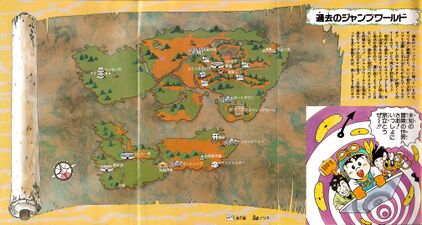 World Map (Past)
 -
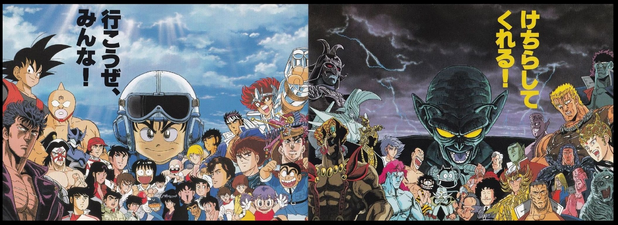
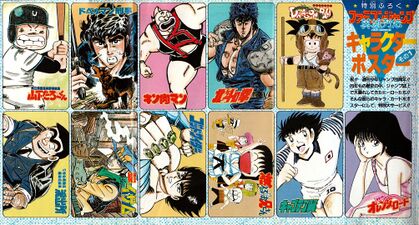 Character Poster
 -
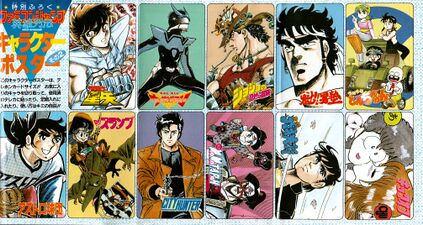 Character Poster Part 2
 -
 Guidebook (Page 15)
 -
 Guidebook (Area 4)
 -
 Guidebook (Area 4)


-
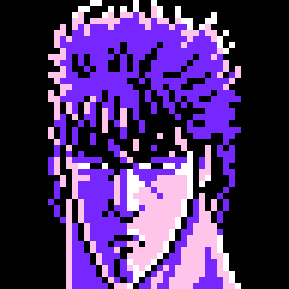
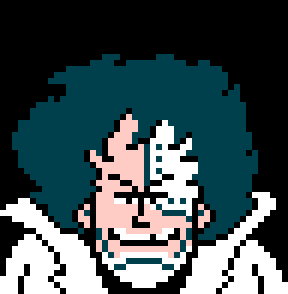
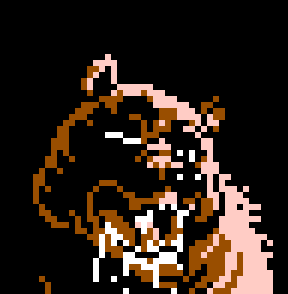
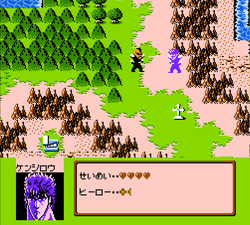 Kenshiro's appearance
 -
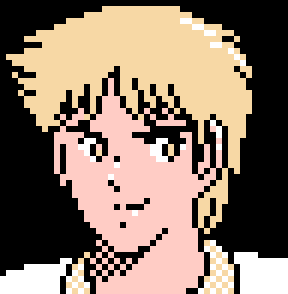
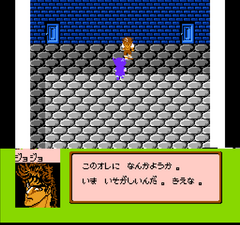 Joseph too busy to join the party
 -
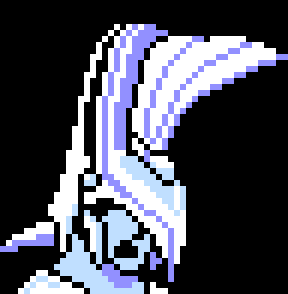
 Speedwagon and men with Stone Masks
 -
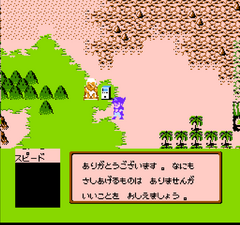 Speedwagon thanks the player for buying him cola
 -
 Joseph joins the party
 -
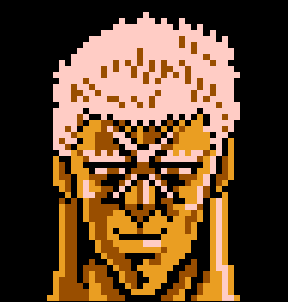
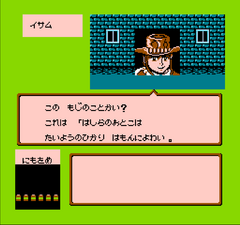 Isamu reads about the Pillar Men
 -
 Joseph and the party at the Nazi Shelter
 -
 Hell Climb Pillar
 -
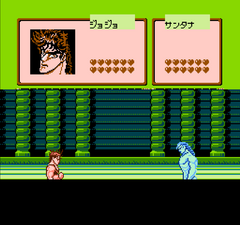 Joseph battling Santana
 -
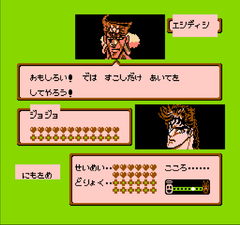 Joseph vs. Esidisi
 -
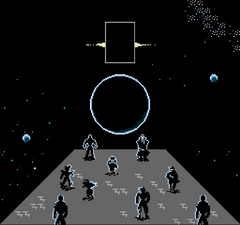 Joseph standing with the other heroes at the end of the game


-
 Hashimoto (Player)
 -
 Mankichi Togawa
 -
 Isamu
Isamu -
 Kyuichi Uno
 -
 Joji Kano
 -
 Suguru Kinniku
 -
 Arale Norimaki
 -
 Tsubasa Ozora
 -

-
 Nukesaku Aida
 -
 Son Goku
 -
 Ryo Saeba
 -
 Momotaro Tsurugi
 -
 Pegasus Seiya
 -
 Taro Yamashita
 -

-
 Reiki Kikoku
 -
 Captain Gyao
 -
 Jotaro Nanjo
 -
 Sunami
 -
 Sakon Hayase
 -
 Kankichi Ryotsu
 -
 Ryuji Takane
 -
 Kiku Takane
 -
 Ryuji Takane (Boxing)
 -
 Kiku Takane (Boxing)
 -
 Buffaloman
 -
 Neptuneman
 -
 Reality Machine
 -
 Obotchaman
 -
 Caramel Man 007
 -
 Dr. Mashirito
 -
 Rei Ichido
 -
 Yui Kawa
 -
 Goalkeeper
 -
 Taiyo Nagai
 -
 Jun Kazami
 -
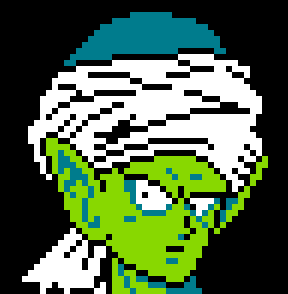
 Wing-Man
 -
 Aoi Yume
 -
 Seedman
 -
 Rimel
Rimel -
 Ranko Kotobuki
 -
 Soichiro Hara
 -
 Rin
Rin -
 Akashachi
 -
 Shachi's Friend
 -
 Zeed Gang Member (White)
 -
 Zeed Gang Member (Brown)
 -
 Zeed Gang Member (Red)
 -
 Hyoh
Hyoh -
 Kaioh
Kaioh -
 Kenshiro (Fighting)
 -
 Kaioh (Fighting)
 -
 Madoka Ayukawa
 -
 Kuririn
 -
 Muten Roshi
 -
 Fortuneteller Baba
 -
 Upa
Upa -
 Tao Pai Pai
 -
 Karin
Karin -
 Red Ribbon Army Soldier (Green)
 -
 Red Ribbon Army Soldier (Blue)
 -
 Red Ribbon Army Soldier (Purple)
 -
 Commander Red
 -
 Battle Jacket
 -
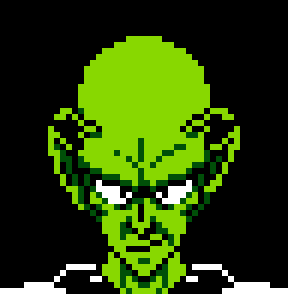
 King Piccolo
 -
 Kaori Makimura
 -
 Saeko Nogami
 -
 Gin Kitsune
 -
 Umibozu (Dark Green)
 -
 Umibozu (Light Green)
 -
 Umibozu (Purple)
 -
 Heihachi Edajima
 -
 Rakkyo University Student
 -
 Raiden
 -
 Hien
Hien -
 Gekko
Gekko -
 Date Omito
 -
 Dragon Shiryu
 -
 Andromeda Shun
 -
 Sanctuary Soldier (Brown)
 -
 Sanctuary Soldier (Blue)
 -
 Sanctuary Soldier (Green)
 -
 Perseus Algol
 -
 Aquarius Camus
 -
 Capricorn Shura
 -
 Cancer Deathmask
 -
 Pisces Aphrodite
 -
 Gemini Saga
 -
 Pegasus Seiya (Fighting)
 -
 Gemini Saga (Fighting)
 -
 Taro Yamashita (Baseball)
 -
 Pitcher
 -

-

-
 Stone Mask Man (Black)
 -
 Stone Mask Man (Blue)
 -
 Stone Mask Man (Green)
 -
 Stone Mask Man (Gray)
 -

-
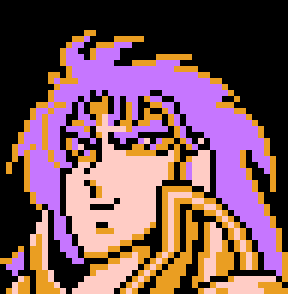
 Joseph Joestar (Fighting)
 -
 Joseph Joestar (Punching)
 -
 Santana (Fighting)
 -
 Santana (Attacking)
 -
 Joseph Joestar (Climbing)
 -
 Joseph Joestar (Climbing)
 -
 Joseph Joestar (Top of Pillar)
 -
 Cola
Cola -
 Secret Ripple Manual
 -

-
 Kenichi Kokuho
 -
 Ruriko Kikoku
 -
 Gyojin Dainichirin
 -
 Halphas / Firebirds
 -
 Lilith
 -
 Pazuzu
 -
 Marin Urashima
 -
 ??? (Area 4 Enemy)
 -
 ??? (Area 5 Enemy)
Videos
Duration: 16 seconds.Duration: 15 seconds.
Trivia
- Famicom Jump: Hero Retsuden marks the debut of the JoJo's Bizarre Adventure franchise in a video game.
- When the game was released, Part 2 had only reached Esidisi's battle against Joseph in the manga. Thus, only Santana and Esidisi appear as enemies faced during the JoJo's Bizarre Adventure part of the game, without Kars and Wamuu.
- The art on the cartridge and back cover features Jonathan Joestar from Volume 3's cover even though Joseph is the playable one and Jonathan isn't in the game at all. One of the desk pads and flyers displaying the list of characters also mistakenly uses art of Jonathan, despite the description for the character mentioning how he is pursuing the Pillar Men.
- One of the randomly generated generic dialogues from the NPCs in Area 3 is "JoJo cares for his grandmother."
