JoJo's Bizarre Adventure: All-Star Battle
JoJo's Bizarre Adventure: All-Star Battle (ジョジョの奇妙な冒険 オールスターバトル, JoJo no Kimyō na Bōken Ōru Sutā Batoru) is a fighting game based on the JoJo's Bizarre Adventure franchise, developed by CyberConnect2 and published by Bandai Namco Entertainment. The game was released exclusively for the PlayStation 3 on August 29, 2013 in Japan, April 25, 2014[1] in Europe, and April 29, 2014 in North America.
All-Star Battle and its downloadable content were removed from the European PlayStation Store in early 2018, with the Japanese and North American editions following suit on August 2, 2022. As a result, the game's online functionality has been terminated.[2]
A remastered version titled All-Star Battle R was announced during the PlayStation State of Play event on March 9, 2022 and released worldwide in early September 2022. The remaster features 10 new playable characters, several new modes, updated voice acting, anime-accurate color schemes, and minor changes to the game's mechanics.
Summary
All-Star Battle was announced on July 5, 2012 alongside the anime in a press conference for Hirohiko Araki JoJo Exhibition 2012 to coincide with the 25th anniversary of the series.[3] The game includes major characters from each of the series's eight arcs, with the protagonist of Baoh the Visitor eventually added as a guest character.
All-Star Battle was the winner of the 2012 Japan Game Awards and received a 40/40 score from Famitsu, making it both the only licensed video game and the only fighting game to receive a perfect score from the magazine.
The Japanese animation studio Graphinica was in charge of some of the character modeling and 3D motion.[4] In order to reproduce Araki's unique art style in the game, a proprietary shading engine called "JOJO Shading Requiem" was developed. The name 'Requiem' comes from the fact that the initial shading program was discarded and reborn.[5] In addition, to express the 'JoJo-esque' action in terms of motion, the game was deliberately created at 30 frames per second instead of 60 frames per second. However, it was changed to 60 frames per second in its remaster, All-Star Battle R.
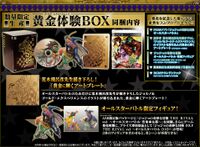
All-Star Battle released with a standard version and limited edition "Gold Experience Box". The Gold Experience Box included the game, a golden plate engraved with an illustration by Hirohiko Araki of Giorno Giovanna and Gold Experience as well as an acrylic case, a DXF Jotaro Kujo and Star Platinum figure, and the official soundtrack on a CD resembling the DISC of Star Platinum extracted by Whitesnake.
Both the limited edition and pre-orders of the standard edition included a download code for Yoshikage Kira on a booklet designed to look like Hayato Kawajiri affected by Heaven's Door. Italian pre-order versions of the game shipped with an alternative "From Italy with Style" version of the box art featuring Giorno Giovanna and Gold Experience.
Basic Gameplay
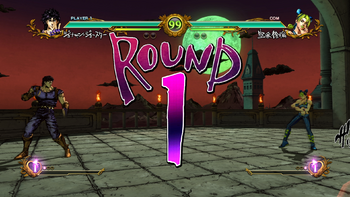
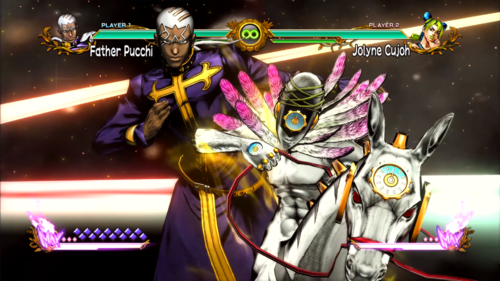
All-Star Battle is a one-on-one 2.5D fighting game with 3D cel-shaded characters. Gameplay in All-Star Battle shares similarities with Heritage for the Future, and boasts a wide variety of different styles, rules, and abilities among each individual fighter.
Like a typical fighting game, the player wins a round by either draining the opponent's health or by having more health than the opponent when time runs out. Battles can either be one round, the best out of three rounds, or the best out of five rounds.
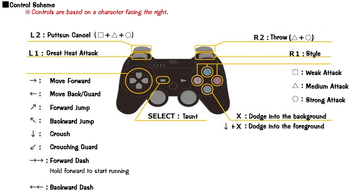
The game uses six main buttons: light attack, medium attack, heavy attack, rotate/dodge, "Style", and taunt. Buttons can be reconfigured in the game's Option Mode. Combos can be chained with light, medium, and heavy attacks.
Expand/Collapse All
The character can chain the three normal attacks together in a combo, but only in order of increasing power, in a system known as Chain Beat. They can also chain into special moves from any normal attack.
Few special skills count as additional normal attacks beyond the universal Light, Medium, and Heavy attacks. These are known as "command normal attacks", and allow the character to chain other special moves from them just as they could a normal attack.
Rarely, certain special moves can be unblockable throw attacks, known as "command throws". These have some advantage over the standard Throw such as increased range or being able to be chained into or from, in exchange for executing slowly, usually just enough time for a human opponent to react to and avoid the command throw.
The Heart Heat Attack requires and consumes one stock of Heart Heat to be performed, whereas the Great Heat Attack requires and consumes two stocks. HHA can be universally chained into, allowing the player character to cancel nearly any attack or skill into them, thus making them effective combo finishers where applicable. However, GHA can only be executed either by themselves or when chained from normal attacks; since they cannot be used while performing special skills, it is much more difficult to connect with them successfully.
This applies to one initial hit only, meaning that attacks that deal damage in single strikes or inflict most of their damage on the first hit benefit the most from landing as a Counter Hit. Inversely, attacks that deliver many weaker hits, mainly punch barrage skills, may only see a very small increase. Light normal attacks done while standing or crouching as well as Throws cannot trigger Counter Hit.
Like with many fighting games, different types of attacks have different properties which can bypass guarding. High attacks are standard and the most common among abilities, able to be guarded against by both a standing and crouching opponent. Middle attacks (alternatively known as "overhead" attacks) can only be guarded against by standing opponents, hitting them if they are crouching (e.g. all air attacks). Low attacks can only be guarded against by crouching opponents, hitting them if they are standing (e.g. all crouching attacks).
A Guard Gauge determines how much the character can guard attacks, and if depleted, results in a Guardbreak that leaves the character stunned and open to attack for a brief moment.
A larger portion of the Guard Gauge is consumed if the character Stylish Evades an attack not of their corresponding defensible height; Stylish Evading a low attack while standing, or a middle attack while crouching.
Most attacks that knock a character off their feet deliver a soft knockdown, which allows them to swiftly recover by pressing the Dodge button the instant they hit the ground, performing a quick roll and getting back on their feet to minimize danger. Certain abilities, such as crouching Heavy attacks, will instead result in a hard knockdown, where recovery is not possible and being downed is unavoidable.
More taunts and taunt voice lines can be unlocked in Campaign Mode and set to a character in Customize Mode.
For every character, the Easy Beat almost always follows a combo structure of:
- Light normal attack
- Medium normal attack
- Heavy normal attack
- A specific special move or series of special moves from the character's arsenal
- Heart Heat Attack (if available and can be comboed into)
The only cases where Easy Beat does not end in an HHA is when the character's HHA is not a standard striking attack, but rather a special power-up, counter, or delayed command throw.
This gives the player a chance to instantly act out of their canceled ability for any number of purposes, including but not limited to: executing more attacks and stringing longer combos on their opponent, making a move less punishable, executing a sudden Throw to surprise a defending opponent, using their HHA (although HHA can often be used instantly in the middle of most attack animations regardless), or even chaining an extended combo into their GHA for a strong finisher.
This will cause the character and their Stand to 'de-sync', with the player instantly regaining control of the Stand user as their Stand continues its attack. While the user may be limited to only their Light and Medium normal attacks and any other moves that do not involve use of their Stand, this opens up opportunities for conjunction attacks, as well as new combos and set-ups, or simply minimizing the risk of their move being punished.
Gauges
The HUD has three main gauges, although some characters have their own unique gauge as well.
Health: The Health/Stamina gauge displays how much damage a character can receive before being K.O. or Retired.
Guard: The Guard gauge displays how long a character can continuously block incoming attacks. If too much Guard damage is sustained and the gauge is depleted, a "Guardbreak" will occur, shattering a character's defense which leaves them staggered and vulnerable to attack. Successfully executing Stylish Evades also depletes the Guard Gauge in large portions. If no Guard damage is taken for a period of time, the Guard Gauge will slowly regenerate.
Heart Heat Gauge: The Heart Heat Gauge (shortened to "HHG") is a special meter that allows characters to perform strong techniques and other special abilities. It is filled by dealing and receiving damage as well as through other actions, and stocks up to a maximum of three levels. One stock of Heart Heat can be used to perform a Heart Heat Attack (ハートヒートアタック, Hāto Hīto Atakku, shortened to "HHA"), while two stocks can be used to perform a Great Heat Attack (グレートヒートアタック, Gurēto Hīto Atakku, shortened to "GHA").
An opponent's HHG can be depleted by executing a taunt while they are knocked down.
Character-Specific Displays
Some characters also have extra icons/gauges near the Heart Heat Gauge with different, unique functions.
- Joseph Joestar has a Trick system or "Guess I did it again!" Level ("またまたやらせていただきましたァン"レベル, "Mata mata yarasete itadakimashitaan" Reberu) that makes any of his Ripple-based and Ripple-enhanced attacks permanently stronger every time he counters with three different abilities, with the level capping at 3.[6]
- Vanilla Ice has a Stand Power Gauge (スタンドパワーゲージ, Sutando Pawā Gēji) that shows how much his powerful Cream can be used.
- Akira Otoishi has a Power Gauge ("電力"ゲージ, "Denryoku" Gēji) that ties in with Red Hot Chili Pepper's available strength and ability power.
- Shigekiyo Yangu has an icon showing if Harvest is in Offensive or Defensive Formation, which determines the abilities he can use.
- Guido Mista has an Ammunition Icon for the number of bullets he has left in his revolver's cylinder, and a Pistols Icon above showing which and how many of his Sex Pistols are currently available for use.
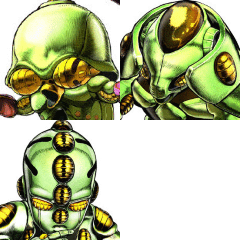
- Pannacotta Fugo has a Capsule Icon showing which of Purple Haze's six bulbs containing its Homicidal Virus are available or broken.
- Ermes Costello has an icon showing the stickers applied to herself at the current time when she uses her "Here's where ya stick it!" ability.
- Enrico Pucci has a Green Baby Gauge ("緑の赤ちゃん"ゲージ, "Midori no Aka-chan" Gēji) that displays 14 rhombus-shaped icons and his progress towards evolving Whitesnake into C-MOON.
- Johnny Joestar has a Tusk's Growth icon displaying his Stand's current ACT, up to ACT4, as well as a Tusk Icon showing his Golden Spin nail bullet ammunition for Tusk ACT2 and beyond.
- Gyro Zeppeli has Steel Ball Icon displaying which of his 2 Steel Balls are in his possession for use, and a Spin Gauge (回転ゲージ, Kaiten Gēji) that ties in with the strength and properties of attacks utilizing said Steel Balls.
Battle Style
Every character is assigned a Battle Style (バトルスタイル, Batoru Sutairu), which determines the effects and abilities attached to their Style button (![]() ). There are 6 Battle Style types:
). There are 6 Battle Style types:
- Ripple (波紋, Hamon): Ripple Users can charge their Heart Heat Gauges with the "Ripple Breath" ability, and spend Heart Heat to execute enhanced versions of their various special skills if the Style button is used instead of an Attack button when inputting said moves. Ripple-enhanced skills typically consume 1/4 of a Heart Heat gauge.
- Vampirism (吸血, Kyūketsu): Vampires can utilize specific attacks that allow them to steal their opponent's health using inputs involving the Style button. Whenever they take damage, especially from combos, a portion of the lost health will appear silver, and will automatically regenerate over time if no more damage is taken for a certain period.
- Mode (
流法 , Mōdo): Mode Users can activate special states with a press of the Style button that spend Heart Heat at a fixed rate to automatically enhance their attacks and trigger other passive bonuses. Whenever they take damage, especially from combos, a portion of the lost health will appear silver, and will automatically regenerate over time if no more damage is taken for a certain period. - Stand (スタンド, Sutando): Stand users can switch between "Stand Off" and "Stand On" states at will using the Style button, summoning and dismissing their Stand to shift their available set of special abilities. While in Stand Off state, Heart Heat can also be spent for Stand users to perform 'Quick Stand On', instantly summoning their Stand during normal attacks for a seamless switch to Stand On. While in Stand On state, they can utilize the Stand Rush mechanic, spending Heart Heat to disconnect from their Stand in the middle of certain attacks to deliver joint attacks and other maneuvers. If successfully knocked down, Stand users will be forced into Stand Off state.
- Mounted (騎乗, Kijō): Mounted characters can mount and dismount from their horse at will using the Style button, altering their mobility and some of their available abilities. Mounted characters cannot Throw but also cannot be Thrown while on horseback. While unmounted, Heart Heat can be spent for Mounted characters to perform 'Quick Mount', instantly summoning their horse during normal attacks for a seamless switch in the middle of attacking, and potentially knock their opponent into the air. If knockback is sustained, Mounted characters will be forcibly dismounted from their horse.
- Baoh Armed Phenomenon (バオー
武装現象 , Baō Āmudo Fenomenon): Exclusive to Ikuro Hashizawa. Baoh gains passive health regeneration that is boosted with every 25% health he loses, signified by the various changes in colors his Health Gauge undergoes. At a tap of the Style button, he can also spend Heart Heat to grant himself super armor during his next special skill, allowing him to power through most incoming attacks when he executes said skill without getting interrupted.
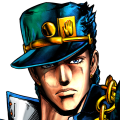
For example, Jotaro's Style summons his Stand Star Platinum, a signature trait among most with the "Stand" Style. Young Joseph's allows him to utilize the Ripple to charge his Heart Heat Gauge using the ability "Ripple Breath", shared among all "Ripple" Style characters.
The majority of characters have only one Style, excluding DIO (Stand, Vampirism), Old Joseph (Ripple/Hamon, Stand), and Vanilla Ice (Stand, Vampirism). Although Johnny Joestar and Gyro Zeppeli also use Stands, their Style is only Mounted.
Character Attributes
Some characters have special attributes and abilities of their own.
- Jonathan Joestar can perform "This is my final Ripple!", which at the cost of a stock of the HHG, replenishes some of his health after an initial K.O. and makes all of his special moves their Ripple-enhanced variations for free, though he loses access to his Heart Heat Gauge once revived.
- Hol Horse receives a decrease in offensive power and a boost to HHG generation if he is fighting a female character (passive effect referred to as "Hol Horse loves the ladies!").
- Josuke Higashikata 4 can have a temporary defense and offense boost along with super armor if a counter that causes the opponent to insult his hair (named "Watch your mouth!") succeeds, though he cannot defend and is forced to walk forward while this ability is active.
- Guido Mista will lose Heart Heat if he suffers damage while he has 4 bullets left ("Unlucky Number 4").
- When in a match, Johnny Joestar, Gyro Zeppeli, and Funny Valentine can collect Holy Corpse Parts scattered around the stage that grant passive bonuses to stats and access to new special abilities. They each gain unique benefits for every part they currently have, but lose a part each time they are successfully knocked down. They need to collect and hold three parts of the Corpse in exchange for their final advantage in the fight.
- Johnny's Heart Heat Gauge charges much faster once collecting all three Parts.
- Once Gyro has collected a singular Corpse Part, he can use "Scan", a new attack that deals substantial damage. After getting all three, he has an unlimited Steel Ball gauge and permanent Golden Spin Mode.
- Once Valentine has collected at least two Corpse Parts, he will take reduced damage from all sources. After getting all three, he will activate "D4C Love Train", further reducing damage taken and automatically nullifying most projectiles. Certain special moves by D4C will execute faster, greatly improving Valentine's combo utility.
- If he is holding all three Corpse Parts and has three stocks of the Heart Heat Gauge, Valentine can completely restore his health to full using an ability called "Back from the 'other side'", in exchange for losing all of the Corpse Parts as well as access to his HHG.
Rush Mode
Much like Heritage for the Future's "Blazing Fists Match", if two attacks- typically barrages, clash, the two fighters will enter a cinematic minigame called Rush Mode (ラッシュモード, Rasshu Mōdo) featuring them or their Stands dramatically exchanging blows as they shout their Stand Cry.
The players must rapidly push the light button to fill a shared bar with their color, and the one who fills the bar more wins the exchange and knocks their opponent back, dealing a small amount of damage. Characters that can enter Rush Mode are Jonathan, Jotaro, Polnareff, DIO, Josuke, Giorno, Bucciarati, Mista, Narancia, Jolyne, Johnny, and Josuke (JoJolion).
Rumble Mode & Resolve Mode
Characters receive an automatic boost to their stats when their health is critically low, with the character's health flashing red while in Rumble Mode or flashing gold in Resolve Mode.
- Rumble Mode (ゴゴゴモード, Go go go Mōdo, lit. "Go Go Go Mode" and referred to as such in the English localization): Activated at 25% health. Attack power increases and Guard and Heart Heat Gauges fill up faster
- Resolve Mode (覚悟モード, Kakugo Mōdo, "Preparedness Mode" in the English localization): Activated at 15% health. In addition to the benefits of Rumble Mode, a character will gain super armor during their attacks, allowing them to continue attacking uninterrupted even when hit by non-Throws/HHA/GHA. Only 5 characters in the game can access this mode: Giorno, Bruno, Mista, Fugo, and Ermes.
Downloadable Content
Yoshikage Kira was initially released as a bonus character for pre-order versions of the game before eventually being released as proper downloadable content on December 3, 2013. Shigekiyo Yangu was the first character made available for download, being included in the The Darkness That Haunts Morioh (杜王町に巣食う闇, Moriō-chō ni Sukuu Yami) campaign on August 29, 2013. Iggy and Pannacotta Fugo were included in the The Ferocious Beasts (どう猛な野獣, Dōmō na Yajū) campaign on September 12 of the same year, with Lisa Lisa and Old Joseph following them on September 26 as part of the The Ripple Masters (波紋の達人, Hamon no Tatsujin) campaign. Vanilla Ice and Narciso Anasui were released on October 2 as part of the The Executioners of Terror (恐怖の処刑人, Kyōfu no Shokeinin) campaign. The game's fifth and final campaign, the This! Is! Baoh!! (これが!バオーだッ!!, Kore ga! Baō da!!) campaign, launched on November 14 and added guest character Ikuro Hashizawa to the game's roster.[7]
The game's downloadable characters were released out-of-order in the European and North American versions. Lisa Lisa and Old Joseph were released internationally on April 29, 2014, followed by Ikuro Hashizawa on May 13. Vanilla Ice, Pannacotta Fugo, and Narciso Anasui followed suit on May 20, with Iggy releasing one week later. Yoshikage Kira and Shigekiyo Yangu, the first downloadable characters in Japan, became the last to be released internationally on June 3, 2014.
Johnny's fourth special costume, referencing his appearance on the cover of SBR Chapter 95, was made available as a download code during Banpresto's Steel Ball Run Ichiban Kuji campaign in Japan on October 12, 2013.[8] In the international editions, the costume instead served as a pre-order bonus, in lieu of an exclusive character. To promote the upcoming release of JoJo's Bizarre Adventure HD Ver., additional alternate costumes for Jotaro Kujo and Jean Pierre Polnareff based on promotional artwork for the arcade game were made available for purchase in Japan on December 19, 2013.
Cast
Yoji Ueda
Ayako Kawasumi
Masashi Sugawara
Hiroshi Naka
Taketora
Atsushi Imaruoka
Hidetoshi Nakamura
Yutaka Nakano
Unshō Ishizuka
Katsue Miwa
Ryuzaburo Otomo
Takahiro Fujimoto
Hisayoshi Suganuma
Koji Ishii
Junichi Suwabe
Hiromu Miyazaki
Cota Nemoto
Masaharu Sato
Tsutomu Kashiwakura
Kazunari Tanaka
Taiki Matsuno
Daisuke Matsubara
Ryō Hirohashi
Bin Shimada
Yuko Sato
Miho Hino
Makoto Naruse
Misa Watanabe
Asami Imai
Hisao Egawa
Taiten Kusunoki
Takuma Terashima
Shinya Fukumatsu
Kenji Nojima
Tatsuhisa Suzuki
Akira Ishida
Naoya Uchida
Hiro Shimono
Takuya Kirimoto
Junko Kitanishi
Ryoko Shiraishi
Toru Okawa
Tamotsu Nishiwaki
Eiji Miyashita
Mitsuru Ogata
Hoko Kuwashima
Yasuhiko Kawazu
Hiroko Yasumoto
Ken Narita
Eri Kitamura
Hiroaki Miura
Kōki Uchiyama

Kanehira Yamamoto

Satoshi Tsuruoka

Sota Arai
Toru Okawa

Miku Yoshikawa

Eiji Miyashita
Game Modes
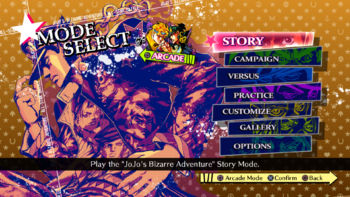
All-Star Battle contains the following game modes:
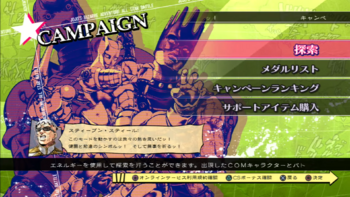
Prior to the game's delisting, this mode allowed the player to search for and battle computer-controlled avatars of other players by using a limited energy supply that refills over time. The player may also encounter boss characters that offer rarer rewards, but take several battles to vanquish. Winning battles in this mode, or having one's avatar win battles, rewards the player with gold and Campaign Score; depending on the opponent fought or the player's Campaign Score, the player may also obtain support items or unlock items in Gallery Mode. The guide character for this mode is Steven Steel. The mode is divided into four sub-modes:
- Search (探索, Tansaku): The player can search for avatars or bosses, using up one bar of energy in the process. Support items that the player has obtained or purchased can be selected at any time before battle. Special support characters may also appear at random before or after searching or battling, providing various challenges and benefits to the player. The player can only store up to ten bars of energy at a time, each of which only refill in intervals of two minutes (or, in the Japanese version, intervals of five minutes).
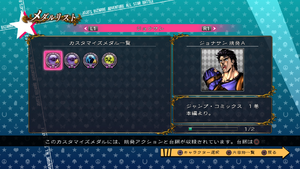
- Medal List (メダルリスト, Medaru Risuto): The player can check the Customize Medals they have earned.
- Campaign Ranking (キャンペーンランキング, Kyanpēn Rankingu): The player can check their Campaign Score ranking relative to their friends, to their region, and to the worldwide community.
- Support Item Shop (サポートアイテム購入, Sapōto Aitemu Kōnyū): The player can purchase certain support items from the PlayStation Store.
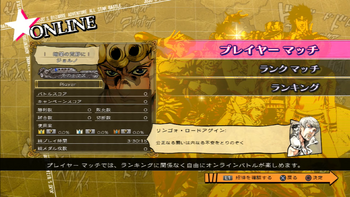
Prior to the game's delisting, this mode would have allowed the player to take on online opponents in ranked and unranked matches. The guide character for this mode is Ringo Roadagain. This mode is divided into three sub-modes:
- Player Match (プレイヤーマッチ, Pureiyā Matchi): The player can battle online without having to worry about their competitive ranking.
- Ranked Match (ランクマッチ, Rank Matchi, lit. "Rank Match"): The player can battle online to improve their competitive ranking.
- Ranking (ランキング, Rankingu): The player can check their competitive ranking relative to their friends, to their region, and to the worldwide community.
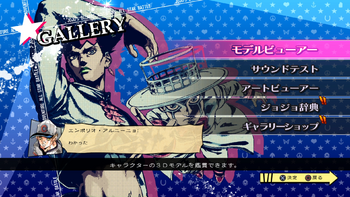
The player can purchase and view voice lines, music tracks, concept art, and unlocked poses and costumes using gold earned in the other modes. The guide character for this mode is Emporio Alnino. This mode contains five sub-modes:
- Gallery Shop (ギャラリーショップ, Gyararī Shoppu): The player can buy artwork, models, sounds, and cosmetic items here. The guide character for this mode is Wang Chan.
- Model Viewer (モデル ビューア, Moderu Byūa): This mode provides a 3D viewer for models purchased in the Gallery Shop, collected in All-Star Battle Mode, received through DLC, or obtained by other means. The guide character for this mode is Telence T. D'Arby.
- Art Viewer (アートビューア, Āto Byūa): This mode allows the player to view the artwork bought or collected throughout the game. The guide characters for this mode are Oingo and Boingo.
- Sound Test (サウンドテスト, Saundo Tesuto): This mode allows the player to use Moody Blues to play any music and voice lines owned. Naturally, the guide character for this mode is Leone Abbacchio.
- JoJo Glossary (ジョジョ辞典, JoJo Jiten): This mode allows the player to view explanations for various terms from throughout the game and JoJo's story. The mode has explanations for various characters, Stands, locations, items, and phenomena from throughout the JoJo series (as well as Baoh the Visitor). The guide character for this mode is Ghiaccio.
Stages
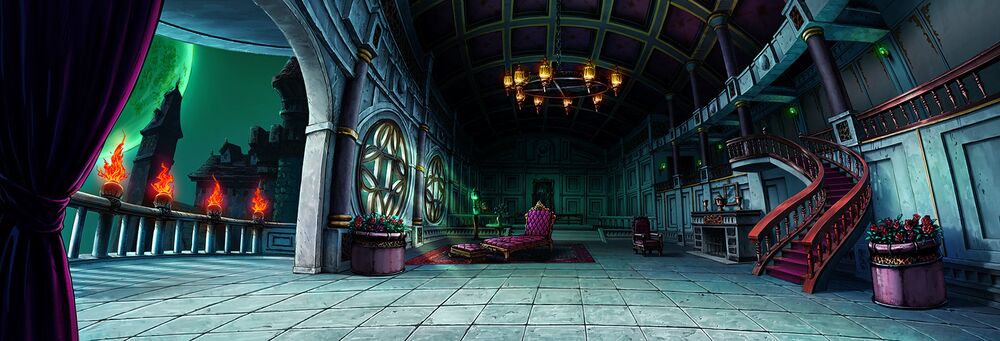
There are 12 stages, with each Part having one or two to represent it. There is also one special stage only accessible as a result of a character's moveset.
Each stage has its own Stage Hazard (ステージギミック, Sutēji Gimikku). Stage Hazards are activated by someone being knocked down over a glowing point on the ground of the stage. Whenever it is activated, a series of colored manga panels will appear. Some hazards occur continuously in set intervals after they have been triggered, while others only occur once during the entire battle and have more severe effects. Stage Hazards can be turned off on the Stage Select screen. Finishing a character with a HHA or GHA knocking them back in a specific direction will trigger a Situation Finish (シチュエーションフィニッシュ, Shichuēshon Finisshu), a special cutscene that depicts the losing character's defeat as a reference to the original story.
- Stage Gimmick: Vampire Horses charge through the players, circling the arena an unlimited number of times.
- Situation Finish: If hit towards the bonfire in the center of the stage, Vampire Horses trample the loser to death.
DIO's Mansion (DIOの館, Dio no Yakata): Cairo

- Stage Gimmick: Nukesaku jumps down and attacks the players, returning an unlimited number of times.
- Situation Finish: If hit towards the wall's opening, the loser is thrown out. Vampires and Pillar Men are disintegrated by the sun's light, while normal characters merely fall to their deaths.
Cairo Streets (カイロ市街, Kairo Shigai): Cairo

- Stage Gimmick: Wilson Phillips's car drives through the players on DIO's orders.
- Situation Finish: If hit towards the water tower, in the same direction as the corner lamppost, the loser is sent flying and crashes into it, recreating Noriaki Kakyoin's death scene.
Morioh Town (杜王町, Moriō-cho)

- Stage Gimmick: Lightning strikes the Pepsi sign and the puddles around the stage, damaging and stunning anyone hit as a result. Akira Otoishi takes no damage, but instead has his Power Gauge set to the first level.
- Situation Finish: If hit towards the stage's ambulance, the loser finds themselves in Ghost Girl's Alley, confronted by Reimi Sugimoto. Ghostly hands then drag them off into the unknown.
Kira Estate (吉良邸, Kira-Tei): Morioh

- Stage Gimmick: Yoshihiro Kira attacks characters with a knife, traveling along a curving path.
- Situation Finish: If hit towards Yoshikage Kira's stack of books, the loser knocks one of the books open, revealing his various nail clipping records and a message declaring that he cannot be stopped during months where his nails grow more than 30 cm.
Naples Station (ネアポリス駅, Neaporisu Eki): Naples

- Stage Gimmick: Pesci's Beach Boy flies out of the train seeking a target, sending fighters flying into the side of the train if caught. This occurs an unlimited number of times.
- Situation Finish: If hit towards the train, Beach Boy hooks the loser by the head or neck from the vehicle. The train departs, and the unfortunate loser is dragged away with it as Pesci and Prosciutto cheer on.
Rome Streets (ローマ市街, Rōma Shigai): Rome

- Stage Gimmick: Secco uses Oasis to dive into the ground and liquefies it, damaging players in the designated areas. This occurs an unlimited number of times.
- Situation Finish: If hit towards the stage's garbage truck, the loser is thrown into its trough, similarly to Cioccolata and Secco in their defeats.
Green Dolphin Street Prison (グリーン・ドルフィン・ストリート刑務所, Gurīn Dorufin Sutorīto Keimusho)

- Stage Gimmick: Weather Report uses his Stand to make poisonous frogs rain from the sky. Players hit by the frogs will be poisoned and gradually lose health over a short period of time. This occurs an unlimited number of times.
- Situation Finish: If hit towards the courtyard's center pillar, the loser has their DISC stolen by Whitesnake. This Situation Finish will not occur if Enrico Pucci is a combatant.
Kennedy Space Center (ケネディ宇宙センター, Kenedi Uchū Sentā): Cape Canaveral

- Stage Gimmick: C-MOON sends various objects falling to where the players are, despite Emporio Alnino's warning to the combatants. This occurs an unlimited number of times.
- Situation Finish: If hit towards the platform's edge facing the spaceship, the loser hits their head on a railing and falls sideways towards the horizon.
- Stage Gimmick: D4C Love Train grants the combatant who touches its column of light a stock of Heart Heat Gauge, only recurring if the light fades before anyone touches it.
- Situation Finish: If hit towards the sign warning travelers about bears, the loser is knocked directly into it.
- Stage Gimmick: Yasuho Hirose's Paisley Park activates. An enraged Joshu Higashikata runs through the stage, swinging a rock to knock back whoever he runs into.
- Situation Finish: If hit towards the Wall Eyes, the loser lands near Yasuho, who screams in surprise. Joshu then smashes their head in with a rock.
Characters
Campaign Mode Surprise Supports
Normal Search:
- The Well-Connected Informant: The Cairo Informant offers to allow the player to select a boss as their next opponent, at the cost of two bars of energy.
- Janken Boy is Coming!: Ken Oyanagi challenges the player to a game of rock-paper-scissors. Paying one extra bar of energy will take away one of Ken's options, and paying two energy bars will leave Ken with only one choice. Winning will allow the player to select a boss as their next opponent.
Boss Search:
- Tamami Kobayashi, the Collector: Tamami Kobayashi activates The Lock, allowing the player to earn an additional Customize Medal in the upcoming fight.
- Scatter Your Mold, Green Day!: Cioccolata activates Green Day, increasing the damage the player can deal to a boss's health. Spending a bar of energy allows him to boost the effect.
- I Wanna Protect You: F.F. offers the player a choice: she can either deal 150 damage to a boss's health (without defeating them) or replenish one bar of the player's energy.
- Dire, the Ripple Warrior: Dire performs his signature Thunder Split Attack, reducing the opponent's health by 40%. The player can pay an additional bar of energy to have him perform Thunder Cross Split Attack instead, reducing the opponent's health by 60%.
- Germanic Pride: Rudol von Stroheim tears into the opponent with his Abdominal Machine Gun, reducing their health by 40%.
- The Road to Ruin!: Devo the Cursed activates Ebony Devil, granting the player higher attack power. By paying up to two bars of energy, the player can increase the strength of the effect.
- The Magic Lamp: Judgement allows the player to pay two bars of energy to activate three random support effects.
- D'Arby the Gambler: Daniel J. D'Arby lets the player choose one of ten cards, with nine revealing an image of D'Arby and one showing Iggy's face. Picking a D'Arby card will allow the player to earn an additional Customize Medal in the upcoming fight.
- Toshikazu Hazamada (Surface): Toshikazu Hazamada activates Surface, duplicating one of the player's obtained support effects.
- May the Dragon's Dream Burn: Dragon's Dream offers to activate a random support effect, at the cost of one bar of energy.
- Wreck On, Wrecking Ball: Wekapipo offers to activate Wrecking Ball and disable the opponent's Heart Heat Gauge, at the cost of one bar of energy.
Victory:
- The Witch's Tarot: Enya the Hag offers the player a choice between five tarot cards, with two displaying Enya's face and one showing Iggy's. The player can pay up to two bars of energy, removing one losing card for each energy bar. If the player selects an Enya card, Enya rewards the player with a random Customize Medal.
- Let's Go Out for Italian: Tonio Trussardi serves the player a meal, restoring one bar of energy.
- A Man in Five Billion: Pocoloco shares his luck with the player, refilling all ten of their energy bars.
Defeat:
- Lessons from George Joestar: George Joestar I grants the player an automatic S rank if they win the next battle.
- A Man's World: Ringo Roadagain offers to let the player retry the previous battle by activating Mandom.
Trophies
Manual
Instruction Manual 
Localization
Some of the names of characters and Stands are altered in non-Japanese territories to avoid copyright lawsuits. Bandai Namco aimed to change the legally-risky names while keeping the patterns Hirohiko Araki aimed for. According to Bandai Namco Europe, these name changes were approved by Araki.[9]
| Muhammad Avdol | Mohammed Avdol
|
| Jean Pierre Polnareff | Jean Pierre Eiffel
|
| Emperor | The Emperor
|
| J. Geil | Centerfold
|
| Vanilla Ice | Cool Ice
|
| Holy Kujo | Holly Kujo
|
| Imposter Captain Tennille | Captain Dragon
|
| Devo the Cursed | Soul Sacrifice
|
| Enya the Hag | Enyaba
|
| ZZ | Zii Zii
|
| Oingo & Boingo | Zenyatta & Mondatta
|
| Daniel J. D'Arby & Telence T. D'Arby | D'Arby Elder & D'Arby Younger
|
| Crazy Diamond | Shining Diamond
|
| Echoes | Reverb
|
| Red Hot Chili Pepper | Chili Pepper
|
| Killer Queen | Deadly Queen
|
| Sheer Heart Attack | Heart Attack
|
| Bites the Dust | Bite the Dust
|
| Pearl Jam | Opal Jam
|
| Atom Heart Father | Heart Father
|
| Boy II Man | BoyManMan
|
| Earth, Wind and Fire | Terra Ventus
|
| Highway Star | Highway Go Go
|
| Enigma | Misterioso
|
| Gold Experience | Golden Wind
|
| Sticky Fingers | Zipper Man
|
| Sex Pistols | Six Bullets
|
| Aerosmith | Li'l Bomber
|
| King Crimson | Emperor Crimson
|
| Epitaph | Eulogy
|
| Purple Haze | Purple Smoke
|
| Purple Haze Distortion | Purple Smoke Distortion
|
| Moody Blues | Moody Jazz
|
| Kraft Work | Arts & Crafts
|
| Little Feet | Tiny Feet
|
| Grateful Dead | Thankful Death
|
| Beach Boy | Fisher Man
|
| Baby Face | Babyhead
|
| White Album | White Ice
|
| Spice Girl | Spicy Lady
|
| Green Day | Green Tea
|
| Oasis | Sanctuary
|
| Stone Free | Stone Ocean
|
| Kiss | Smack
|
| Enrico Pucci | Father Pucchi
|
| Whitesnake | Pale Snake
|
| C-MOON | Full Moon
|
| Made in Heaven | Maiden Heaven
|
| Narciso Anasui | Narc Anastasia
|
| Diver Down | Diver Drive
|
| Burning Down the House | Burning Down
|
| Foo Fighters | F.F.
|
| Weather Report | Weather Forecast
|
| Highway to Hell | Highway to Death
|
Trivia
- CyberConnect2 president and CEO Hiroshi Matsuyama explained that All-Star Battle was conceived “partly thanks to” the 2006 video game JoJo's Bizarre Adventure: Phantom Blood. Following that game's release, the idea of a new game involving all the Parts came to the team.[10]
- Prior to the game's launch, an official computer-player tournament dubbed the All-Star Battle League was hosted by CyberConnect2. The tournament was announced on June 9, 2013 during the game's fifth trailer, and ran from July 3 to August 28 of the same year. Ultimately, DIO defeated Jotaro Kujo to win the tournament, and a special PlayStation 3 theme was released to commemorate the tournament's conclusion.[11]
- In the English localization, Joseph Joestar's victory quote against Lisa Lisa is translated as, "Why did it have to come to this?! You are tearing me APART, Lisa Lisa!"[12] The translated line is a reference to The Room, in which a major character yells a similar line at another character named Lisa.[13]
References
- ↑ JoJo's Bizarre Adventure: All-Star Battle EU Release Date
- ↑ Service Ends for JoJo’s Bizarre Adventure: All-Star Battle (PS3)
- ↑ ""荒木飛呂彦原画展 ジョジョ展"発表会リポート&荒木氏のコメント全文掲載! 言葉ひとつひとつに"ふるえるぞハート!"", Famitsu, July 5, 2012.
- ↑ "「ジョジョの奇妙な冒険 オールスターバトル」の制作に関するお知らせ", CyberConnect2, September 19, 2013.
- ↑ "【特別対談】NBGI×CC2――強力タッグの実情とは!? 『ナルティメットストーム3』の制作秘話、そして『ジョジョ』は!?【前編】", Famitsu, February 26, 2013.
- ↑ Famitsu with detailed info on the game
- ↑ ジョジョの奇妙な冒険 オールスターバトル 攻略ランド
- ↑ コミックナタリー - 「ジョジョ」7部の一番くじ、A賞にはトロフィー型貯金箱が
- ↑ "JoJo's Bizarre Adventure: All-Star Battle - PS3 - Jean Pierre Eiffel (Gameplay Combo Trailer)", Bandai Namco Europe, April 16, 2014. Comment image.
- ↑ An interview with CyberConnect2 president and CEO Hiroshi Matsuyama
- ↑ ジョジョの奇妙な冒険 オールスターバトル | バンダイナムコゲームス公式サイト
- ↑ JoJo's Bizarre Adventure: All-Star Battle Special Dialogue Parts 1 to 3 - HD (quote appears at 7:07)
- ↑ You're Tearing Me Apart, Lisa! - The Room (2003)

