


Generic Rooms
| Line 53: | Line 53: | ||
{{Tb|font=100%|w1=20%|w2=10%|w3=50%|w4=20%|'''Boxes'''<br />(ボックス, ''Bokkusu'')|[[File:PPPRangeBox.png|80px]]|Matching six or more of the same character panels when not in Stand-Up Time will make a Box panel. Some characters can also produce one or more with their skills. Tapping one will create five character panels in a cross pattern.|{{PPPAv|Avdol2}}{{PPPAv|Koichi2}}{{PPPAv|BugEaten}}{{PPPAv|Mikitaka}}{{PPPAv|Kira}}{{PPPAv|Bucciarati2}}{{PPPAv|Mista3}}{{PPPAv|Melone}}}} |
{{Tb|font=100%|w1=20%|w2=10%|w3=50%|w4=20%|'''Boxes'''<br />(ボックス, ''Bokkusu'')|[[File:PPPRangeBox.png|80px]]|Matching six or more of the same character panels when not in Stand-Up Time will make a Box panel. Some characters can also produce one or more with their skills. Tapping one will create five character panels in a cross pattern.|{{PPPAv|Avdol2}}{{PPPAv|Koichi2}}{{PPPAv|BugEaten}}{{PPPAv|Mikitaka}}{{PPPAv|Kira}}{{PPPAv|Bucciarati2}}{{PPPAv|Mista3}}{{PPPAv|Melone}}}} |
||
{{Tb|font=100%|w1=20%|w2=10%|w3=50%|w4=20%|'''Block Panels'''<br />(おジャマパネル, ''Ojama Paneru'')|[[File:PPPBlockPanel.png|80px]]|Block panels are generally created by the enemy, although some characters can produce them as part of their skill as well. They do not fall like other tiles, blocking potential matches and wasting space. These panels can be destroyed by opening boxes adjacent to them or using certain character skills to replace or erase them.|{{PPPAv|Boingo}}{{PPPAv|Giorno4}}{{PPPAv|Polpo}}{{PPPAv|Cioccolata}}{{PPPAv|Diavolo}}}} |
{{Tb|font=100%|w1=20%|w2=10%|w3=50%|w4=20%|'''Block Panels'''<br />(おジャマパネル, ''Ojama Paneru'')|[[File:PPPBlockPanel.png|80px]]|Block panels are generally created by the enemy, although some characters can produce them as part of their skill as well. They do not fall like other tiles, blocking potential matches and wasting space. These panels can be destroyed by opening boxes adjacent to them or using certain character skills to replace or erase them.|{{PPPAv|Boingo}}{{PPPAv|Giorno4}}{{PPPAv|Polpo}}{{PPPAv|Cioccolata}}{{PPPAv|Diavolo}}}} |
||
{{Tb|font=100%|w1=20%|w2=10%|w3=50%|w4=20%|'''Enhanced Panels'''<br />(強化パネル, ''Kyoka Paneru'')|[[File:PPPEnhancedPanel.png|80px]]|Enhanced panels are created by characters with Enhancing skills and also some bosses. They deal extra damage and increase the skill gauge charge more when matched or erased.|{{PPPAv|Straizo}}{{PPPAv|Joseph2-3}}{{PPPAv|Caesar2}}{{PPPAv|LisaLisa}}{{PPPAv|Enya}}{{PPPAv|Mariah}}{{PPPAv|Telence}}{{PPPAv|Jotaro3-2}}{{PPPAv|Joseph3}}{{PPPAv|DIO2}}{{PPPAv|Oingo}}{{PPPAv|Josuke2}}{{PPPAv|Koichi}}{{PPPAv|Koichi3}}{{PPPAv|Otoishi}}{{PPPAv|Rohan}}{{PPPAv|Shigechi}}{{PPPAv|Kira2}}{{PPPAv|Mikitaka}}{{PPPAv|Giorno3}}{{PPPAv|Abbacchio2}}{{PPPAv|Pesci}}{{PPPAv|Risotto}}{{PPPAv|Jonathan3}}}} |
{{Tb|font=100%|w1=20%|w2=10%|w3=50%|w4=20%|'''Enhanced Panels'''<br />(強化パネル, ''Kyoka Paneru'')|[[File:PPPEnhancedPanel.png|80px]]|Enhanced panels are created by characters with Enhancing skills and also some bosses. They deal extra damage and increase the skill gauge charge more when matched or erased.|{{PPPAv|Straizo}}{{PPPAv|Joseph2-3}}{{PPPAv|Caesar2}}{{PPPAv|LisaLisa}}{{PPPAv|Enya}}{{PPPAv|Mariah}}{{PPPAv|Telence}}{{PPPAv|Jotaro3-2}}{{PPPAv|Joseph3}}{{PPPAv|DIO2}}{{PPPAv|Oingo}}{{PPPAv|Josuke2}}{{PPPAv|Koichi}}{{PPPAv|Koichi3}}{{PPPAv|Otoishi}}{{PPPAv|Rohan}}{{PPPAv|Shigechi}}{{PPPAv|Kira2}}{{PPPAv|Mikitaka}}{{PPPAv|Giorno3}}{{PPPAv|Abbacchio2}}{{PPPAv|Pesci}}{{PPPAv|Risotto}}{{PPPAv|Jonathan3}}{{PPPAv|Giorno5}}{{PPPAv|BucciaratiAbbacchio}}{{PPPAv|Joseph2-4}}}} |
||
{{Tb|font=100%|w1=20%|w2=10%|w3=50%|w4=20%|'''Enhanced Boxes'''<br />(強化ボックス, ''Kyoka Bokkusu'')|[[File:PPPEnhancedBoxPanel.png|80px]]|When tapping one of these enhanced box panels, five enhanced character panels will be created in a cross pattern.|{{PPPAv|Rohan2}}{{PPPAv|Yukako2}}}} |
{{Tb|font=100%|w1=20%|w2=10%|w3=50%|w4=20%|'''Enhanced Boxes'''<br />(強化ボックス, ''Kyoka Bokkusu'')|[[File:PPPEnhancedBoxPanel.png|80px]]|When tapping one of these enhanced box panels, five enhanced character panels will be created in a cross pattern.|{{PPPAv|Rohan2}}{{PPPAv|Yukako2}}}} |
||
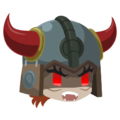
{{Tb|font=100%|w1=20%|w2=10%|w3=50%|w4=20%|'''Enhanced Block Panels'''<br />(強化おジャマパネル, ''Kyoka Ojama Paneru'')|[[File:PPPEnhancedBlockPanel.png|80px]]|Some characters like [[Pannacotta Fugo|Fugo]] and [[Secco]] can create enhanced block panels which deal extra damage and increase the skill gauge charge only when they are erased by a skill. Enemy boss [[Pannacotta Fugo|Fugo]] (Voiced) also can create them.|{{PPPAv|Fugo}}{{PPPAv|Secco}}{{PPPAv|Giorno4}}}} |
{{Tb|font=100%|w1=20%|w2=10%|w3=50%|w4=20%|'''Enhanced Block Panels'''<br />(強化おジャマパネル, ''Kyoka Ojama Paneru'')|[[File:PPPEnhancedBlockPanel.png|80px]]|Some characters like [[Pannacotta Fugo|Fugo]] and [[Secco]] can create enhanced block panels which deal extra damage and increase the skill gauge charge only when they are erased by a skill. Enemy boss [[Pannacotta Fugo|Fugo]] (Voiced) also can create them.|{{PPPAv|Fugo}}{{PPPAv|Secco}}{{PPPAv|Giorno4}}}} |
||
| Line 63: | Line 63: | ||
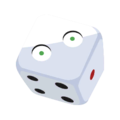
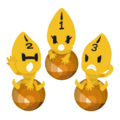
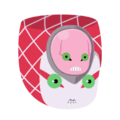
{{Tb|font=100%|w1=20%|w2=10%|w3=50%|w4=20%|'''YESNO Panels'''<br />(YESNOパネル, ''Iesunō Paneru'')|[[File:PPPYESNOPanel.png|80px]]|YESNO panels are only created by [[Telence T. D'Arby]]. After tapping a YESNO Panel, they'll randomly become an Enhanced D'Arby panel or an Enhanced Partner panel. They can also be moved around the board, If various YESNO panels are connected, one tap will pop all the panels at once.|{{PPPAv|Telence}}}} |
{{Tb|font=100%|w1=20%|w2=10%|w3=50%|w4=20%|'''YESNO Panels'''<br />(YESNOパネル, ''Iesunō Paneru'')|[[File:PPPYESNOPanel.png|80px]]|YESNO panels are only created by [[Telence T. D'Arby]]. After tapping a YESNO Panel, they'll randomly become an Enhanced D'Arby panel or an Enhanced Partner panel. They can also be moved around the board, If various YESNO panels are connected, one tap will pop all the panels at once.|{{PPPAv|Telence}}}} |
||
{{Tb|font=100%|w1=20%|w2=10%|w3=50%|w4=20%|'''Shot Panels'''<br />(ショットパネル, ''Shotto Paneru'')|[[File:PPPShotPanel.png|80px]]|Shot panels are created by [[Sale]]'s skill. Shot Panels will erase the panels above them when tapped 10 times.|{{PPPAv|Sale}}}} |
{{Tb|font=100%|w1=20%|w2=10%|w3=50%|w4=20%|'''Shot Panels'''<br />(ショットパネル, ''Shotto Paneru'')|[[File:PPPShotPanel.png|80px]]|Shot panels are created by [[Sale]]'s skill. Shot Panels will erase the panels above them when tapped 10 times.|{{PPPAv|Sale}}}} |
||
{{Tb|font=100%|w1=20%|w2=10%|w3=50%|w4=20%|'''Intensified Panels'''<br />(激化パネル, ''Gekika Paneru'')|[[File:PPPIntensifiedPanel.png|80px]]|Intensified panels are a variant of Enhanced panels. They deal higher damage compared to Enhanced panels, but the skill gauge increase is the same as a regular panel. If the panel is replaced, the effect will disappear. The more panels that match at one time, the higher the multiplier of their damage becomes.|{{PPPAv|Straizo2}}{{PPPAv|Risotto2}}{{PPPAv|Formaggio2}}}} |
{{Tb|font=100%|w1=20%|w2=10%|w3=50%|w4=20%|'''Intensified Panels'''<br />(激化パネル, ''Gekika Paneru'')|[[File:PPPIntensifiedPanel.png|80px]]|Intensified panels are a variant of Enhanced panels. They deal higher damage compared to Enhanced panels, but the skill gauge increase is the same as a regular panel. If the panel is replaced, the effect will disappear. The more panels that match at one time, the higher the multiplier of their damage becomes.|{{PPPAv|Straizo2}}{{PPPAv|Risotto2}}{{PPPAv|Formaggio2}}{{PPPAv|Caesar3}}}} |
||
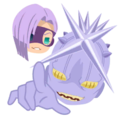
{{Tb|font=100%|w1=20%|w2=10%|w3=50%|w4=20%|'''Frog Panels'''<br />(カエルパネル, ''Kaeru Paneru'')|[[File:PPPFrogPanel.png|80px]]|Created from Giorno (Real Frog) ver.'s EX Sticker. Similar to the Zipper panels, Frog panels will turn into Box panels after certain time has passed. However, Frog panels can be dragged and erased.|(With EX Sticker)<br />{{PPPAv|Giorno2}}}} |
{{Tb|font=100%|w1=20%|w2=10%|w3=50%|w4=20%|'''Frog Panels'''<br />(カエルパネル, ''Kaeru Paneru'')|[[File:PPPFrogPanel.png|80px]]|Created from Giorno (Real Frog) ver.'s EX Sticker. Similar to the Zipper panels, Frog panels will turn into Box panels after certain time has passed. However, Frog panels can be dragged and erased.|(With EX Sticker)<br />{{PPPAv|Giorno2}}}} |
||
}} |
}} |
||
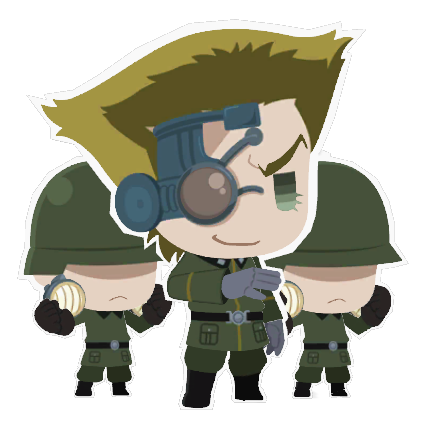
Pitter-Patter Pop was revealed in the August 2018 issue of Ultra Jump, and features "super-deformed" (SD) artwork of characters from the JoJo's Bizarre Adventure series.
Before the game released, Bandai Namco previewed the characters in a teaser app called "JoJo's Pitter-Patter Pop! Chiramise" (ジョジョのピタパタポップ ちらみせ) on August 27, 2018. It was a sneak peek that allowed users to take photos with the SD characters appearing in different poses, though the full game is much different.[2]
JoJo's Pitter-Patter Pop! is a tile-matching video game featuring characters from the first five parts of the series: Phantom Blood, Battle Tendency, Stardust Crusaders, Diamond is Unbreakable and Vento Aureo.
The top of the screen shows two characters the player controls (such as Giorno and Bucciarati) who face off against a boss character (e.g. Luca) with a health bar. The rest of the screen displays a 6x6 grid consisting of icons of many different characters. Players will have to match the tiles to make them fold and then disappear, which increases their score and decreases the health of the boss. Matching over 6 tiles at once will create a box of that tile, which can be moved just like other tiles and clicked on to open, creating 5 tiles in a cross shape. By matching fast the player earns combo, which increases the damage every 10 combo gained, maxing out at 200 combo. The player is unable to lose combo if in stopped time or stand up time. The battle ends when the boss is defeated or time runs out.
Matching and erasing tiles over time will build up the "Stand-up Time" meter and skill meter. The Stand-up Time meter is a blue meter around the grid. Once full, the player temporarily enters Stand-up Time, during which the timer is stopped and matched tiles remain on the board and flip over, allowing the player to build up their combo. Making squares of tiles (up to a 6x6) multiplies the damage. Once Stand-up Time is over, all matched tiles will disappear doing an equivalent amount of damage to the boss, normal gameplay resumes and the meter resets.
If time runs out or the boss is defeated and a character has full meter, all tiles of that character will get erased, adding points and damaging the boss if they have any health left. Any boxes left untapped will open, also adding points and dealing damage if a match is created. If the boss is defeated within a given amount of time, "Rush Time" activates, and the player can repeatedly strike the boss by quickly matching icons to rack up their score and earn additional coins. Once entering Rush Time special tiles and obstacles will disappear (with a few exceptions). Certain characters passive effects stay active in Rush Time.
Battle items are power-ups which the player can buy or use before a battle starts. The player can buy them with either diamonds or coins, changing the currency type with the small button on the right. The player can obtain battle items from chest drops or limited time challenges.

|
Increases damage by 10%.
Costs 500 coins or 2 diamonds |

|
Coins earned multiplied by 2.5.
Costs 500 coins or 2 diamonds |

|
Adds 5 seconds to the clock.
Costs 1000 coins or 4 diamonds |

|
Grants the leader a charged skill from the start of the match.
Costs 2000 coins or 8 diamonds |
Below each character is a skill meter in the form of three stars. Once a character's skill meter is full, their skill can be activated by tapping the character. All characters possess unique skills with different effects falling into one of four categories. "Replace" (変化, Henka) skills replace tiles with others, usually of those of the character activating it. "Enhance" (強化, Kyōka) skills charge tiles so that getting rid of them will do more damage, recharge skills faster, and earn more points. "Erase" (消去, Shōkyo) skills remove tiles without needing to match them. "?" skills are skills that do not fall into any of the previous categories, such as rearranging tiles, stopping the timer, or a combination of multiple categories.
Later, "Boost" (ブースト, Būsuto) skills were introduced which a unit may have in addition to one of the previous skills. These units have different boost levels that increase each time the skill is used per battle.
Skills can be activated in battle and during Stand-up Time, but not in Rush Time or during stopped time (such as when DIO or Part 4 Jotaro use their skills). Each unit has five skill levels (excluding the limited Giorno Real Frog ver. which only has three) which determine the range of the skill, their effect, and their cooldown. Cooldown means how many tiles are matched after the skill is used, which varies per character.
Cooldown is defined by how many tiles the player needs to clear, by matching or erasing to activate the skill. It can be influenced by using enhanced tiles or matching tiles of the character used in the team. By raising the skill level of the character the cooldown of their skill can be lowered.
On special stages such as Rock-Paper-Scissors Special Battle leaders skill gauge get replaced by a pink mini-game skill gauge and locks your partner away from using skills. The skill animation plays as normal but the effect depends on the mini-game (for example giving you a free win in Rock-Paper-Scissors).
There are many different panel types that different characters and bosses can create.
| Panel | Image | Description | Units
|
|---|
| Boxes (ボックス, Bokkusu) |

|
Matching six or more of the same character panels when not in Stand-Up Time will make a Box panel. Some characters can also produce one or more with their skills. Tapping one will create five character panels in a cross pattern. |
|
| Block Panels (おジャマパネル, Ojama Paneru) |

|
Block panels are generally created by the enemy, although some characters can produce them as part of their skill as well. They do not fall like other tiles, blocking potential matches and wasting space. These panels can be destroyed by opening boxes adjacent to them or using certain character skills to replace or erase them. |
|
| Enhanced Panels (強化パネル, Kyoka Paneru) |

|
Enhanced panels are created by characters with Enhancing skills and also some bosses. They deal extra damage and increase the skill gauge charge more when matched or erased. |
|
| Enhanced Boxes (強化ボックス, Kyoka Bokkusu) |

|
When tapping one of these enhanced box panels, five enhanced character panels will be created in a cross pattern. |
|
| Enhanced Block Panels (強化おジャマパネル, Kyoka Ojama Paneru) |

|
Some characters like Fugo and Secco can create enhanced block panels which deal extra damage and increase the skill gauge charge only when they are erased by a skill. Enemy boss Fugo (Voiced) also can create them. |
|
| Lock Panels (ロックパネル, Rokku Paneru) |

|
Mista's EX sticker and some enemies can create locked panels which places an X on top of a character panel. These function the same as character panels, but they cannot be moved. They can be matched as usual or removed by a replacing or erasing skill. | (With EX Sticker)
|
| Bubble Panels (シャボンパネル, Shabon Paneru) |

|
Bubble panels are created by Caesar, Fugo (Voiced) and some enemies. The character panel is placed inside a bubble which can be moved around the board. If they're tapped, the bubble will pop and the character panel can be matched. If various Bubble panels are connected, one tap will pop all the bubbles at once. |
|
| Cutter Panels (カッターパネル, Kattā Paneru) |

|
Cutter panels are only created by Will Anthonio Zeppeli. They can't be manually moved, but they'll fall down if the panels below them are matched or erased. When tapped, they erase all panels in a horizontal line. |
|
| Zipper Panels (ジッパーパネル, Jippā Paneru) |

|
Zipper panels are only created by Bruno Bucciarati. Zipper panels remain as zippers for five seconds until they become a Box panel of the character panel that was on the position where the Zipper panel was created. Zipper Panels created by the copy ability of Abbacchio work as well as normal ones. |
|
| Book Panels (ブックパネル, Bukku Paneru) |

|
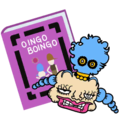
Book panels are only created by Boingo. Tapping a Book panel erases five panels in a cross shape. They can also be moved around but will turn into Block panels after some seconds. |
|
| YESNO Panels (YESNOパネル, Iesunō Paneru) |

|
YESNO panels are only created by Telence T. D'Arby. After tapping a YESNO Panel, they'll randomly become an Enhanced D'Arby panel or an Enhanced Partner panel. They can also be moved around the board, If various YESNO panels are connected, one tap will pop all the panels at once. |
|
| Shot Panels (ショットパネル, Shotto Paneru) |

|
Shot panels are created by Sale's skill. Shot Panels will erase the panels above them when tapped 10 times. |
|
| Intensified Panels (激化パネル, Gekika Paneru) |

|
Intensified panels are a variant of Enhanced panels. They deal higher damage compared to Enhanced panels, but the skill gauge increase is the same as a regular panel. If the panel is replaced, the effect will disappear. The more panels that match at one time, the higher the multiplier of their damage becomes. |
|
| Frog Panels (カエルパネル, Kaeru Paneru) |

|
Created from Giorno (Real Frog) ver.'s EX Sticker. Similar to the Zipper panels, Frog panels will turn into Box panels after certain time has passed. However, Frog panels can be dragged and erased. | (With EX Sticker)
|
| Panel | Image | Description | Units(Examples)
|
|---|
| Hole Panels (穴パネル, Ana Paneru) |

|
Hole panels function similarly to block panels but cannot be destroyed. They are only created by enemies, either automatically or as a reaction to certain actions, depending on the battle. There is no ordinary way to get rid of a hole panel, although Abbacchio and Illuso are able to replace one if the panel is within their skill's range. | Only enemies
|
| Jail Panels (ジェイルパネル, Jeiru Paneru) |

|
Jail panels can only be placed by enemies, locking the board in place and not allowing new panels to move below them. They can either be removed by using a replacing skill once or an erasing skill twice. Using an eraser skill once will make it a damaged Jail panel. | (As enemy Boss)
|
| Ink Panels (インクパネル, Inku Paneru) |

|
Ink panels cover the panels in black ink and are meant to serve as a distraction. This makes it more difficult to differentiate them from other characters, although the color of the panel remains visible. They can be removed by normally matching them, using a Box panel next to them, or by using an erasing or replacing skill. In some battles, Ink panels may turn into Hole panels if not removed in time. | (As enemy Boss)
|
| Dirty Panels (ダーティーパネル, Dātī Paneru) |

|
Dirty panels have a green fog placed on them and are only created by enemies such as Cioccolata. If a panel is moved below them and they fall down, they will become Block panels wherever they land. They can be removed by matching them before they move, using a Box panel next to them, or by using an erasing or replacing skill. | (As enemy Boss)
|
| Slash Panels (スラッシュパネル, Surasshu Paneru) |

|
Certain enemies such as Kars will place these on the board. When four or more Slash panels are connected, they'll turn into a Hole panel. A skill or Box panel can be used to get rid of them, although they can also be moved around to prevent them from matching. | (As enemy Boss)
|
| Block Shot Panels (おジャマショットパネル, Ojamashotto Paneru) |

|
Block Shot panels are only created by enemy Sale. Block Shot Panels will turn into Hole panels after a few seconds. You must tap them 10 times to erase them and prevent them from turning into Hole panels. | (As enemy Boss)
|
A new mode named "All-out War" was added to the game on patch 2.5.14. The player is able to fight up to 39 times without consuming hearts for rewards like chests, skill tickets, level tickets, gacha tickets and sticker ink. The player is not able to use the same characters twice and upon failure there is no penalty. Progress can be reset with a button and the number of clears and used characters will be reset. However, it does not reset the rewards. The event card rotates every month with a different enemy.
A new permanent stage was added to the game on patch 2.5.18. The player is allowed to test out unit combinations without spending hearts. The stage works like a Score Attack stage without any obstacles or effects and uses the 60 seconds Score Attack length format. The player cannot use the damage and coin boosts.
The stage repeats itself five times and after the last attempts time depletes, the board freezes and the player is unable to match or use skills. Upon going into the pause menu, the player can see their data in all five attempts separately, such as damage, stand-ups entered and highest combo. The stage cannot be completed and forces the player to quit the stage manually.
Characters differ in rarity: ![]() ,
, ![]() ,
, ![]() , and
, and ![]() . There are currently 130 playable units in the game. The units displayed with a
. There are currently 130 playable units in the game. The units displayed with a ![]() in the tables below are limited whereas
in the tables below are limited whereas ![]() means they are voiced.
means they are voiced.
Characters with the same name but are different units cannot be used in the same team or put in the same room together. However if they are from different parts they can be used together.


The following have data within the game's files.
Only In Promotional Images/GIFS
Part 2
Part 4
Four types of in game currency exist: Coins, Diamonds, Furniture Points, and Furniture Tickets. These currencies can earned by completing missions for levels and daily quests. Coins and furniture points can also be earned by playing through levels themselves. Diamonds can be used to obtain characters from ongoing gacha banners.
Characters are categorized into four types of rarity, ![]() ,
, ![]() ,
, ![]() and
and ![]() , with
, with ![]() being the rarest and
being the rarest and ![]() being the least. Obtaining duplicate characters will help progress that character's skill level and give the player their awakening jewels (if awakenable). Leveling up a character's skill will upgrade that characters skill, with a maximum level of 5. Characters themselves have a maximum level of 80 if awakened to the maximum awakening level and can be leveled up by gaining exp by playing through levels. Every 5 levels and 10 levels after level 50, coins will be required to unlock that character's level limit so they can continue to earn exp.
being the least. Obtaining duplicate characters will help progress that character's skill level and give the player their awakening jewels (if awakenable). Leveling up a character's skill will upgrade that characters skill, with a maximum level of 5. Characters themselves have a maximum level of 80 if awakened to the maximum awakening level and can be leveled up by gaining exp by playing through levels. Every 5 levels and 10 levels after level 50, coins will be required to unlock that character's level limit so they can continue to earn exp.
Skill Tickets and Level Tickets can also be obtained to earn points towards their skill or level. The player's level determines the amount of rooms available within the mansion and villa. It also raises players damage by 1% every 5 levels, maxing out at 20% additional damage on level 100. The player can earn points to level up by purchasing and obtaining furniture from events or clicking on apartment events. Furniture can be purchased with furniture points and furniture tickets.
Players have their own JoJo mansion with several rooms that they can decorate with collectable items and props. The characters residing in each room can also be chosen, and they will interact with each other. The player is able to set a roommate if the owner of the room has reached Skill Level 5.
The mansion resets 3 times a day granting the player additional experience points and coins. Following the reset 3 room interactions refresh for the player to collect.
Room interactions grant point and experience whilst a visit to an another player grants a heart or one diamond depending if the players follow each other.
On patch 2.7, the player is given access to a three floored eighteen room villa in which they can display their characters. Each floor has its own Premium Room displaying the six characters placed on each floor of the villa. Premium Rooms have their own unique furniture which can be bought with Furniture Points and Furniture Tickets. At Mansion Level 80, the second villa floor unlocks, and at Level 90, the final floor unlocks.
On patch 2.5.3, "Adventure" and "Friendship" were added to the game. Players can send gifts to characters in their rooms to raise their Friend Level. When the friendship gauge fills up, the player will obtain the character's badge. Each character has at least two badges, with certain characters having three badges and unlockable voiced responses when they receive a gift. These obtainable badges can be used as the player's icon. Up to three gifts can be given to a character per day. The gifts present themselves as bags of 3 sizes or unique items.
Gifts are obtained in Adventure mode. Adventure is a function in which two to five characters can be sent to a certain adventure for a determined amount of time where they'll collect items. After sending them out, the player will be able to automatically receive the items after the indicated hours have passed. The length of the adventure varies depending on the chosen course, but longer adventures will allow players to earn more items at once. The characters are able to find coins, level tickets, gifts and even diamonds or chests on special event adventures.
On patch 2.7.2, Stickers and Pitter Sets were added to the game.


Awakening is a new feature added in patch 3.0.0 where the player can collect Jewels to release the level limit of units. There are three Awakening levels. If the Awakening level is maximized, players will unlock that character's EX sticker for GR and WGR units. The EX Sticker requires the same unit to be in the team to be used.
Only certain characters branded as Awakenable are able to be Awakened. It is possible to know which characters are Awakenable by looking at their character profile.
Per each Awakening Level, the character's maximum level limit increases by ten and maximum sticker cost increases by +2, +3, +5 (+, ++, +++ respectively) on ![]() and
and ![]() and on
and on ![]() /
/![]() the sticker cost raises by +5 per awakening level. At the final awakening level, the character can level up to 80 instead of 50.
the sticker cost raises by +5 per awakening level. At the final awakening level, the character can level up to 80 instead of 50.
Awakening each character requires Jewels, and each rarity requires a different amount of Jewels.
Jewels can be earned by obtaining a unit that the player already owns. However, characters that can't awaken will not give any Jewels. The amount of Jewels received depends on the gacha banner. Diamond gachas give five Jewels, and coin gacha give one Jewel.

Gameplay screenshots
April Fools Day Event


Jotaro and Star Platinum

Young Joseph Joestar

Iggy sleeping

Josuke and Crazy Diamond

Giorno on a tree

Abbacchio and Moody Blues

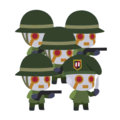
The Stardust Crusaders

Rohan and Heaven's Door

Fugo and Purple Haze
Giorno Giovanna sprites
| JoJo video games | |
|---|---|
| JoJo mobile games | |
| Jump video games | |
| Card games | |
| Collaborations | |
| References and Homages | |


