Phantom Blood (PS2 Game): Difference between revisions
m Reverted edits by You-know-who-62 (talk) to last version by Morganstedmanms |
Paisley Park (talk | contribs) m Text replacement - "Bandai Namco Entertainment" to "Bandai Namco Entertainment" |
||
| (180 intermediate revisions by 21 users not shown) | |||
| Line 1: | Line 1: | ||
{{TabWrapper|{{PTabs|base=Phantom Blood|Manga}}{{PTabs|base=JoJo's Bizarre Adventure (Season)|Anime}}{{PTabs|base=Phantom Blood (PS2 Game)|Video Game|width=7em|s=PB}}{{PTabs|base=Phantom Blood (Film)|Film}}{{PTabs|base=Phantom Blood (Musical)|Musical}}}} |
|||
{{Video Game |
|||
{{Video Game Infobox |
|||
|title = JoJo's Bizarre Adventure: <br>Phantom Blood |
|||
|title = ''JoJo's Bizarre Adventure:<br />Phantom Blood'' |
|||
|colors = PhantomBlood |
|||
|image |
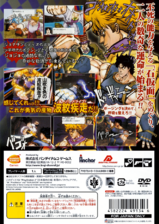
|image = {{Tabber|Front|[[File:Phantom_Blood_Game.png|{{ImageSize}}]]|Back|[[File:Phantom_Blood_game_back.png|{{ImageSize}}]]}} |
||
|develop |
|develop = {{W|Anchor Inc.}} |
||
|publisher |
|publisher = [[Bandai Namco Entertainment]] |
||
|producer = <u>'''Executive Producer'''</u><br />Shin Unozawa<br />{{S|[http://bandainamcoent.co.jp/ Bandai Namco]}}<br /><u>'''Producer'''</u><br />Yusuke Sasaki<br />{{S|[http://bandainamcoent.co.jp/ Bandai Namco]}} |
|||
|music = [[Wikipedia:Takayuki Nakamura|Takayuki Nakamura]] |
|||
| |
|music = {{W|Takayuki Nakamura}} |
||
| |
|platform = {{W|PlayStation 2}} |
||
|release = {{vgrelease|JP=October 26, 2006}} |
|||
|genre = Action, Beat'em Up |
|||
|genre = {{W|Action game|Action}}, {{W|Beat 'em up}} |
|||
|modes = Story Mode |
|||
| |
|modes = Single-Player |
||
|rating = {{rating|JP=B}} |
|||
|media = Disc |
|||
|media = DVD-ROM |
|||
|website = [http://www.bandaigames.channel.or.jp/list/ps2_jojo/ Official Website] |
|||
|website = [https://web.archive.org/web/20190224010213/http://www.bandaigames.channel.or.jp/list/ps2_jojo/about/index.html Official Website] |
|||
}}{{nihongo|'''''JoJo's Bizarre Adventure: Phantom Blood'''''|ジョジョの奇妙な冒険 ファントムブラッド|JoJo no Kimyō na Bōken Fantomu Buraddo}} is an action-adventure video game adaptation of ''[[Phantom Blood]]'' released for the PlayStation 2 by developer {{W|Anchor Inc.}} and publisher {{W|Bandai Namco Entertainment#Bandai Namco Studios|Bandai Namco Games}} on October 26, 2006. |
|||
|previous = ''[[GioGio's Bizarre Adventure]]'' |
|||
|next = {{ASB}} |
|||
|colors = PhantomBlood |
|||
}} |
|||
{{Nihongo|'''''JoJo's Bizarre Adventure: Phantom Blood'''''|ジョジョの奇妙な冒険 ファントムブラッド|JoJo no Kimyō na Bōken Fantomu Buraddo}} is an action-adventure video game adaptation of ''[[Phantom Blood]]'' released for the PlayStation 2 by developer {{W|Anchor Inc.}} and publisher [[Bandai Namco Entertainment]] on October 26, 2006. |
|||
This is the second game for the PS2 that is based on ''[[JoJo's Bizarre Adventure]]''. It was released to coincide with the 20th anniversary of the series. |
This is the second game for the PS2 that is based on ''[[JoJo's Bizarre Adventure]]''. It was released to coincide with the 20th anniversary of the series. |
||
==Gameplay== |
==Gameplay== |
||
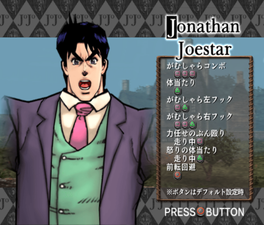
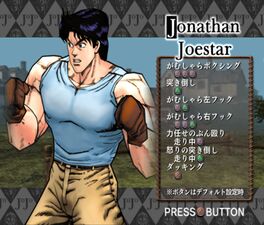
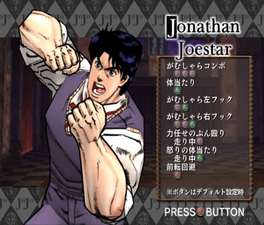
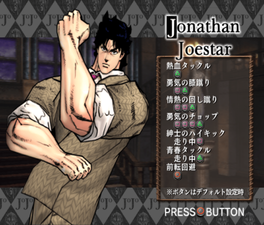
Phantom Blood is a 3D beat'em up action game. Like [[GioGio's Bizarre Adventure]], the gameplay takes place in the form of hand-to-hand battle in an arena the characters cannot leave, although unlike in GioGio multiple enemies can attack at once. The game is divided into chapters, in which the playable characters change for each chapter as the story progresses. After a fight, the game provides the player with a letter rank (S, A, B, C, D or E) based on a score of six categories: ''Time Taken'', ''Health Remaining'', ''Maximum Beat'' (Combo), ''Number of Times Downed'', ''Posing'' and ''Enemies Defeated''. Depending on the fight, the number of categories graded can range from three to six. |
|||
=== |
===Stamina Meter and Poses=== |
||
Characters capable of utilizing the Ripple show a Stamina Meter below their health meter. The Stamina Meter shows how much Ripple energy the character can use, and is depleted by performing Ripple moves ({{PS|T}} by default) or charged attacks ({{PS|R1}} by default). Performing a counter by dodging while taking damage ({{PS|O}} by default) also uses up the Stamina Meter. To refill the Stamina Meter, the player must remain still while performing a pose ({{PS|X}} by default). Poses can also be used in the middle of combos to temporarily increase one of four different stats depending on where in the combo the pose is used: health recovery speed, defensive ability, attack power, and movement speed. |
|||
Next to the character's health, there is a bar called ''Heat Gauge'', which fills up while damage is inflicted on enemies and lowers when the player takes damage. When the Heat Gauge is full, the words '''Heat MAX''' will flash inside of it, indicating that the player is able to use an '''Overdrive''' move. When applying the move, the screen will change to a cinematic of the character performing his distinct attack in a multi-colored background while an empty bar will appear. Filling this bar by quickly circling the left analog stick clockwise will prompt the character to do a barrage of attacks to the opponent while the player needs to tap the '''square''' button. If the player doesn't succeed, a less powerful attack will still be delivered and inflict damage. Only [[Ripple]] users and [[Robert E. O. Speedwagon|Speedwagon]] (Hammer) are able to use the Overdrive technique. |
|||
=== |
===Awakening=== |
||
Above the character's health is a Heat Gauge, which fills up when damage is inflicted on enemies and lowers when the player takes damage. When the Heat Gauge is full, the words '''Heat MAX''' begin flashing inside of it, indicating that the player is able to use an Awakening move ({{PS|R2}} by default). If the initial charge attack connects, the screen will change to a cinematic of the character preparing to attack over a multi-colored background. At a certain point, an empty bar will appear at the bottom of the screen; filling this bar by quickly rotating the right analog stick will cause the character to perform a barrage of attacks on the opponent, during which the player can tap the {{PS|S}} button to deal more damage. If the player doesn't fill up the bar, a less powerful attack will be delivered and inflict less damage. Only [[Ripple]] users and [[Robert E. O. Speedwagon|Speedwagon]] (Hammer) are able to use the Awakening technique. |
|||
Various poses from the series are used in the gameplay to increase the '''Stamina Meter'''. The Stamina Meter, divided into 3 levels, shows how much a Ripple-charged attack can be used. It's depleted each time the Ripple is used by pressing the '''R1''' button. The longer R1 is held, the stronger the Ripple move will be and more Stamina Meter will be depleted. To refill the Stamina Meter, the player needs to perform a pose by holding the '''X''' button. |
|||
If the player uses the X button after a combo, they can either increase their stats (Defense, Attack or Speed) or recover their health by performing a different pose. Each combo prompts a different increase and pose. |
|||
==Game Modes== |
==Game Modes== |
||
===Story Mode=== |
===Story Mode=== |
||
The story mode follows the |
The story mode faithfully follows the plot of the manga. The game is heavily composed of cutscenes recreating the manga storyline through dialogue in static comic book cinematics, as well as fully 3D rendered cutscenes for key events. The cutscenes take up to 70% of the expected time to finish the game. If the player wants to retry a chapter, they can do so without needing to go through Story Mode again. By selecting '''Chapter Mode''' on the main menu, the player can freely play any previously beaten chapter. |
||
It |
It is possible to win the battles in the first two chapters, which [[Jonathan Joestar|Jonathan]] lost in the original storyline. If the player happens to do so, a unique cutscene connecting the player's victory to the game's storyline will play. Once Story Mode is cleared, alternate characters can be selected for many of the battles in either Story Mode or Chapter Mode. |
||
After a fight, the game provides the player with a letter grade (S, A, B, C, D & E) based on a score of six categories: ''Time'', ''Accuracy'', ''Beat'', ''Number of Blocks'', ''Hits Taken'' and ''Enemies Killed''. If the player wants to retry a chapter, they can do so without needing to go through Story Mode again. By selecting '''Chapter Mode''' on the main menu, the player can freely play any previously beaten chapter. |
|||
===Museum=== |
===Museum=== |
||
'''Museum''' provides access to ''' |
'''Museum''' provides access to '''Profile Mode''', which provides descriptions of almost every character seen in the game, and '''Theater Mode''', which allows the player to view all of the cutscenes seen in Story Mode. In addition, there are three sections that need to be unlocked: |
||
*'''Extra Battle Mode''': Play "''Dream Matches''" that are not from the original manga. |
|||
*'''Extra Battle Mode''': Play original scenarios that are not seen in the original story. This mode is unlocked by clearing Story Mode, and the battles themselves are unlocked by the player's total number of points. |
|||
*'''[[77 Rings]] Knight Mode''': Based on the [[77 Rings]] challenge, the player must battle 77 enemies in a row in this survivor-like mode |
|||
*'''77 Rings Knights Mode''': Based on the trial of the [[77 Rings]], the player must battle 77 zombies in this survivor-like mode. The majority of the enemies are common Knight Zombies; [[Caineghis]], [[Eijkman]], and [[Winzaleo]] appear as the 33rd, 55th, and 77th enemies respectively. The mode is split into two variations, Ripple Warriors and Living Corpses, which are unlocked by clearing Extra Battles 10 and 20 respectively. |
|||
*'''[[Dio Brando|Dio]] Mode''': Play through the game from Dio's perspective. There are battles such as Dio facing the brats that bullied [[Jonathan Joestar|Jonathan]] and [[Erina Pendleton|Erina]] at the beginning of Phantom Blood, showing how they decided to follow Dio's orders in later events. Cutscenes are not present in this scenario and there are some differences to provide extra battles, like {{MN|Doobie}} and {{MN|Adams}} teaming up to defeat Dio. |
|||
*'''Dio Mode''': Play through the game from [[Dio Brando|Dio]]'s perspective. Cutscenes are not present in this mode, and changes are made to the story to provide additional battles: for instance, Dio must battle [[Doobie]] and [[Adams]] together. This mode is unlocked by clearing Extra Battle 30. |
|||
==Characters== |
==Characters== |
||
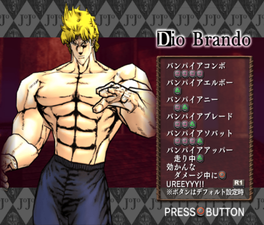
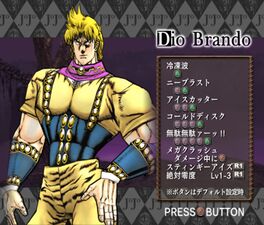
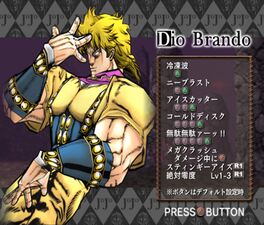
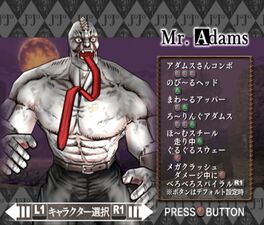
Most of the characters from ''[[Phantom Blood]]'' are playable, including several [[Unnamed Characters|unnamed]] and [[Minor Characters|minor characters]]. Depending on the mode, players can choose to play as alternate versions of Jonathan and Dio from different points in the story. Each character has their own distinct moveset. Once Story Mode is beaten, different characters can be selected for some battles in Story and Chapter Mode. However, there is not a single mode that allows you to freely select any character. The characters that can be played as are limited depending on the mode and selected battle. |
|||
{{Tabber |
|||
===List of Playable Characters=== |
|||
|Story Mode| |
|||
<gallery expand="true"> |
|||
<gallery> |
|||
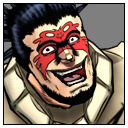
AztecChiefPS2.png|{{UN|Aztec Chief}} |
|||
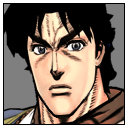
YoungJonathanPS2.png|[[Jonathan Joestar]] (Young) |
|||
BornnamPS2.png|{{MN|Page, Jones, Plant and Bornnam|Bornnam}} |
|||
JonathanBoxingPS2.jpg|[[Jonathan Joestar]] (Boxing) |
|||
Brat A.jpg|{{UN|Brats|Brat A}} |
|||
TeenJonathanPS2.png|[[Jonathan Joestar]] (Young, vs. Dio) |
|||
Brat B.png|{{UN|Brats|Brat B}} |
|||
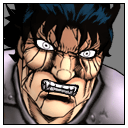
AdultJonathanPS2.png|[[Jonathan Joestar]] (Adult) |
|||
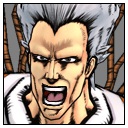
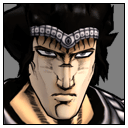
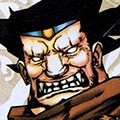
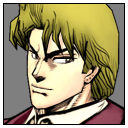
BrufordPS2.png|[[Bruford]] |
|||
OgreStreetJonathanPS2.jpg|[[Jonathan Joestar]] (Adult, Ogre Street) |
|||
CaineghisPS2.png|{{MN|The 77 Rings Challenge Winners|Caineghis}} |
|||
ClawZombiePS2.jpg|Claw [[Zombie]] |
|||
DioBoxingPS2.png|[[Dio Brando]] (Boxing Match) |
|||
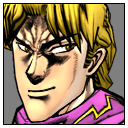
YoungDioPS2.png|[[Dio Brando]] (13 years old) |
|||
TeenDioPS2.png|[[Dio Brando]] (14 years old) |
|||
AdultDioPS2.png|[[Dio Brando]] (21 years old) |
|||
DrunkDioPS2.jpg|[[Dio Brando]] (Live subject fight) |
|||
VampireDioPS2.png|[[Dio Brando]] (Vampire) |
|||
BurningMansionDioPS2.png|[[Dio Brando]] (Joestar Mansion fight) |
|||
DioCemeteryPS2.jpg|[[Dio Brando]] (Cemetery fight) |
|||
DioBrandoPS2.jpg|[[Dio Brando]] (Final battle) |
|||
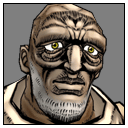
DirePS2.jpg|[[Dire]] |
|||
DoobiePS2.jpg|{{MN|Doobie}} |
|||
EijkmanPS2.png|{{MN|The 77 Rings Challenge Winners|Eijkman}} |
|||
JacktheRipperPS2.jpg|[[Jack The Ripper]] |
|||
YoungJonathanPS2.png|[[Jonathan Joestar]] (12 years old) |
|||
JonathanBoxingPS2.jpg|[[Jonathan Joestar]] (Boxing Match) |
|||
TeenJonathanPS2.png|[[Jonathan Joestar]] (13 years old) |
|||
AdultJonathanPS2.png|[[Jonathan Joestar]] (20 years old) |
|||
OgreStreetJonathanPS2.jpg|[[Jonathan Joestar]] (Ogre Street fight) |
|||
SpearJonathanPS2.png|[[Jonathan Joestar]] (Spear) |
SpearJonathanPS2.png|[[Jonathan Joestar]] (Spear) |
||
JonathanJoestarMansionPS2.png|[[Jonathan Joestar]] ([[Joestar Mansion]] |
JonathanJoestarMansionPS2.png|[[Jonathan Joestar]] (Adult, [[Joestar Mansion|Mansion]]) |
||
JonathanRippleTrainingPS2.png|[[Jonathan Joestar]] ( |
JonathanRippleTrainingPS2.png|[[Jonathan Joestar]] (Training) |
||
WillAZeppeliPS2.png|[[Will Anthonio Zeppeli]] |
|||
JonathanAfterTrainingPS2.jpg|[[Jonathan Joestar]] (After [[Ripple]] Training) |
|||
JonathanAfterTrainingPS2.jpg|[[Jonathan Joestar]] (Post-Training) |
|||
JonathanBrufordPS2.png|[[Jonathan Joestar]] (Underwater) |
|||
JonathanPS2.png|[[Jonathan Joestar]] |
|||
JonathanLuckandPluckPS2.png|[[Jonathan Joestar]] ({{MI|Luck and Pluck}}) |
|||
JonathanSuitPS2.png|[[Jonathan Joestar]] (Final Battle) |
|||
JonathanInjuredPS2.png|[[Jonathan Joestar]] (Wounded) |
|||
JonesPS2.png|{{MN|Page, Jones, Plant and Bornnam|Jones}} |
|||
KempoFighterPS2.jpg|{{UN|Kempo Master}} |
|||
MrAdamsPS2.jpg|{{MN|Adams}} |
|||
PagePS2.png|{{MN|Page, Jones, Plant and Bornnam|Page}} |
|||
PlantPS2.png|{{MN|Page, Jones, Plant and Bornnam|Plant}} |
|||
PolicePS2.jpg|Police |
|||
PoliceZombiePS2.jpg|Police [[Zombie]] |
|||
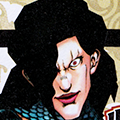
SpeedwagonPS2.jpg|[[Robert E. O. Speedwagon]] (Hat) |
|||
SpeedwagonHammerPS2.jpg|[[Robert E. O. Speedwagon]] (Hammer) |
SpeedwagonHammerPS2.jpg|[[Robert E. O. Speedwagon]] (Hammer) |
||
JonathanShirtlessPS2.jpg|[[Jonathan Joestar]] (Shirtless) |
|||
JonathanPS2.png|[[Jonathan Joestar]] |
|||
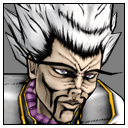
StraizoPS2.png|[[Straizo]] |
StraizoPS2.png|[[Straizo]] |
||
JonathanLuckandPluckPS2.png|[[Jonathan Joestar]] ([[Luck and Pluck]]) |
|||
SwordZombiePS2.jpg|Sword [[Zombie]] |
|||
JonathanInjuredPS2.png|[[Jonathan Joestar]] (Wounded) |
|||
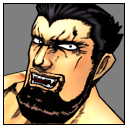
TarkusPS2.png|[[Tarkus]] |
|||
JonathanSuitPS2.png|[[Jonathan Joestar]] (Honeymoon) |
|||
TattooPS2.jpg|[[Tattoo]] |
|||
DirePS2.jpg|[[Dire]] |
|||
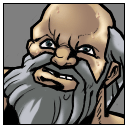
TonpettyPS2.jpg|[[Tonpetty]] |
TonpettyPS2.jpg|[[Tonpetty]] |
||
</gallery> |
|||
|Extra Battle| |
|||
<gallery> |
|||
Brat A.jpg|[[Brats|Brat A]] |
|||
Brat B.png|[[Brats|Brat B]] |
|||
TattooPS2.jpg|[[Tattoo]] |
|||
KempoFighterPS2.jpg|[[Amato]] |
|||
SpeedwagonPS2.jpg|[[Robert E. O. Speedwagon]] |
|||
PoliceZombiePS2.jpg|[[Unnamed Characters/Part 1#Police Zombie|Police Zombie]] |
|||
PolicePS2.jpg|[[Unnamed Characters/Part 1#Police Officers|Police]] |
|||
WangChanPS2.jpg|[[Wang Chan]] |
WangChanPS2.jpg|[[Wang Chan]] |
||
JacktheRipperPS2.jpg|[[Jack the Ripper]] |
|||
WangChanDioPS2.jpg|[[Wang Chan]] with [[Dio Brando|Dio]]'s head |
|||
AztecChiefPS2.png|[[Aztec Chief]] |
|||
BrufordPS2.png|[[Bruford]] |
|||
WinzaleoPS2.jpg|{{MN|The 77 Rings Challenge Winners|Winzaleo}} |
|||
TarkusPS2.png|[[Tarkus]] |
|||
DoobiePS2.jpg|[[Doobie]] |
|||
SwordZombiePS2.jpg|[[Unnamed Characters/Part 1#Executed Zombies|Sword Zombie]] |
|||
ClawZombiePS2.jpg|[[Unnamed Characters/Part 1#Executed Zombies|Claw Zombie]] |
|||
PagePS2.png|[[Page, Jones, Plant, and Bornnam|Page]] |
|||
JonesPS2.png|[[Page, Jones, Plant, and Bornnam|Jones]] |
|||
PlantPS2.png|[[Page, Jones, Plant, and Bornnam|Plant]] |
|||
BornnamPS2.png|[[Page, Jones, Plant, and Bornnam|Bornnam]] |
|||
WinzaleoPS2.jpg|[[Winzaleo]] |
|||
EijkmanPhantomBloodPS2.png|[[Eijkman]] |
|||
CaineghisPS2.png|[[Caineghis]] |
|||
</gallery> |
</gallery> |
||
|Dio Mode/77 Rings Knights| |
|||
<gallery> |
|||
DioBoxingPS2.png|[[Dio Brando]] (Young, Boxing) |
|||
YoungDioPS2.png|[[Dio Brando]] (Young) |
|||
TeenDioPS2.png|[[Dio Brando]] (Young, vs. Jonathan) |
|||
AdultDioPS2.png|[[Dio Brando]] (Adult) |
|||
DrunkDioPS2.jpg|[[Dio Brando]] (Adult, Live Subject Test) |
|||
VampireDioPS2.png|[[Dio Brando]] ([[Joestar Mansion|Mansion]]) |
|||
BurningMansionDioPS2.png|[[Dio Brando]] (Shirtless) |
|||
DioCemeteryPS2.jpg|[[Dio Brando]] (Cemetery) |
|||
DioBrandoPS2.jpg|[[Dio Brando]] |
|||
WangChanDioPS2.jpg|[[Wang Chan]] w/ [[Dio Brando|Dio]] |
|||
MrAdamsPS2.jpg|[[Adams|Mr. Adams]] |
|||
</gallery> |
|||
|Non-Playable| |
|||
<gallery> |
|||
StoneMaskProfilePS2.png|[[Stone Mask]] |
|||
YoungErinaProfilePS2.png|[[Erina Pendleton]] (Young) |
|||
AdultErinaProfilePS2.png|[[Erina Pendleton]] |
|||
PocoProfilePS2.png|[[Poco]] |
|||
KnightZombieProfilePS2.png|[[Unnamed Characters#Zombie Knights|Knight Zombies]] |
|||
HungryZombieProfilePS2.png|[[Unnamed Characters#Zombie Knights|Hungry Zombie]] |
|||
PocoSisterProfilePS2.png|[[Poco's Sister]] |
|||
ChimerasProfilePS2.png|[[Unnamed Characters#Chimera Zombies|Cat-bird and Dog-man]] |
|||
DioStyxProfilePS2.png|[[Dio Brando]] ([[Father Styx|Styx]]'s Body) |
|||
ErinaJoestarProfilePS2.png|[[Erina Pendleton|Erina Joestar]] |
|||
</gallery> |
|||
}} |
|||
==Stages== |
|||
{{-}} |
|||
{{ExpandButton}} |
|||
{{Tabber |
|||
|Story Mode| |
|||
{{GameStage|PBPS2|0|header=true}} |
|||
{{GameStage|PBPS2|1}} |
|||
{{GameStage|PBPS2|2}} |
|||
{{GameStage|PBPS2|3}} |
|||
{{GameStage|PBPS2|4}} |
|||
{{GameStage|PBPS2|5}} |
|||
{{GameStage|PBPS2|6}} |
|||
{{GameStage|PBPS2|7}} |
|||
{{GameStage|PBPS2|8}} |
|||
{{GameStage|PBPS2|9}} |
|||
{{GameStage|PBPS2|10}} |
|||
{{GameStage|PBPS2|11}} |
|||
{{GameStage|PBPS2|12}} |
|||
{{GameStage|PBPS2|13}} |
|||
{{GameStage|PBPS2|14}} |
|||
{{GameStage|PBPS2|15}} |
|||
{{GameStage|PBPS2|16}} |
|||
{{GameStage|PBPS2|17}} |
|||
{{GameStage|PBPS2|18}} |
|||
{{GameStage|PBPS2|19}} |
|||
{{GameStage|PBPS2|20}} |
|||
{{GameStage|PBPS2|21}} |
|||
{{GameStage|PBPS2|22}} |
|||
{{GameStage|PBPS2|23}} |
|||
{{GameStage|PBPS2|23a}} |
|||
{{GameStage|PBPS2|24}} |
|||
{{GameStage|PBPS2|25}} |
|||
|Extra Battle| |
|||
{{GameStage|PBPS2|E1|header=true}} |
|||
{{GameStage|PBPS2|E2}} |
|||
{{GameStage|PBPS2|E3}} |
|||
{{GameStage|PBPS2|E4}} |
|||
{{GameStage|PBPS2|E5}} |
|||
{{GameStage|PBPS2|E6}} |
|||
{{GameStage|PBPS2|E7}} |
|||
{{GameStage|PBPS2|E8}} |
|||
{{GameStage|PBPS2|E9}} |
|||
{{GameStage|PBPS2|E10}} |
|||
{{GameStage|PBPS2|E11}} |
|||
{{GameStage|PBPS2|E12}} |
|||
{{GameStage|PBPS2|E13}} |
|||
{{GameStage|PBPS2|E14}} |
|||
{{GameStage|PBPS2|E15}} |
|||
{{GameStage|PBPS2|E16}} |
|||
{{GameStage|PBPS2|E17}} |
|||
{{GameStage|PBPS2|E18}} |
|||
{{GameStage|PBPS2|E19}} |
|||
{{GameStage|PBPS2|E20}} |
|||
{{GameStage|PBPS2|E21}} |
|||
{{GameStage|PBPS2|E22}} |
|||
{{GameStage|PBPS2|E23}} |
|||
{{GameStage|PBPS2|E24}} |
|||
{{GameStage|PBPS2|E25}} |
|||
{{GameStage|PBPS2|E26}} |
|||
{{GameStage|PBPS2|E27}} |
|||
{{GameStage|PBPS2|E28}} |
|||
{{GameStage|PBPS2|E29}} |
|||
{{GameStage|PBPS2|E30}} |
|||
{{GameStage|PBPS2|E31}} |
|||
{{GameStage|PBPS2|E32}} |
|||
|77 Rings Knights| |
|||
{{GameStage|PBPS2|77A|header=true}} |
|||
{{GameStage|PBPS2|77B}} |
|||
|Dio Mode| |
|||
{{GameStage|PBPS2|D1|header=true}} |
|||
{{GameStage|PBPS2|D2}} |
|||
{{GameStage|PBPS2|D3}} |
|||
{{GameStage|PBPS2|D4}} |
|||
{{GameStage|PBPS2|D5}} |
|||
{{GameStage|PBPS2|D6}} |
|||
{{GameStage|PBPS2|D7}} |
|||
{{GameStage|PBPS2|D8}} |
|||
{{GameStage|PBPS2|D9}} |
|||
{{GameStage|PBPS2|D10}} |
|||
{{GameStage|PBPS2|D11}} |
|||
{{GameStage|PBPS2|D12}} |
|||
{{GameStage|PBPS2|D13}} |
|||
{{GameStage|PBPS2|D14}} |
|||
{{GameStage|PBPS2|D15}} |
|||
{{GameStage|PBPS2|D16}} |
|||
}} |
|||
==Cast== |
|||
{{Tabber |
|||
|Protagonists| |
|||
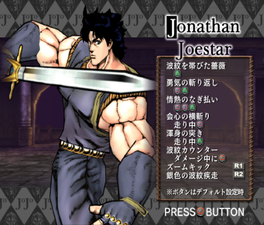
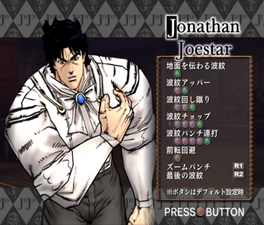
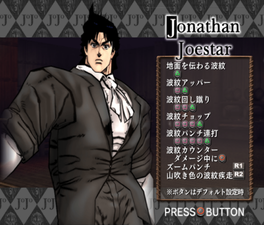
{{Cast|Name=Jonathan Joestar|Av=JonathanPS2Av.png|VA=Hideyuki Tanaka|Color=PB|Color2=PB2}} |
|||
{{Cast|Name=Will Anthonio Zeppeli|Av=WillZeppeliPS2Av.png|VA=[[Rikiya Koyama]]|Color=PB|Color2=PB2}} |
|||
{{Cast|Name=Robert E. O. Speedwagon|Av=SpeedwagonPS2Av.png|VA=Masaya Onosaka|Color=PB|Color2=PB2}} |
|||
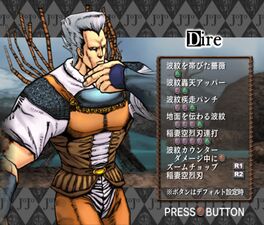
{{Cast|Name=Dire|Av=DirePS2Av.png|VA=Yukitoshi Hori|Color=PB|Color2=PB2}} |
|||
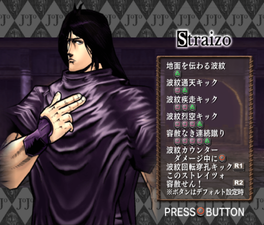
{{Cast|Name=Straizo|Av=StraizoPS2Av.png|VA=Hiroaki Miura|Color=PB|Color2=PB2}} |
|||
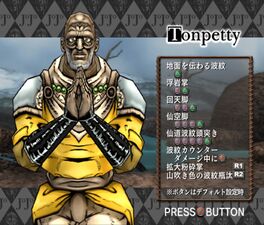
{{Cast|Name=Tonpetty|Av=TonpettyPS2Av.png|VA=Osamu Saka|Color=PB|Color2=PB2}} |
|||
{{Cast|Name=Jonathan Joestar|SName=Jonathan Joestar (Young)|Av=YoungJonathanPS2Av.png|VA=[[Kazuya Nakai]]|Color=PB|Color2=PB2}} |
|||
|Enemies| |
|||
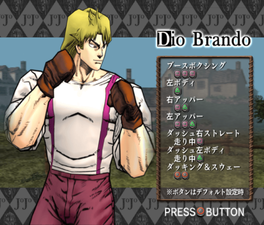
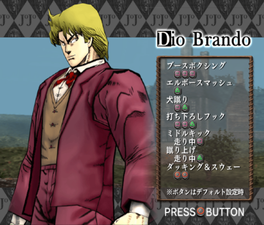
{{Cast|Name=Dio Brando|Av=DioPS2Av.png|VA=[[Hikaru Midorikawa]]|Color=PB|Color2=PB2}} |
|||
{{Cast|Name=Tattoo|Av=TattooPS2Av.png|VA=Unknown|Color=PB|Color2=PB2}} |
|||
{{Cast|Name=Kempo Fighter|Av=KempoPS2Av.png|VA=Unknown|Color=PB|Color2=PB2}} |
|||
{{Cast|Name=Wang Chan|Av=WangChanPS2Av.png|VA=Kazumi Tanaka|Color=PB|Color2=PB2}} |
|||
{{Cast|Name=Jack the Ripper|Av=JackTheRipperPS2Av.png|VA=Hisao Egawa|Color=PB|Color2=PB2}} |
|||
{{Cast|Name=Bruford|Av=BrufordPS2Av.png|VA=Nobutoshi Canna|Color=PB|Color2=PB2}} |
|||
{{Cast|Name=Tarkus|Av=TarkusPS2Av.png|VA=Daisuke Gori|Color=PB|Color2=PB2}} |
|||
{{Cast|Name=Doobie|Av=DoobiePS2Av.png|VA=Unknown|Color=PB|Color2=PB2}} |
|||
{{Cast|Name=Page, Jones, Plant, and Bornnam|SName=Page, Jones, Plant,<br/><span style="padding-left:5px">and Bornnam</span>|Av=PJPBPS2Av.png|VA=Kanemitsu Yoshihiro|Color=PB|Color2=PB2}} |
|||
{{Cast|Name=Winzaleo|Av=WinzaleoPS2Av.png|VA=Yasunori Masutani|Color=PB|Color2=PB2}} |
|||
{{Cast|Name=Eijkman|Av=EijkmanPS2Av.png|VA=Michitaka Kobayashi|Color=PB|Color2=PB2}} |
|||
{{Cast|Name=Caineghis|Av=CaineghisPS2Av.png|VA=Tomohisa Aso|Color=PB|Color2=PB2}} |
|||
{{Cast|Name=Dio Brando|SName=Dio Brando (Young)|Av=YoungDioPS2Av.png|VA=Kenji Nojima|Color=PB|Color2=PB2}} |
|||
|Other| |
|||
{{Cast|Name=Narrator|Av=NoPicAv.png|VA=Mahito Ohba|Color=PB|Color2=PB2}} |
|||
{{Cast|Name=Dario Brando|Av=DarioPS2Av.png|VA=Koji Yada|Color=PB|Color2=PB2}} |
|||
{{Cast|Name=George Joestar I|Av=GeorgePS2Av.png|VA=Tsutomu Isobe|Color=PB|Color2=PB2}} |
|||
{{Cast|Name=Erina Pendleton|Av=ErinaPS2Av.png|VA=Aya Hisakawa|Color=PB|Color2=PB2}} |
|||
{{Cast|Name=Poco|Av=PocoPS2Av.png|VA=Daisuke Sakaguchi|Color=PB|Color2=PB2}} |
|||
{{Cast|Name=Poco's Sister|Av=PocoSisterPS2Av.png|VA=Junko Hagimori|Color=PB|Color2=PB2}} |
|||
}} |
|||
==Gallery== |
==Gallery== |
||
<gallery> |
<gallery> |
||
PBPS2logo.png|Logo |
|||
Phantom Blood game back.png|Back Cover |
|||
Phantom Blood game back.png|Back cover |
|||
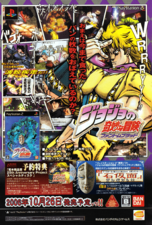
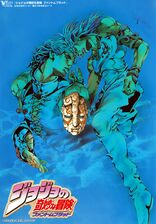
PB Game Poster.jpg|Promotional Poster |
|||
JoJo2006PS2.png|Clean front cover art |
|||
Phantom Blood Jonathan Render.png|Jonathan Joestar render |
|||
PS2 PB Dio render.png|Dio Brando render |
|||
PS2End.png|The group of heroes at the ending |
PS2End.png|The group of heroes at the ending |
||
1 PBPS2Pre Order Cover.jpg|Disc given to those who pre-ordered the game |
|||
Pb jojo render.jpg|Jonathan Joestar Render |
|||
2 PBPS2Pre Order Back Cover.jpg|Pre-order disc contents: a [[Hirohiko Araki]] 30 min interview, game trailers and a teaser for the [[Phantom Blood (Film)|Phantom Blood film]] |
|||
PS2 PB Dio render.png|Dio Brando Render |
|||
3 PBPS2Pre Order Disc.jpg|Pre-order disc |
|||
</gallery> |
|||
PB PS2 Game Guide.jpg|Front cover of a [[V Jump|strategy guide]] |
|||
==Trailers== |
|||
PB PS2 Game Guide Index.jpg|Stage list from the strategy guide |
|||
<gallery> |
|||
PBPS2GameGuide LastPage.jpg|Last page of the strategy guide, advertising a golden Stone Mask fridge magnet with only 50 units in circulation |
|||
『ジョジョの奇妙な冒険|ファントムブラッド』 PV |
|||
PB PS2 Event Poster.png|2006 event poster |
|||
ジョジョの奇妙な冒険 CM |
|||
PB PS2 Release Poster.png|2006 promo poster |
|||
PB Game Poster.jpg|Promotional poster |
|||
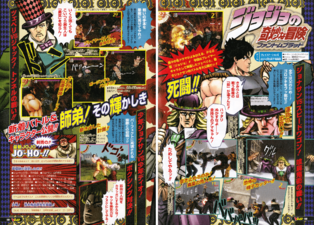
PB Game UJ Poster Sep 2006.png|Game ad #1 featured in [[Ultra Jump]] [[SBR Chapter 41|September]] 2006 |
|||
UJ Oct 2006 PB Game Poster.jpg|Game ad #1 featured in Ultra Jump [[SBR Chapter 42|October]] 2006 |
|||
UJ Oct 2006 PB Game Ad.jpg|Game ad #2 featured in Ultra Jump October 2006 |
|||
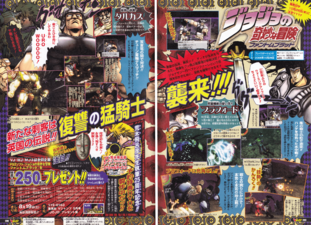
2 November 2006 UJ PB PS2Poster.png|Game ad #1 featured in Ultra Jump [[SBR Chapter 43|November]] 2006 |
|||
3 November 2006 UJ Ad 1.png|Game ad #2 featured in Ultra Jump November 2006 |
|||
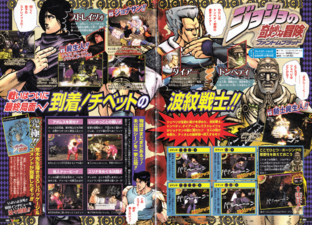
2 V Jump August 2006 PB PS2 Ad.png|[[V Jump]] (08/2006) |
|||
2 V Jump Sep 2006 PB PS2 Ad.png|V Jump (09/2006) |
|||
2 V Jump Oct 2006 PB PS2 Game Ad.png|V Jump (10/2006) |
|||
2 V Jump Dec 2006 PB PS2 Game Ad 1.png|V Jump #1/2 (12/2006) |
|||
3 V Jump Dec 2006 PB PS2 Game Ad 2.png|V Jump #2/2 (12/2006) |
|||
PBPS2FebruaryAdvert.jpg|Game ad featured in [[Weekly Shonen Jump]] (late January/early February 2006) |
|||
PBGame-BoxingAD.png|Game ad featured in Weekly Shonen Jump (late June/early July 2006) |
|||
PS2PhantomBloodGameA4PromoCard.jpeg|Front of an A4 promotional card |
|||
PS2PhantomBloodGameA4BackOfPromoCard.jpeg|Back of an A4 promotional card |
|||
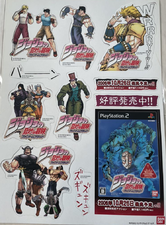
Pop-out PB PS2 Characters.png|Pop-out Character Cards #1 |
|||
Pop-out PB PS2 Characters 2.png|Pop-out Character Cards #2 |
|||
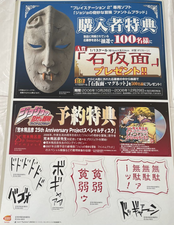
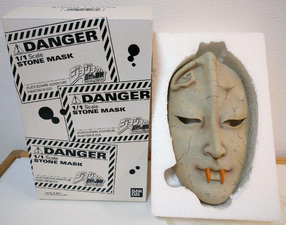
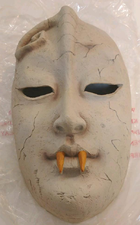
PB PS2 IRL StoneMask & Box.png|A real-life Stone Mask that was sold in limited quantities at an [[Phantom Blood (Film)#Phantom Blood PS2 Event|event]] |
|||
PB PS2 IRL StoneMask.png|Close-up of the mask |
|||
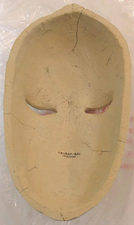
PB PS2 IRL StoneMask Inside.png|Inside of the mask |
|||
PB PS2 IRL StoneMask Box Side.png|The side of the box the mask is packaged in |
|||
PB PS2 IRL StoneMask Box.png|The back of the box the mask is packaged in |
|||
</gallery> |
</gallery> |
||
==Videos== |
|||
{{GBox|Title=Commercials|height=auto|Collapse=true|bg={{Color|PB}}|TOC=false| |
|||
{{Vid|LfXMRdjIsVk}}{{Vid|gka4hDvQ218}}{{Vid|ksibGUyQ7P4}} |
|||
}} |
|||
{{GBox|Title=Soundtrack|height=auto|Collapse=true|bg={{Color|PB}}|TOC=false| |
|||
{{#ev:youtubeplaylist|https://www.youtube.com/playlist?list=PLhn2acs1jf_9ComhSWB8SI101xIw1Ts1F}} |
|||
}} |
|||
==See also== |
|||
*[[Interview:Phantom Blood PS2 (October 2006)]] |
|||
==Trivia== |
==Trivia== |
||
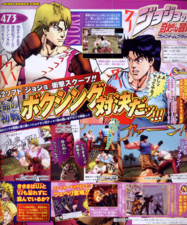
*If the player manages to win battles that Jonathan originally lost in the manga, alternate cutscenes will take place: |
*If the player manages to win battles that Jonathan originally lost in the manga, alternate cutscenes will take place: |
||
** |
**If Young Jonathan beats the two bullies bothering Erina, the bullies will give back the doll but beat up Jonathan nonetheless after finding out he's from the [[Joestar Family|Joestar family]]. |
||
** |
**If the player wins the boxing match against Dio, he claims that Jonathan put a rock in his glove during their fight, making the audience think Jonathan is a coward who can't fight fair. |
||
*If the player uses an |
*If the player uses an Awakening move in the underwater battle against [[Bruford]] during Chapter 13, a cutscene featuring the end of the battle will immediately take place, ending the chapter earlier. This cutscene, like most Awakening move cinematics, cannot be unlocked in Theater Mode. The player can still win the battle without using Awakening, but will not get to see the cutscene. |
||
*If the player manages to get |
*If the player manages to get an S rank in Chapter 22 while playing Story Mode, a secret chapter will replace the regular Chapter 23 as the final battle; the game's menus refer to this secret chapter and the Extra Battle based on it as {{Nihongo|'''The Final Ripple! (Reverse)'''|最後の波紋!(裏)}}. This secret chapter can't be unlocked while playing in Chapter Mode, but can be accessed from Chapter Mode once it is unlocked. |
||
*Even though the game faithfully follows the manga's storyline, some events were still cut from the game |
*Even though the game faithfully follows the manga's storyline, some events were still cut from the game, including the [[Aztec Chief]] draining a follower's life force, Dio hiding a knife from [[George Joestar I]], Danny's death, Dio's flashback to meeting Wang Chan, the [[Inspector Archer|Inspector]]'s flashback, Wang Chan regrouping with Dio after his fight with Jonathan, the explanations of the trial of the 77 Rings and Bruford's hair, [[Will Anthonio Zeppeli|Zeppeli]]'s flashbacks to his training, Dio's encounter with a mother and child, the newspaper excerpts describing the fate of the Stone Mask and Jonathan's marriage, and Father Styx's entire canon appearance (save in the alternate final chapter). |
||
==Site Navigation== |
==Site Navigation== |
||
{{Languages}} |
|||
{{Phantom Blood PS2 Navbox}} |
|||
{{Part 1 Chapters}} |
{{Part 1 Chapters}} |
||
{{Games Navigation}} |
{{Games Navigation}} |
||
[[Category:Video Games|Phantom Blood (PS2 Game)]] |
[[Category:Video Games|Phantom Blood (PS2 Game)]] |
||
{{DISPLAYTITLE:''JoJo's Bizarre Adventure: Phantom Blood''}} |
|||
{{PhantomBlood}} |
|||
{{Icon|PB}} |
|||
Latest revision as of 20:09, 6 March 2025
JoJo's Bizarre Adventure: Phantom Blood (ジョジョの奇妙な冒険 ファントムブラッド, JoJo no Kimyō na Bōken Fantomu Buraddo) is an action-adventure video game adaptation of Phantom Blood released for the PlayStation 2 by developer Anchor Inc. and publisher Bandai Namco Entertainment on October 26, 2006.
This is the second game for the PS2 that is based on JoJo's Bizarre Adventure. It was released to coincide with the 20th anniversary of the series.
Gameplay
Phantom Blood is a 3D beat'em up action game. Like GioGio's Bizarre Adventure, the gameplay takes place in the form of hand-to-hand battle in an arena the characters cannot leave, although unlike in GioGio multiple enemies can attack at once. The game is divided into chapters, in which the playable characters change for each chapter as the story progresses. After a fight, the game provides the player with a letter rank (S, A, B, C, D or E) based on a score of six categories: Time Taken, Health Remaining, Maximum Beat (Combo), Number of Times Downed, Posing and Enemies Defeated. Depending on the fight, the number of categories graded can range from three to six.
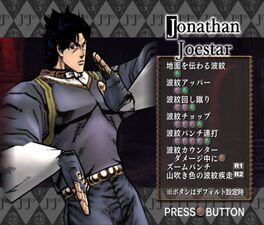
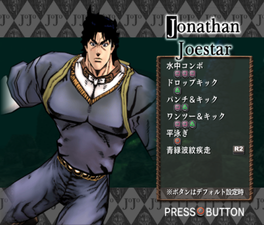
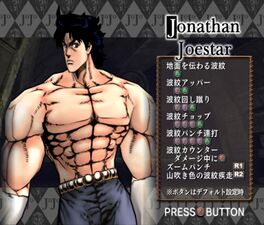
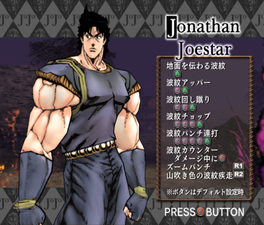
Stamina Meter and Poses
Characters capable of utilizing the Ripple show a Stamina Meter below their health meter. The Stamina Meter shows how much Ripple energy the character can use, and is depleted by performing Ripple moves (![]() by default) or charged attacks (
by default) or charged attacks (![]() by default). Performing a counter by dodging while taking damage (
by default). Performing a counter by dodging while taking damage (![]() by default) also uses up the Stamina Meter. To refill the Stamina Meter, the player must remain still while performing a pose (
by default) also uses up the Stamina Meter. To refill the Stamina Meter, the player must remain still while performing a pose (![]() by default). Poses can also be used in the middle of combos to temporarily increase one of four different stats depending on where in the combo the pose is used: health recovery speed, defensive ability, attack power, and movement speed.
by default). Poses can also be used in the middle of combos to temporarily increase one of four different stats depending on where in the combo the pose is used: health recovery speed, defensive ability, attack power, and movement speed.
Awakening
Above the character's health is a Heat Gauge, which fills up when damage is inflicted on enemies and lowers when the player takes damage. When the Heat Gauge is full, the words Heat MAX begin flashing inside of it, indicating that the player is able to use an Awakening move (![]() by default). If the initial charge attack connects, the screen will change to a cinematic of the character preparing to attack over a multi-colored background. At a certain point, an empty bar will appear at the bottom of the screen; filling this bar by quickly rotating the right analog stick will cause the character to perform a barrage of attacks on the opponent, during which the player can tap the
by default). If the initial charge attack connects, the screen will change to a cinematic of the character preparing to attack over a multi-colored background. At a certain point, an empty bar will appear at the bottom of the screen; filling this bar by quickly rotating the right analog stick will cause the character to perform a barrage of attacks on the opponent, during which the player can tap the ![]() button to deal more damage. If the player doesn't fill up the bar, a less powerful attack will be delivered and inflict less damage. Only Ripple users and Speedwagon (Hammer) are able to use the Awakening technique.
button to deal more damage. If the player doesn't fill up the bar, a less powerful attack will be delivered and inflict less damage. Only Ripple users and Speedwagon (Hammer) are able to use the Awakening technique.
Game Modes
Story Mode
The story mode faithfully follows the plot of the manga. The game is heavily composed of cutscenes recreating the manga storyline through dialogue in static comic book cinematics, as well as fully 3D rendered cutscenes for key events. The cutscenes take up to 70% of the expected time to finish the game. If the player wants to retry a chapter, they can do so without needing to go through Story Mode again. By selecting Chapter Mode on the main menu, the player can freely play any previously beaten chapter.
It is possible to win the battles in the first two chapters, which Jonathan lost in the original storyline. If the player happens to do so, a unique cutscene connecting the player's victory to the game's storyline will play. Once Story Mode is cleared, alternate characters can be selected for many of the battles in either Story Mode or Chapter Mode.
Museum
Museum provides access to Profile Mode, which provides descriptions of almost every character seen in the game, and Theater Mode, which allows the player to view all of the cutscenes seen in Story Mode. In addition, there are three sections that need to be unlocked:
- Extra Battle Mode: Play original scenarios that are not seen in the original story. This mode is unlocked by clearing Story Mode, and the battles themselves are unlocked by the player's total number of points.
- 77 Rings Knights Mode: Based on the trial of the 77 Rings, the player must battle 77 zombies in this survivor-like mode. The majority of the enemies are common Knight Zombies; Caineghis, Eijkman, and Winzaleo appear as the 33rd, 55th, and 77th enemies respectively. The mode is split into two variations, Ripple Warriors and Living Corpses, which are unlocked by clearing Extra Battles 10 and 20 respectively.
- Dio Mode: Play through the game from Dio's perspective. Cutscenes are not present in this mode, and changes are made to the story to provide additional battles: for instance, Dio must battle Doobie and Adams together. This mode is unlocked by clearing Extra Battle 30.
Characters
Most of the characters from Phantom Blood are playable, including several unnamed and minor characters. Depending on the mode, players can choose to play as alternate versions of Jonathan and Dio from different points in the story. Each character has their own distinct moveset. Once Story Mode is beaten, different characters can be selected for some battles in Story and Chapter Mode. However, there is not a single mode that allows you to freely select any character. The characters that can be played as are limited depending on the mode and selected battle.
-
 Jonathan Joestar (Young)
 -
 Jonathan Joestar (Boxing)
 -
 Jonathan Joestar (Young, vs. Dio)
 -
 Jonathan Joestar (Adult)
 -
 Jonathan Joestar (Adult, Ogre Street)
 -
 Jonathan Joestar (Spear)
 -
 Jonathan Joestar (Adult, Mansion)
 -
 Jonathan Joestar (Training)
 -
-
 Jonathan Joestar (Post-Training)
 -
 Jonathan Joestar (Underwater)
 -
 Robert E. O. Speedwagon (Hammer)
 -
 Jonathan Joestar (Shirtless)
 -
-
-
-
 Jonathan Joestar (Wounded)
 -
 Jonathan Joestar (Honeymoon)
 -
-


-
 Dio Brando (Young, Boxing)
 -
 Dio Brando (Young)
 -
 Dio Brando (Young, vs. Jonathan)
 -
 Dio Brando (Adult)
 -
 Dio Brando (Adult, Live Subject Test)
 -
-
 Dio Brando (Shirtless)
 -
 Dio Brando (Cemetery)
 -
-

-


Stages
(プロローグ Purorōgu)

(侵略者ディオ Shinryakusha Dio)

(新しき友人! Atarashiki Yūjin!)

(負けられない戦い Makerarenai Tatakai)

(過去からの手紙 Kako kara no Tegami)

(

(人間を超越する! Ningen o Chōetsu Suru!)

(ディオとの青春に決着! Dio to no Seishun ni Ketchaku!)

(奇跡のエネルギー Kiseki no Enerugī)

(呪われた町 Norowareta Machi)

(恐怖を我が物とせよ Kyōfu o Wagamono to seyo)

(罠への招待 Wana e no Shōtai)

(血も凍る仮面力 Chi mo Kōru Kamen Pawā)

(暗黒の騎士達 Ankoku no Kishitachi)

(英雄として眠る Eiyū toshite Nemuru)

(双首竜の間へ Sōshuryū no Ma e)

(老師の予言 Rōshi no Yogen)

(怒りをたたきこめ! Ikari o Tatakikome!)

(遥かな国からの3人 Haruka na Kuni kara no 3-nin)

(怪人ドゥービー Kaijin Dūbī)

(

(血戦!JoJo&Dio Kessen! JoJo ando Dio)

(悪鬼の最後 Akuki no Saigo)

(最後の波紋! Saigo no Hamon!)

(最後の波紋!(裏) Saigo no Hamon! (Ura))

(忘却の彼方へ Bōkyaku no Kanata e)

(エンディング Endingu)

(金持ちは嫌いだ‼ Kanemochi wa Kirai da!!)
Unlock Criteria: Clear Story Mode
(そこにシビれる!あこがれるぅ! Soko ni Shibireru! Akogareru!)
Unlock Criteria: Clear Story Mode and earn 1,000,000 points
(手下を作れッ‼ Teshita o Tsukure!!)
Unlock Criteria: Clear Story Mode and earn 1,300,000 points
(食屍鬼街の戦い Shokujiki-gai no Tatakai)
Unlock Criteria: Clear Story Mode and earn 1,600,000 points
(生ける死者の襲撃 Ikeru Shisha no Shūgeki)
Unlock Criteria: Clear Story Mode and earn 1,900,000 points
(なんだこいつは〜〜ッ‼ Nanda Koitsu wa!!)
Unlock Criteria: Clear Story Mode and earn 2,200,000 points
(この仮面⋯金になるよ⋯ Kono Kamen... Kin ni naru yo...)
Unlock Criteria: Clear Story Mode and earn 2,500,000 points
(悪のエリート Aku no Erīto)
Unlock Criteria: Clear Story Mode and earn 2,800,000 points
(波紋法の手本 Hamon-hō no Tehon)
Unlock Criteria: Clear Story Mode and earn 3,100,000 points
(べロべロなめてやるね! Berobero Namete yaru ne!)
Unlock Criteria: Clear Story Mode and earn 3,400,000 points
(猟奇的殺人鬼 Ryōkiteki Satsujinki)
Unlock Criteria: Clear Story Mode and earn 3,700,000 points
(地下迷宮の戦い Chika Meikyū no Tatakai)
Unlock Criteria: Clear Story Mode and earn 4,000,000 points
(汝!わたしの生命となるか! Nanji! Watashi no Seimei to naru ka!)
Unlock Criteria: Clear Story Mode and earn 4,300,000 points
(お前らァ雑魚はいいッ! Omaerā Zako wa ī!)
Unlock Criteria: Clear Story Mode and earn 4,600,000 points
(双首竜の間の戦い Sōshuryū no Ma no Tatakai)
Unlock Criteria: Clear Story Mode and earn 4,900,000 points
(DIOに造られしモノ DIO ni Tsukura Reshimono)
Unlock Criteria: Clear Story Mode and earn 5,200,000 points
(この牙の歯型としてくれる! Kono Kiba no Hagata toshite Kureru!)
Unlock Criteria: Clear Story Mode and earn 5,500,000 points
(血管針ゾンビの逆襲① Kekkan Hari Zonbi no Gyakushū 1)
Unlock Criteria: Clear Story Mode and earn 5,800,000 points
(血管針ゾンビの逆襲② Kekkan Hari Zonbi no Gyakushū 2)
Unlock Criteria: Clear Story Mode and earn 6,100,000 points
(血管針ゾンビの逆襲③ Kekkan Hari Zonbi no Gyakushū 3)
Unlock Criteria: Clear Story Mode and earn 6,400,000 points
(必殺稲妻十字空烈刃① Hissatsu Inazuma Jūji Sora Retsujin 1)
Unlock Criteria: Clear Story Mode and earn 6,700,000 points
(必殺稲妻十字空烈刃② Hissatsu Inazuma Jūji Sora Retsujin 2)
Unlock Criteria: Clear Story Mode and earn 7,000,000 points
(石仮面を追う3人 Ishi Kamen o Ou 3-nin)
Unlock Criteria: Clear Story Mode and earn 7,300,000 points
(遥かな国からの3人 Haruka na Kuni kara no 3-nin)
Unlock Criteria: Clear Story Mode and earn 7,600,000 points
(厳しい苦行 Kibishī Kugyō)
Unlock Criteria: Clear Story Mode and earn 7,900,000 points
(修行でも容赦せん Shugyō demo Yōsha-sen)
Unlock Criteria: Clear Story Mode and earn 8,200,000 points
(老師の教え Rōshi no Oshie)
Unlock Criteria: Clear Story Mode and earn 8,500,000 points
(伝説の騎士たち① Densetsu no Kishitachi 1)
Unlock Criteria: Clear Story Mode and earn 8,800,000 points
(伝説の騎士たち② Densetsu no Kishitachi 2)
Unlock Criteria: Clear Story Mode and earn 9,100,000 points
(伝説の騎士たち③ Densetsu no Kishitachi 3)
Unlock Criteria: Clear Story Mode and earn 9,400,000 points
(最後の波紋! Saigo no Hamon!)
Unlock Criteria: Clear Story Mode and earn 9,700,000 points
(最後の波紋!(裏) Saigo no Hamon! (Ura))
Unlock Criteria: Clear Story Mode and earn 10,000,000 points
(波紋戦士編 Hamon Senchi-hen)
Unlock Criteria:
Jonathan Joestar: Clear Extra Battle 10
Will Anthonio Zeppeli: Clear Ripple Warriors Edition once
Robert E. O. Speedwagon (Hammer): Clear Ripple Warriors Edition twice
Dire: Clear Ripple Warriors Edition three times
Straizo: Clear Ripple Warriors Edition four times
Tonpetty: Clear Ripple Warriors Edition five times
Jonathan Joestar (Luck and Pluck): Clear Ripple Warriors Edition six times
Jonathan Joestar (Honeymoon): Clear Ripple Warriors Edition six times and clear Dio Mode
(屍生人編 Shiseijin-hen)
Unlock Criteria:
Wang Chan: Clear Extra Battle 20
Jack the Ripper: Clear Living Corpses Edition once
Bruford: Clear Living Corpses Edition twice
Tarkus: Clear Living Corpses Edition three times
Mr. Adams: Clear Living Corpses Edition four times
Doobie: Clear Living Corpses Edition five times
Dio Brando: Clear Living Corpses Edition six times
Wang Chan w/ Dio: Clear Living Corpses Edition six times and clear Dio Mode
(徹底的に叩きのめせッ‼ Tetteiteki ni Tatakinomese!!)
Unlock Criteria: Clear Extra Battle 32
(子分を増やせ! Kobun o Fuyase!)
Unlock Criteria: Clear Dio Mode 01
(怒りのジョナサン Ikari no Jonasan)
Unlock Criteria: Clear Dio Mode 02
(薬を奪い返せッ‼ Kusuri o Ubaikaese!!)
Unlock Criteria: Clear Dio Mode 03
(石仮面の秘密 Ishi Kamen no Himitsu)
Unlock Criteria: Clear Dio Mode 04
(人間をやめるぞ! Ningen o Yameru zo!)
Unlock Criteria: Clear Dio Mode 05
(人間を超越するッ! Ningen o Chōetsu Suru!)
Unlock Criteria: Clear Dio Mode 06
(闇の帝王 Yami no Teiō)
Unlock Criteria: Clear Dio Mode 07
(死生人を服従させろ‼ Shiseijin o Fukujū Sasero!!)
Unlock Criteria: Clear Dio Mode 08
(歴史を下僕にしろッ!① Rekishi o Geboku ni Shiro! 1)
Unlock Criteria: Clear Dio Mode 09
(歴史を下僕にしろッ!② Rekishi o Geboku ni Shiro! 2)
Unlock Criteria: Clear Dio Mode 10
(ディオの造りしモノ Dio ni Tsukura Reshimono)
Unlock Criteria: Clear Dio Mode 11
(生物界の頂点 Seibutsu-kai no Chōten)
Unlock Criteria: Clear Dio Mode 12
(遥かな国からの刺客 Haruka na Kuni kara no Shikaku)
Unlock Criteria: Clear Dio Mode 13
(血戦!Dio&JoJo Kessen! Dio ando JoJo)
Unlock Criteria: Clear Dio Mode 14
(狂嵐の旅路 Kyō Arashi no Tabiji)
Unlock Criteria: Clear Dio Mode 15
Cast
Hideyuki Tanaka
N/A
N/A
N/A
N/A
N/A
N/A
N/A
N/A

Rikiya Koyama
N/A
N/A
N/A
N/A
N/A
N/A
N/A
N/A

Masaya Onosaka
N/A
N/A
N/A
N/A
N/A
N/A
N/A
N/A
Yukitoshi Hori
N/A
N/A
N/A
N/A
N/A
N/A
N/A
N/A

Hiroaki Miura
N/A
N/A
N/A
N/A
N/A
N/A
N/A
N/A
Osamu Saka
N/A
N/A
N/A
N/A
N/A
N/A
N/A
N/A

Kazuya Nakai
N/A
N/A
N/A
N/A
N/A
N/A
N/A
N/A
Hikaru Midorikawa
N/A
N/A
N/A
N/A
N/A
N/A
N/A
N/A
Unknown
N/A
N/A
N/A
N/A
N/A
N/A
N/A
N/A

Unknown
N/A
N/A
N/A
N/A
N/A
N/A
N/A
N/A
Kazumi Tanaka
N/A
N/A
N/A
N/A
N/A
N/A
N/A
N/A
Hisao Egawa
N/A
N/A
N/A
N/A
N/A
N/A
N/A
N/A
Nobutoshi Canna
N/A
N/A
N/A
N/A
N/A
N/A
N/A
N/A
Daisuke Gori
N/A
N/A
N/A
N/A
N/A
N/A
N/A
N/A
Unknown
N/A
N/A
N/A
N/A
N/A
N/A
N/A
N/A

Kanemitsu Yoshihiro
N/A
N/A
N/A
N/A
N/A
N/A
N/A
N/A
Yasunori Masutani
N/A
N/A
N/A
N/A
N/A
N/A
N/A
N/A
Michitaka Kobayashi
N/A
N/A
N/A
N/A
N/A
N/A
N/A
N/A
Tomohisa Aso
N/A
N/A
N/A
N/A
N/A
N/A
N/A
N/A
Kenji Nojima
N/A
N/A
N/A
N/A
N/A
N/A
N/A
N/A

Mahito Ohba
N/A
N/A
N/A
N/A
N/A
N/A
N/A
N/A
Koji Yada
N/A
N/A
N/A
N/A
N/A
N/A
N/A
N/A

Tsutomu Isobe
N/A
N/A
N/A
N/A
N/A
N/A
N/A
N/A

Aya Hisakawa
N/A
N/A
N/A
N/A
N/A
N/A
N/A
N/A

Daisuke Sakaguchi
N/A
N/A
N/A
N/A
N/A
N/A
N/A
N/A

Junko Hagimori
N/A
N/A
N/A
N/A
N/A
N/A
N/A
N/A
Gallery
-
 Logo
Logo -
 Back cover
 -
 Clean front cover art
 -
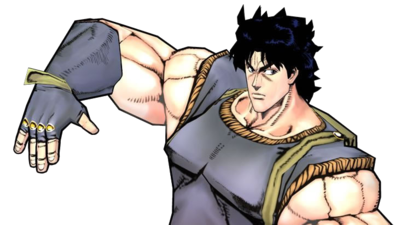 Jonathan Joestar render
 -
 Dio Brando render
 -
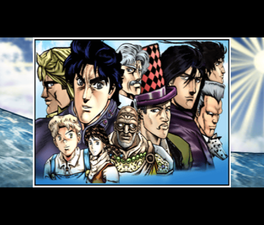 The group of heroes at the ending
 -
 Disc given to those who pre-ordered the game
 -
 Pre-order disc contents: a Hirohiko Araki 30 min interview, game trailers and a teaser for the Phantom Blood film
 -
 Pre-order disc
 -
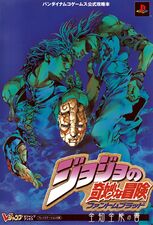 Front cover of a strategy guide
 -
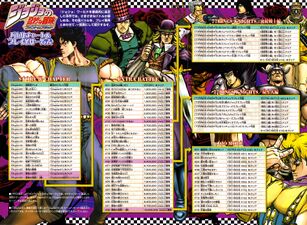 Stage list from the strategy guide
 -
 Last page of the strategy guide, advertising a golden Stone Mask fridge magnet with only 50 units in circulation
 -
 2006 event poster
 -
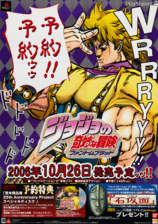 2006 promo poster
 -
 Promotional poster
 -
 Game ad #1 featured in Ultra Jump September 2006
 -
 Game ad #1 featured in Ultra Jump October 2006
 -
 Game ad #2 featured in Ultra Jump October 2006
 -
 Game ad #1 featured in Ultra Jump November 2006
 -
 Game ad #2 featured in Ultra Jump November 2006
 -
 V Jump (08/2006)
 -
 V Jump (09/2006)
 -
 V Jump (10/2006)
 -
 V Jump #1/2 (12/2006)
 -
 V Jump #2/2 (12/2006)
 -
 Game ad featured in Weekly Shonen Jump (late January/early February 2006)
 -
 Game ad featured in Weekly Shonen Jump (late June/early July 2006)
 -
 Front of an A4 promotional card
 -
 Back of an A4 promotional card
 -
 Pop-out Character Cards #1
 -
 Pop-out Character Cards #2
 -
 A real-life Stone Mask that was sold in limited quantities at an event
 -
 Close-up of the mask
 -
 Inside of the mask
 -
 The side of the box the mask is packaged in
 -
 The back of the box the mask is packaged in


Videos
See also
Trivia
- If the player manages to win battles that Jonathan originally lost in the manga, alternate cutscenes will take place:
- If Young Jonathan beats the two bullies bothering Erina, the bullies will give back the doll but beat up Jonathan nonetheless after finding out he's from the Joestar family.
- If the player wins the boxing match against Dio, he claims that Jonathan put a rock in his glove during their fight, making the audience think Jonathan is a coward who can't fight fair.
- If the player uses an Awakening move in the underwater battle against Bruford during Chapter 13, a cutscene featuring the end of the battle will immediately take place, ending the chapter earlier. This cutscene, like most Awakening move cinematics, cannot be unlocked in Theater Mode. The player can still win the battle without using Awakening, but will not get to see the cutscene.
- If the player manages to get an S rank in Chapter 22 while playing Story Mode, a secret chapter will replace the regular Chapter 23 as the final battle; the game's menus refer to this secret chapter and the Extra Battle based on it as The Final Ripple! (Reverse) (最後の波紋!(裏)). This secret chapter can't be unlocked while playing in Chapter Mode, but can be accessed from Chapter Mode once it is unlocked.
- Even though the game faithfully follows the manga's storyline, some events were still cut from the game, including the Aztec Chief draining a follower's life force, Dio hiding a knife from George Joestar I, Danny's death, Dio's flashback to meeting Wang Chan, the Inspector's flashback, Wang Chan regrouping with Dio after his fight with Jonathan, the explanations of the trial of the 77 Rings and Bruford's hair, Zeppeli's flashbacks to his training, Dio's encounter with a mother and child, the newspaper excerpts describing the fate of the Stone Mask and Jonathan's marriage, and Father Styx's entire canon appearance (save in the alternate final chapter).
