Eyes of Heaven

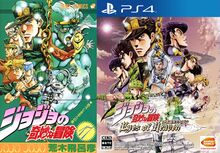
JoJo's Bizarre Adventure: Eyes of Heaven (ジョジョの奇妙な冒険 アイズオブヘブン, JoJo no Kimyō na Bōken Aizu Obu Hebun) is a tag team fighting game based on the JoJo's Bizarre Adventure franchise, developed by CyberConnect2 and published by Bandai Namco Games exclusively for the PlayStation 3 and PlayStation 4.

The game features 52 playable characters (53 with first print bonus), ranging from Phantom Blood to JoJolion. It was announced on Famitsu's January 15, 2015, issue and was presented at Jump Festa 2015.

The game was released on December 17, 2015, in Japan, June 28, 2016, in North America and July 1, 2016, in Europe.[2]

Gameplay

Eyes of Heaven is a 3D action brawler, described as Stylish Tag JoJo Action (スタイリッシュタッグジョジョアクション, Sutairisshu Taggu JoJo Akushon), set in relatively large arenas based on locations in the JoJo's Bizarre Adventure manga.

The game format is that of effective 2v2 matches between four characters, although either four players or two players and two CPUs will play. However, the game doesn't allow for local multiplayer but only online multiplayer in 1v1 or 2v2 matches.

During a match, each team has to deplete the enemy team's health gauges first before the end of the round. To do so, the characters have access to either basic attacks (A Normal Attack used to string basic combos and a Powerful Attack with combo-specific properties that can also be charged to perform an unblockable Takedown) or special skills. Skills usually take the form of unique, powerful abilities that can inflict higher damage to an opponent, but can also prepare/provide a number of advantages and bonuses when used. Each character usually has one skill they can occasionally perform that has notably more potent effects or damage compared to others, but also a greater cooldown. All special skills are subject to cooldowns during which a character cannot perform them again, though various buffs can increase cooldown speed. Certain skills have cooldown gauges that also serve to display secondary elements, such as how many times a skill can be used before being placed on cooldown, and the length of an effect or enhanced state. If a character is hit from behind, it is registered as a Backstab, increasing the damage dealt to them. Similarly, if a character is interrupted with an attack while they themselves are attacking or in the middle of a combo, a Combo Breaker will occur and grant an amount of Dual Heat Gauge to the offender.

Defensively speaking, a player can either block an attack to greatly reduce the damage taken and potentially counter, or dodge with a fast but short side-/back-step. Aside from evasion, Sidestepping can also be used to cancel out of attacks or certain skills in order to extend ground combos, or interrupt an unsafe maneuver.

All characters (except AU Diego) possess the ability to Homing Dash, allowing them to charge forward or toward their targets in short bursts at the cost of stamina in order to quickly close distance. Other abilities available to all characters are a Flash Burst and Flash Cancels, which are signified by a purple light and two smaller green lights by the player character's portrait, respectively. A Flash Burst will cause the character to pose with a burst of light, breaking them out of enemy combos by granting them invincibility and sending attackers flying; Flash Cancels instantly cancel a character's attack in order to open up more opportunities to make a combo. When a Flash Burst or Cancel is used, there is a long cooldown before they can be used again.

Both teams have a Dual Heat Gauge with six different sections that fill when dealing or taking damage, using special skills and abilities, or performing other tasks such as destroying stage objects. When one section of the gauge is filled, a team can activate a Dual Combo (デュアルコンボ, Dyuaru Konbo), entering a timed state where all stats are given a boost (attack damage, defense, movement speed, cooldown speed, etc). During a Dual Combo, the team can fill a special gauge by landing attacks on the enemy team before the timer runs out in order to perform a special cinematic Dual Combo Finish, further damaging opponents whilst restoring some health as a bonus reward. When three sections are filled, a team can then perform Dual Heat Attacks (デュアルヒートアタック, Dyuaru Hīto Attaku), causing the characters to pose before charging forward, cloaked in a red aura. If the charging character successfully connects with an opponent, a special cinematic joint attack will initiate, greatly damaging the target. Each time the Dual Heat Gauge is filled completely, it will reset but become more difficult to fill each time.

Moreover, the battle arena contains interactive items the characters can freely use for a number of goals. These include objects that can be thrown or trapped depending on the character, and stage-specific gimmicks such as knocking enemies down onto spikes to deal bonus damage and resting at a cafe to replenish health. Among the many stage objects are destructible red boxes containing temporary power-ups, such as attack and defense boosts, instantaneous cooldowns to all abilities, and even Dual Combo and DHA charges.

Characters have three health gauges which are depleted in succession until the character is "Retired", and knocked out of the fight. Each time a health bar is depleted, the character is temporarily knocked down before being able to resume fighting, permanently preventing them from restoring health past that point as well as granting them invincibility and therefore a chance to recover. For some characters, special effects may take place when they reach certain health levels. When a member of a team is Retired, their partner will be powered up to balance the number disadvantage under a Soul Succession (also referred to as "Inherited Will" in some descriptions). Soul Successions grant the character in question an extra purple health bar that will slowly deplete over time, and incredible power-ups to movement speed, skill cooldown speed, and attack damage, as well as super armor when attacking. All unused Dual Combo charges are unavailable for the rest of the match, while charges of Dual Heat Attacks are converted into Soul Succession charges. However, in rare scenarios where both fighters are defeated at the exact same time, no Soul Succession will occur and the match will end immediately.

Certain match-ups contain special animations and dialogue between two characters, mostly between allies in the form of unique, fully animated and cinematic Dual Heat Attacks.

Style Actions

All characters possess a Style Action, a singular special ability that predominantly acts as their main skill or unique gimmick, and is often representative of their Style and abilities as a fighter. For some characters, such as Rudol von Stroheim or Koichi Hirose, a Style Action takes the form of core abilities integral to their playstyle; for others such as Jotaro Kujo or Giorno Giovanna, their Style Actions may take the form of limited-use, tremendously powerful abilities that accessorize or augment their skill set. While Style Actions have little commonality, as their roles and utility differ between the playable characters, they ultimately share the trait of being important in how every fighter operates in combat.

Story Mode

The Story Mode includes a level system and ability tree for each character, and each playable character levels up using XP earned from Story Mode battles and missions, up to Lv. 50. Characters are originally available within the Story Mode with an incomplete set of techniques and lowered stats. These parameters can be unlocked by fighting with them and using the point rewards gained from levels to unlock a technique or improve the character's various stats in the tree. Stats such as health and attack strength automatically grow upon a character leveling up, and require no points.

Aside from recovering skills and abilities that were otherwise already available to the character as part of their core moveset, the ability tree also features upgrades granting exclusive enhancements not available in the standard Free Battle. Among these upgrades are reducing stamina consumption, reducing the cooldown on Flash Bursts and Flash Cancels, and increasing the effectiveness and duration of abilities beyond their normal limit. As a result, playable characters are functionally inferior to their Free Battle counterparts at Lv. 1, but eventually grow to surpass them in all areas when the tree is complete.

Battle Styles

Like in JoJo's Bizarre Adventure: All Star Battle, characters are categorized by Battle Styles which change how each character plays in the game, as well as their different strengths and weaknesses. "Ripple User" (波紋使い, Hamon-tsukai), "Vampire" (吸血鬼, Kyūketsuki), "Mode" (流法(モード), Mōdo), "Stand User" (スタンド使い, Sutando-tsukai), and "Mounted" (騎乗, Kijō) return from All Star Battle (with slightly different names), while Eyes of Heaven adds "Ogre Street" (食屍鬼街(オウガーストリート), Ōgā Sutorīto) and "The Prime Example of Superior German Science" (ゲルマン民族の最高知能の結晶, Geruman Minzoku no Saikō Chinō no Kesshō, literally "The Greatest Crystallized Intelligence of the German People") to the game. Vampires and the Mode-using Pillar Men still recover damage over time, unless the damage was dealt by a Ripple-enhanced attack, and also they can be paralyzed by ultraviolet lamps made from Superior German Science.

Also new in Eyes of Heaven is that characters that were previously classified in All Star Battle as having one Battle Style but displayed abilities of another are now classified as having two Battle Styles. For example, Old Joseph Joestar is now classed as both a Ripple User and a Stand User, while in the previous game he was only classified as a Stand User who happened to have Ripple-based abilities and attacks as well.

Storyline

The game features an original storyline supervised by Hirohiko Araki[3] and centers around a major timeline and universal interference within the JoJo universe affecting characters across all arcs, as well as the Saint's Corpse Parts.

SPOILER WARNING: Part spoiler details may follow.
Though the chains of destiny may bind you, though you may be fated to fight, know that a noble heart is as strong as a diamond, and as free as golden wind in the sky. Though you may be imprisoned in a sea of stone, you can keep walking toward the light. There's always a blessing waiting in the wings, and as many signposts to guide you as there are stars in the sky.

Chapter 1: Stardust Crusaders (スターダストクルセイダース, Sutādasuto Kuruseidāsu)
The story begins with the final battle between Jotaro Kujo and DIO in Egypt, 1988, as Jotaro defeats DIO as per the original storyline and burns his diary the following night. On their way back to Japan, Jotaro and Joseph Joestar are stopped by a young Robert E. O. Speedwagon at the airport shortly before Jean Pierre Polnareff returns to them, claiming to have been attacked on the plane before takeoff. The three subsequently encounter the thought-to-be-deceased Muhammad Avdol and Iggy, who meet the group with hostility, claiming that they were sent by "him". They flee the airport to avoid endangering civilians and, after a battle on the rooftops of Cairo, the two assailants are incapacitated. Immediately afterwards, Jotaro, Polnareff and Joseph are attacked by Noriaki Kakyoin and N'Doul, who were also thought to have been dead. After they are both defeated, N'Doul manages to escape, but Speedwagon uses a part of the Saint's Corpse he obtained beforehand to heal Kakyoin. Speedwagon explains that the Saint's Corpse Part in his possession has led him through time in search of an unknown danger that is causing strange phenomena, like bringing people back from the dead; thus, supposedly slowly destroying the time-space continuum. Speedwagon then enlists the Crusaders' help in gathering the remaining eight parts of the Saint's Corpse, just as the one in his possession resonates, indicating another part nearby. The part is found and kept by Jotaro, and Speedwagon guides the heroes through a "light rift", a dimensional crack from which light seeps out, where they travel to another time period to continue their search.

Chapter 2: Vento Aureo (黄金の風, Ōgon no Kaze)
A brief summary of the events of Vento Aureo is shown as Jotaro and Speedwagon appear at the Colosseum in 2001, where Guido Mista, Trish Una and Giorno Giovanna reside, having defeated Diavolo. After Mista and Trish suddenly disappear, Giorno is attacked by Bruno Bucciarati, who was originally supposed to be dead. Bucciarati is quickly fended off after Jotaro arrives at the scene and the two are then challenged by Narancia Ghirga and Pannacotta Fugo. After their defeat, Fugo disappears, but Jotaro is able to heal Narancia using the life energy of his Saint's Corpse part and brings him to their side. Jotaro and Giorno head to the Napoli Train Station where they find Polnareff; Giorno feels like he knows Polnareff from somewhere but cannot remember. Bucciarati appears once again with Vanilla Ice and after a brief bout, the two escape. Soon after Giorno finds and secures the third Saint's Corpse Part, Trish and Mista, who had been trapped by Bucciarati's Sticky Fingers when Giorno was not looking (thus explaining their disappearance), appear with Narancia and they recognize who Polnareff is, claiming that he is "Polnareff the Turtle" (by that time, the older Polnareff's soul was inhabiting Coco Jumbo's body). Polnareff is confused by this, so the group decides to it's best to pretend they don't know him. Speedwagon takes them inside Mr.President so the ever-growing group can cross over the light rifts without overloading them, which is done by way of Jotaro tucking Coco Jumbo into his jacket. Unknown to the heroes, they are spied on by a revived Diavolo, who is currently working for "that man".

Chapter 3: Diamond is Unbreakable (ダイヤモンドは砕けない, Daiyamondo wa Kudakenai)
Jotaro and Joseph arrive at Morioh in 1999. Joseph recognizes the town, but quickly changes the subject and walks off when Jotaro asks him about it. Soon after, Josuke Higashikata and Koichi Hirose find Jotaro, who asks them about strange happenings in town. As Koichi thinks about what to tell him, Okuyasu Nijimura and Rohan Kishibe appear and attack them for interfering with "his" plans, forcing Josuke and Koichi to battle them. After their defeat, Okuyasu and Rohan try to escape, but Jotaro uses Star Platinum's time stop ability to stop them in their tracks and heal them with his part of the Saint's Corpse. While Rohan is successfully healed, Okuyasu escapes and Josuke gives chase. Later, Jotaro finds Joseph and explains to him that they are ten years into their future, when Josuke appears, saying he trailed Okuyasu until he disappeared. After learning he is talking to a younger Jotaro, Josuke spots one of Harvest's beings and chases after it to gather them, having remembered that Shigechi died at the hands of Yoshikage Kira. One of them, however, escapes and returns to Shigechi who, joined by Akira Otoishi, confronts Josuke and Jotaro. After being defeated, Shigechi and Otoishi escape, and Jotaro asks Joseph to explain the situation to a very nervous Josuke. For obvious reasons, Joseph keeps trying to dodge it, until Jotaro forces him to do so by having them enter Mr.President. Rohan and Koichi soon join Jotaro, when Yukako Yamagishi appears, under the influence of a strange phenomenon and ready to fight them. After being defeated, Yukako disappears like the rest. Unexpectedly, Enya the Hag shows up and sends her zombies to attack Jotaro, Rohan and Koichi. After the zombies are defeated, Enya extols "his" virtues and "his" power to "overwrite" and leaves. Jotaro then convinces Rohan and Koichi to help him search for the Saint's Corpse Parts. As Josuke returns, Jotaro's Corpse Part starts resonating, and the fourth Corpse Part is given to Josuke for safekeeping. Joseph then reappears, showing a camera he found in Mr.President and, using Hermit Purple on it, a picture of a white-skinned DIO is developed - much to the Crusaders' shock, as they were assured of DIO's demise at Jotaro's hands.

Chapter 4: Phantom Blood (ファントムブラッド, Fantomu Buraddo)
The heroes' next stop is inside the Joestar Mansion, in 19th century England. Jotaro and Speedwagon arrive in this century as Speedwagon realizes that the Joestar Mansion was supposed to be destroyed from their previous battle with Dio Brando. They soon find a badly battered Jonathan Joestar, followed by the era's Dio, who commands his zombies to fight his opponents. Jonathan, helped by Jotaro, makes short work of them, and Dio, interested in Jotaro's Stand powers, decides to take matters into his own hands, joined by Diego Brando. Despite the animosity between them, they decide to team up to eliminate Jonathan (whom Diego recognizes as Johnny's counterpart), but Speedwagon takes his friend's place to fight them with Jotaro. When Dio and Diego are defeated, they flee, swearing revenge. Speedwagon then tells Jotaro about the first strange phenomenon they sensed: just after finding out Dio was hiding in Windknight's Lot, the Joestar Mansion, which had been burned to the ground, suddenly reappeared, infested with zombies: that was when Jonathan and Speedwagon found the first Saint's Corpse Part, and Jonathan stayed behind to secure the mansion. Speedwagon wanted to help, but was forcibly sent to retrieve the rest of the Saint's Corpse Parts. While a recovered Jonathan and Jotaro get acquainted, Mariah appears, shortly followed by Will Zeppeli, who is revived and now under the influence of the era's strange phenomenon. Jonathan sees no other choice than to fight his master, despite not being completely recovered. Still, he and Jotaro manage to defeat Zeppeli and Mariah, who escape. Speedwagon passes his Saint's Corpse Part on to Jonathan, who then collapses due to exhaustion. Speedwagon brings him to Mr.President so he can rest.

Chapter 5: Battle Tendency (戦闘潮流, Sentō Chōryū)
Jotaro arrives at Air Supplena Island along with Joseph, who tells him about the island and how they hope to get helpful information there. Upon seeing Caesar Zeppeli, along with his younger self, Joseph realizes they had gone back to 1938. Caesar and the young Joseph meet Jotaro and the old Joseph with some mistrust, when Lisa Lisa appears and attacks Caesar. Rudol von Stroheim appears afterwards, under the influence of a strange phenomenon like Lisa Lisa, and tells Joseph that "his" power brought him back to life, more powerful than before. Joseph decides to fight them, along with a hesitant Caesar. After they are defeated, Stroheim flees, but Lisa Lisa, left barely conscious, is brought back to normal by Jotaro. As Caesar takes her inside to rest, the young Joseph, still not knowing he is talking to his older self, manages to sense his Ripple by touching his shoulder. The old Joseph is reluctant to tell his younger self that they are one and the same, but Jotaro practically forces him to come clean. Joseph tells his younger self that they are traveling through time, and has the younger Speedwagon from the 19th century come out to prove his point. As the young Joseph recovers from the shock of these revelations, Jotaro senses someone else coming: it is Hol Horse, who confronts Jotaro for the Saint's Corpse Parts. He is, however, defeated, and after withholding information on "him" when asked by Jotaro, disappears like the others, before Caesar comes out, incensed. The younger Joseph tries to calm him down by making up a story about them being acquaintances of his when, suddenly, Esidisi, Wamuu and Kars appear, having trailed the Red Stone of Aja to an island next to Air Supplena and had made a stopgap. Wamuu asks if he can have his promised rematch with Joseph, but Kars instead sends vampires to attack the heroes. With the vampires defeated, Kars allows Wamuu to fight Joseph and sends Esidisi along with him, so the young Joseph and Caesar fight them together. When they manage to prevail over the two Pillar Men, Kars decides to take matters into his hands and fights them in the others' stead, since their priority is still the Red Stone of Aja. Even though Kars has been defeated, the old Joseph recognizes that the power of their Ripple is still not enough to take out the Pillar Men, when Lisa Lisa, recovered, decides to fight off the Pillar Men. Both iterations of Joseph observe that she hasn't completely recovered and would be defeated for sure until the old Joseph tackles the situation by bluffing Kars with knowledge of the Red Stone of Aja. After a lengthy "team talk" in which the young Joseph nearly blurts out his older self's identity, the old Joseph convinces the Pillar Men to give Joseph and Caesar six days to prepare for their final battle. They leave, but not before Esidisi expresses his desire to test out the old Joseph's Ripple in battle. When Lisa Lisa asks for the old Joseph's identity, he convinces them all to enter Mr.President so he can explain himself better. Left alone, Jotaro senses another Saint's Corpse Part and lets the young Joseph out so he can safeguard it.

Chapter 6: Stone Ocean (ストーンオーシャン, Sutōn Ōshan)
When Jotaro arrives, the first thing he notices is how the ground appears to be turned on its side: he is in the Cape Canaveral USAF Station after C-Moon used its powers to change the gravitational pull, in 2011. Looking further, he spots Jolyne Cujoh and Emporio Alniño talking about Enrico Pucci's newfound powers and how Jolyne is determined to not let Pucci get away from her when Jotaro approaches them. They are both relieved to see him alive and well, but Jolyne instantly realizes something's off when she sees her father looking about 20 years younger. Jotaro ponders about this, when they are approached by Ermes Costello and Narciso Anasui, who are affected by this age's strange phenomenon, and so Jotaro joins Jolyne in fighting them. After the fight, Jotaro manages to heal both Ermes and Anasui with his Saint's Corpse Part. When Anasui starts to get jealous of Jotaro, Jolyne ends up telling everyone he's her father, even though he is 20 years younger and has traveled from the past, surprising even the teenage Jotaro. Not wanting to bother with explanations, he asks Joseph, who by this point is starting to get annoyed, to get Jolyne and her friends up to speed. Ermes, Anasui and Emporio follow Joseph into Mr.President, but Jolyne stays behind long enough to spot a phenomenon-possessed Weather Report. Once he is defeated, he disappears, and Pucci comes out to confront Jotaro and Jolyne, accompanied by Pet Shop. Pucci explains that "his friend" has shown him a greater truth than the path to Heaven he once sought, and now he strives to achieve this truth; in order to do so, he must defeat Jotaro and Jolyne, body and soul. He, however, ends up defeated, but regardless explains that he has found the true path to Heaven and intends to guide the people of the world to eternal bliss through this path, which he calls the "Eyes of Heaven". As he and Pet Shop leave, Pucci warns Jotaro that once all of the Saint's Corpse Parts are gathered, that is when "his friend" will draw open the curtains to Heaven. Jotaro is left to think about how Pucci could be the cause of the strange phenomena, and what the "truth" he mentioned could be, as his Saint's Corpse Part starts resonating. The sixth Saint's Corpse Part is found and entrusted to Jolyne. While departing to Morioh, the heroes are unaware that Funny Valentine is watching them from the shadows. After taking a detour to 1999 Morioh to pick up a report of Rohan's notes on the phenomena, Jotaro finds himself unable to exit Morioh through the light rift. Speedwagon observes that the rift has built a protective wall around itself, and only someone "qualified" can get through. At that moment, one of the Saint's Corpse Parts resonates amongst all the JoJos assembled there, which is quickly revealed to be Josuke's, followed by Jonathan's, meaning they are the only ones who can cross the rift to the next era, while the rest stays at Morioh. Feeling a bit bothered, Jolyne decides to go for a walk, stopping at the Cafe Deux Magots, where she meets Daniel J. D'Arby, who tries to goad Jolyne into a wager. Observing that she has seen through his loaded deck, he tries a game of heads-or-tails. D'Arby then appears to digress by talking about Jolyne's star birthmark, until he mentions the "Eyes of Heaven" just as he tosses his coin, and it lands on tails, as he had called before. Jotaro arrives too late to warn Jolyne about D'Arby, as Osiris steals her soul immediately afterwards. Jotaro then finds out that D'Arby's coin is loaded, with tails on both faces. Determined not to be humiliated again, D'Arby challenges Jotaro to a poker game, with Jolyne's soul on the line; Jotaro ups the ante by wagering his own soul as well. As before, Jotaro manages to win by calling D'Arby's bluffs and eroding his composure, thus restoring Jolyne's soul to her. Before disappearing, D'Arby warns Jotaro that "his" power is not to be trifled with, but "he" will fight if confronted. Jotaro deduces that it has something to do with "overwriting the truth", having put together the hints that were dropped earlier by Enya and Pucci, and has a hunch of who could have such a power.

Chapter 7: Steel Ball Run (スティール・ボール・ラン, Sutīru Bōru Ran)
Jonathan finds himself alone in the 1890's U.S.A. of the alternate timeline, along a coastline. He looks around and sees Johnny Joestar, kneeling on the ground, next to a Saint's Corpse Part. As Jonathan tries to approach him, Valentine appears before Johnny, apparently unharmed after taking the full power of Johnny's Golden Rotation. Valentine explains that someone interrupted their fight and it went unfinished, then turns his attention to Jonathan. He tells him to continue gathering the Corpse Parts, and warns him that, when all are gathered, the true battle will start, before vanishing. Johnny then notices the Corpse Part that was next to him is gone, while Jonathan uses his Ripple to heal Slow Dancer's wounded leg. He then asks Johnny about the Parts, showing his own, when Johnny, in despair, almost accuses Jonathan of being a thief, before straightening out his thoughts and allowing Jonathan to tell him about the quest for the Saint's Corpse Parts and all that happened so far. Johnny accepts to help Jonathan because he, too, is searching for the Corpse Parts. They depart through the light rift to a village in the Rocky Mountains, where Johnny spots a prowling dinosaur (a villager transformed by Scary Monsters) and brings Jonathan into hiding with him. Johnny thinks it is weird, because he saw Diego dying at the New Jersey Railway. Jonathan tells Johnny that he had met Diego before, and Johnny deduces he is using the dinosaurs to look for the Saint's Corpse Parts. They decide to leave to gather the Corpse Parts, when Diego appears and summons his dinosaurs to stop the Joestars. They, however, manage to defeat the creatures, and Dio joins Diego, warning that he will be the one to take out Jonathan, as is his fate, while Diego takes it upon himself to deal with Johnny. After they are defeated and leave, Valentine reappears, bringing along a phenomenon-possessed Gyro Zeppeli. Johnny refuses to believe this, as Valentine goads him into powering his Stand up to the fullest. Johnny and Jonathan manage to defeat Gyro and Valentine, and Johnny's attempts to get to Gyro are in vain, as he escapes, still influenced by the phenomenon. Valentine then praises Johnny's potential, but tells them about Giorno's power, which is expected to be on par with "his". After he leaves, Jonathan's Saint's Corpse Part resonates, indicating the presence of another Corpse Part, which is entrusted to Johnny, who laments the losses in his life. Jonathan sympathizes with him, then tries to cheer him up by saying that, with the Corpse Parts, they may be able to fight off the strange phenomena and save his friends.

Chapter 8: JoJolion (ジョジョリオン, JoJorion)
Josuke, in the meantime, is sent to the Higashikata Family Estate, in the Morioh of the alternate timeline, only noticing Jonathan is not with him after taking in his surroundings. In the distance, he spots Joshu Higashikata and the alternate Josuke Higashikata. Joshu is, as usual, whining how Josuke is always getting the best of him, until Josuke spots an abnormal purple energy swirling behind Joshu, which soon engulfs him. Knowing what this means, Josuke 4 decides to act fast. As he attempts to explain the situation to Josuke 8, Joshu stands up, the corruption fueling his resentment; Josuke 4 quickly joins Josuke 8 to take on him, and they defeat him handily, despite their mutual lack of familiarity with Joshu's own Stand, Nut King Call. Josuke 4 heals Joshu with his Saint's Corpse Part, but knocks him down again when he starts to get confrontational, thinking he hasn't been healed. Josuke 8 recognizes the Corpse Part, and Josuke 4 fills him in on their quest. Having seen the Saint's Corpse Part he had heard about, Josuke 8 agrees to lend his help, as Josuke 4 feels they are being watched. The one who was observing them reveals himself: it's Yoshikage Kira, joined by another Kira, this one impersonating Kosaku Kawajiri. The combined power of both Josukes manages to bring both Kiras down, and they disappear expressing their desire for a "peaceful life" and, as such, the Saint's Corpse Parts do not matter to them. After they leave, Joshu wakes up, not remembering what happened, but shocked all the same. Josuke 4's Saint's Corpse Part then starts resonating, indicating another Corpse Part nearby, which is found and entrusted to Josuke 8. When Josuke 8 accepts to join the quest for the Corpse Parts, Joshu also decides he wants to tag along.

Chapter 9: Wicked Star (凶星, Kyōsei)
At the prime universe Morioh, Speedwagon and Jotaro are waiting for Jonathan and Josuke 4 to return, the former worried about his friend. Jonathan reappears along with Johnny, shortly followed by Josuke 4, Josuke 8 and Joshu. Speedwagon then assembles the JoJos to review which Corpse Parts they have:

  • Jonathan has the eyes;
  • Young Joseph, the ears;
  • Jotaro, the torso;
  • Josuke 4, the left arm;
  • Giorno, the head;
  • Jolyne, the right arm;
  • Johnny, the legs;
  • and Josuke 8, the heart.

Speedwagon then wonders where the final Corpse Part could be. Giorno then remembers that, when Bucciarati and Fugo escaped, they were enveloped in lights similar to those of the Saint's Corpse Parts before disappearing, and wonders if there could be any connection. Suddenly, Enya appears, taunting the Joestars about how they will never find the final Corpse Part, the vertebral spine, which "he" has already seized. She says that they are destined to be slaughtered and have the Corpse Parts stolen away, but as "he" cannot be bothered with that, she will take it upon herself to eliminate them by attacking along with her zombies. Despite being outraged at her defeat, Enya says she has fulfilled her duties to investigate on them and leaves. Suddenly, everything starts trembling, and the reality around them gets distorted: the Joestars are all transported to some sort of celestial ocean. A figure approaches them, stating that the gathered Corpse Parts reacted with the Corpse's spine and sent them to that place, which he dubs "The Foundation of the World". Jotaro's hunch is confirmed as the one speaking to them is none other than DIO, looking much different than before, with pale white skin and longer hair. Johnny charges forward, hoping that defeating DIO will bring Gyro back, but DIO's significantly powered-up The World easily repels his attack with Tusk ACT4, but just before he can attack Johnny, Giorno has Gold Experience Requiem stop the attack and, while he is repelled, Jotaro lands a blow with Star Platinum. DIO uses his godlike healing factor to roll with the punch and knocks Johnny, Jotaro and Giorno away at the same time. DIO then uses the Saint's Corpse's spine to draw the other Corpse Parts to him, absorbing them into himself, and amplifying his power even further. Before DIO can eliminate the Joestars, however, light rifts appear at their feet. As they escape, DIO realizes there is still one part of the corpse missing - the one that Jotaro kept with himself. DIO is annoyed that, even in the universal interference world he created, he must be the one to deal with Jotaro, considering him as his greatest threat and the Joestar Group's last hope. He then asks Enya to give the Corpse Parts in his possession to his underlings so that they can pursue Jotaro and the others. Finally, DIO contemplates how, once he has the last Corpse Part in his possession, he will orchestrate the extinction of the Joestars with his evolved Stand, The World Over Heaven.

Chapter 10: Dead Man Gambling (遺体を賭けたゲーム, Itai o Kaketa Gēmu)
The Joestars reappear at Air Supplena Island. Johnny is angered that his attack could not do a thing to DIO. Giorno states that he could feel as if The World Over Heaven had nullified Gold Experience Requiem's momentum, and had never seen anything like it. At that point, Valentine appears and challenges Jotaro to a fight, as he wants to witness the power of Star Platinum. After the fight, Valentine has figured out that Star Platinum and The World are the same type of Stands, even after the Stands evolving, much like Jotaro's adult self from 11 years in the future, which is why DIO could not take Jotaro's Corpse Part. He explains that his goal had always been gathering the Corpse Parts, but Johnny had captured him with his Infinite Rotation technique, so he used Dirty Deeds Done Dirt Cheap to escape to a parallel Earth which, incidentally, was very similar to the main Earth - except that, in that parallel Earth, DIO was not defeated by Jotaro; instead, the opposite happened, and DIO evolved his Stand to the maximum as he took over the world. Valentine then tried to bring DIO over to destroy Johnny, but his Stand was too overwhelmingly powerful; his ambition far more dangerous than he anticipated. Realizing that the world he ruled was only one of many, DIO decided to invade the main world and conquer it. Valentine then confesses that he wishes to defeat DIO; he pretended to be loyal and help him invade the original universe, while seeking someone who could defeat him, and found that someone in Jotaro. Valentine himself could not figure out any secret behind the power of The World Over Heaven, but he noticed how DIO could not steal the Corpse Part held by Jotaro, and realized that could not have been a coincidence. He says that he does not want the Corpse Parts for the power to invade worlds, but for the prosperity of his country and its citizens, but he alone cannot avoid DIO's conquering march over the United States, as well as the rest of the world. He states that finding the secret to DIO's power is the key to defeat him, and only Jotaro can do that. He then gives DIO's plan away, telling the Joestars to recover the stolen Corpse Parts so they can turn the tables. Valentine also confirms to Joseph that identical objects/beings from different timelines within the same world can safely interact with one another, after Valentine demonstrates the effects between his gun and his counterpart's gun which was stolen by Johnny. Lastly, Valentine points out that while DIO was defeated in the main world, there are still his mortal remains. He explains that when something from a world meets the same thing from another world, they extinguish each other. DIO's case is different, though, since he no longer exists in the main world. Jotaro points out that he left DIO's corpse under the sun to burn away, and was sure nothing was left of him, but Valentine replies that some of DIO's missing remains still lie where he was defeated by Jotaro. After a brief demonstration of his and Johnny's guns colliding and effectively destroying each other, Valentine decides to end the conversation, leaving the Joestars to decide whether to believe him or not, but hoping they will make the right decision. Johnny remains reticent about not trusting Valentine, and Speedwagon wants to figure out an explanation for DIO's powers, but Jonathan reminds them they now have to retrieve the Saint's Corpse Parts. Giorno then asks Johnny whether he felt DIO's counterattack repelling Tusk ACT4, and Johnny says it was more like he nullified his attack. Giorno says that he felt DIO's Stand similar to Gold Experience Requiem, but with an opposite power: in the fight, he sensed that DIO used his power to "overwrite the truth" of their attacks getting through to him. Speedwagon dismisses the notion, stating that this would make it impossible to beat DIO, but Jonathan says he will fight all the same, if only to figure out DIO's weakness. The others also give their reasons to fight, concluding with Jotaro offering four good reasons to fight: to retrieve the Saint's Corpse Parts, bring back the friends DIO has been manipulating, find out the secret to his power so he can be defeated... and because he's getting tired of DIO.
Afterwards, Jotaro heads for Morioh-Prime, as he would likely find a Corpse Part holder there. He soon finds D'Arby back at the Cafe Deux Magots. He goes to propose him a gamble. If D'Arby wins, Jotaro lets him take his soul along with his Corpse Part; if Jotaro wins, D'Arby will have to surrender his Corpse Part and tell him the secret of DIO's Stand. D'Arby gets nervous for a moment, but says that the detailed knowledge of DIO's power is far away from him; however, he agrees to wager a "name". Jotaro manages to defeat him again, and D'Arby, after surrendering his Corpse Part (the left arm), gives Pucci's name as the only one who knows about DIO's power, as his right-hand man. He also reveals that DIO's power has one thing in common with his Stand: they both have a relation with souls. While D'Arby collects souls for fun, DIO needs souls to manifest his power. Jotaro muses whether that has any relation to DIO's notes that he burned after destroying him. D'Arby then suggests that Jotaro look for Pucci, since he has no more information than what he has just said.
The next stop is the village in the Rocky Mountains in the parallel world, where Okuyasu and Stroheim appear before Jotaro. They both challenge him for his Corpse Parts, but the young Joseph and Josuke 4 soon appear to even the odds. With both of them defeated, Jotaro manages to heal them with his Corpse Part, just as Will Zeppeli and Gyro show up to battle. Sure enough, Jonathan and Johnny appear to take matters into their hands. Once defeated, they too are healed, and Jotaro retrieves the Corpse's heart while Jonathan explains the situation to the others, who accept to join the heroes.
Jotaro then travels back to 1988 Cairo, right at the bridge where he defeated DIO. There he finds DIO's bracelets and, remembering what Valentine said about identical objects/beings from different worlds cancelling each other out, believes that they might be useful.
Next, at Napoli Train Station, Jotaro is challenged by Bucciarati, when Giorno, Mista, Trish and Narancia all step up to battle him. Bucciarati is also defeated and healed, and Jotaro retrieves the Saint's Corpse's ears. After Giorno explains to him the situation, Bucciarati agrees to lend his aid.
The next stop in the trip through time is at Green Dolphin Street Prison, where Yukako appears to challenge Jotaro. Koichi is brought out along with his friends. Josuke 4 is worried about Koichi, but the boy assures him that he will fight to save Yukako. They manage to defeat her and bring her back to her senses, when Josuke 4 senses someone else coming: it is the two Kiras, stating that they do not really care for DIO's mission, but are there to get their revenge on Josuke and his friends. They are defeated, but swear that this is not the end and they will come back to kill each and every one of the heroes if they dare disturb their "tranquility" again. After they leave, Jotaro recovers the Corpse's right arm that the Kiras left behind, while Koichi fills Yukako in on what has been happening so far.
At the rebuilt Joestar Mansion, Pucci informs DIO that Jotaro has managed to retrieve half of the Corpse Parts he entrusted to his "pawns", and brought a number of them back to normal. DIO is not worried, because the Saint's Corpse is influenced by its owner, which may cause its spiritual strength to grow bigger, and the Parts are simply means to an end. What is important at the moment are "the souls of more than 36 sinners". He states that the criminals that turned their backs to heaven are influenced by the Joestar bloodline, and may eventually stand against him. This is why he will have to absorb these sinners' souls, to uphold his conviction of conquering the world. Pucci then tells DIO that "he" was found as one of the sinners. DIO says he will deal with him and starts to leave, when Pucci asks him, in case those souls weren't worth sacrificing, if he would do away with him. DIO answers affirmatively and leaves. Left alone, Pucci asks those who would hinder their way to Heaven to protect their souls.

Chapter 11: The Man Who Desired Heaven (天国を望んだ男, Tengoku o Nozonda Otoko)
The next stop in the quest to retrieve the Saint's Corpse Parts is Boing-Boing Cape in Morioh, where Shigechi and Otoishi instantly appear to challenge Jotaro, Josuke 4 and Okuyasu. After they are defeated and healed, Weather Report appears and is confronted by Jolyne and Anasui. Like the others, he is brought back to his senses once beaten. Jotaro then retrieves the Saint's Corpse's head.
In the meantime, Valentine appears in 1988 Cairo, now very tired after trying to escape through multiple parallel worlds. He is suddenly brought before DIO, who has heard that Valentine told the Joestars about his power, and asks if he is planning a way to defeat him. After a long time of hesitation, Valentine speaks up and says that what he wants is justice, and attacks DIO, who simply uses The World Over Heaven to erase Valentine from existence.
Back to the heroes, they head to the Colosseum next. At first, nothing seems to be happening, but then Giorno and the others sense that time has been subtly accelerated, and they come to one conclusion: they have come within range of King Crimson, Diavolo's Stand. Diavolo shows up, revealing his intention of defeating Giorno first. After he is defeated by Giorno and Trish, Diavolo surrenders his Corpse Part (the legs) to them and leaves.
Returning to Air Supplena Island, the group is confronted by Diego and Dio, who are defeated once again and flee. Before Jotaro can take another step, Avdol and Iggy appear before him to fight, so Joseph, Kakyoin and Polnareff are brought out to bring their friends back to normal. Once Avdol and Iggy are defeated, they too are freed from DIO's control with the power of Jotaro's Saint's Corpse Part. While Joseph decides to tell Avdol the whole story later, Polnareff takes the time to try and get friendly with Iggy, who inevitably attacks him.
Next, Jotaro heads for the Joestar Mansion, where Pucci is waiting. Pucci already knows what Jotaro is going to ask him, and says that there is nothing they can do against DIO's power, going on to say that those foolish enough to oppose him will face Heaven's judgement, as zombies come out to attack. Once they are dealt with, Jotaro asks if Pucci will come and fight, to which the priest says they are in a place of destiny, as it was in the Joestar Mansion where everything began. There, DIO showed him his destiny: a higher path to Heaven to walk on and to guide people through, and he will demonstrate the Heaven he is aiming for to those before him now. That is the "truth", and those who receive it will receive bliss, thus the "Eyes of Heaven" he seeks are a plan for the people's salvation. However, Jotaro doesn't care for this, and seeing it would be a waste of time to pry DIO's secrets from Pucci, he decides to show him his own power instead. Despite being defeated by Jotaro and Jolyne, Pucci knows that the young Jotaro will summon older Joseph to uses Hermit Purple to find the weakness of DIO's new form in which Pucci knows inside his memories, and says that he feels a strange tranquility, because DIO is close to the next step in his goal: the souls of the "36 Sinners" are those of the very expanded Joestar Group; DIO intends to offer them as his sacrifices. He says that, in the world's current state, each person has only one soul, but wonders what if they could have more and what would happen. After proclaiming his love for DIO, Pucci then commits suicide by throwing himself from a balcony and is impaled on the Love Goddess's statue, thus preventing the heroes from finding out DIO's weakness. Even with this setback, Jotaro proceeds to retrieve the Saint's Corpse's eyes.

Chapter 12: The World Over Heaven (ザー・ワールド・オーバーヘブン, Zā Wārudo Ōbā Hebun)
The JoJos and Speedwagon return to Egypt to confront Heaven Ascension DIO in order to stop him. Jotaro and Jolyne face DIO in battle where he demonstrates his power, including the ability to turn Jolyne against Jotaro. Jotaro and Jolyne seemingly defeat him, only for DIO to immediately heal himself and reveal that his real motive was to mark Coco Jumbo with The World Over Heaven, thus obtaining it and thus all of those inside the turtle. Jotaro and Jolyne prepare to battle DIO once again, while the other JoJos and Speedwagon go forth into other worlds to face an ally once again in three different battles. However, Giorno realizes too late that it's all a ploy by DIO to separate the other JoJos from Jotaro and Jolyne, thus allowing him to kill the other JoJos and Speedwagon before absorbing their souls, along with all of their allies' souls and the Saint's Corpse Parts. Further empowered, DIO rewrites the universe to his own liking, but Jotaro and Jolyne stand in his way. After a final showdown, DIO kills Jolyne and absorbs her soul before preparing to destroy Jotaro once and for all. This does not work out properly for DIO, when Star Platinum (which is the same as DIO's) evolves to become Star Platinum Over Heaven, overwriting DIO's reality. The fight proceeds and DIO appears to once again gain the upper hand and attempts to finish Jotaro off. However, having remembered Valentine's warnings about identical objects/beings from different worlds not being able to exist simultaneously, Jotaro pulls out the original DIO's bracelets, which fuse with Heaven Ascension DIO's bracelets and destroy his hands, thus making him unable to use The World Over Heaven. Enraged by this, Heaven Ascension DIO tries to deliver a fatal blow (by repeating the original DIO's final, fatal mistake and attempting to blind Jotaro with his own blood), but Jotaro successfully retaliates and kills DIO with one final punch, once again stating that he only did it because DIO "pissed him off".

As a result of Heaven Ascension DIO's death, all of the timelines and realities are restored and Jotaro returns to meeting Joseph and a fully-healed Polnareff. They're informed that Kakyoin, Avdol and Iggy are resting in Cairo Hospital, as Jotaro realizes that he's in a new timeline, which gives him a sense of deja vu, having prevented their deaths in the previous timeline. After visiting the previously-deceased, Jotaro, Joseph and Polnareff return to the airport, where Jotaro and Joseph head back home, while Polnareff stays behind in Egypt to take care of his friends after the end of another bizarre adventure. After Jotaro and Joseph depart for Japan and promise to return to Egypt to visit their friends after they make a full recovery, the scene ends with Kakyoin, Avdol and Iggy recuperating in Cairo Hospital.

After the credits are shown, a photo montage shows events that happen in the JoJo universe as a result of the new timeline:

  • Jonathan facing off against Dio, with a surviving Will Zeppeli at Speedwagon's side looking on.
  • Joseph and a surviving Caesar facing off against Wamuu and a surviving Esidisi together at the Skeleton Heel Stone.
  • Josuke 4, Koichi and Okuyasu hanging out together with a surviving Shigechi, with the real Kosaku Kawajiri walking by the group.
  • Giorno as the new boss of Passione, with all the members of Team Bucciarati (including Leone Abbacchio) at his side.
  • Jolyne shown together with Ermes, Emporio, Anasui, Weather Report and a middle-aged Jotaro.
  • Johnny and a surviving Gyro battling the alternate Diego Brando.
  • Josuke 8 together with Joshu, seemingly getting along.
  • Jotaro and Joseph reuniting with Polnareff, Avdol, Kakyoin and Iggy at the airport.

Epilogue: 11 years after the events of the game (after Part 3's new timeline), Koichi encounters an incredibly tall man arriving in Morioh, accompanied by his young daughter. He had decided to bring her along because she kept throwing tantrums. After she runs off to look at a turtle, the tall man asks Koichi about the location of a certain Josuke Higashikata...

Dual Heat Attacks

Dual Heat Attacks (デュアルヒートアタック, Dyuaru Hīto Attaku, DHA) are cinematic team combo specials that can be activated once the Dual Heat Gauge is filled in a match. Its activation sound effect is similar to the Time Stop sound effect from All Star Battle.
Most DHA's consist of the secondary player attacking briefly, followed by the player who initiated the attack performing a cinematic move reminiscent of an HHA or GHA from All Star Battle.

Normal Dual Heat Attacks

Here's a list describing the cinematic moves performed by the player who initiated the attack after the secondary player briefly making their move.

  • Jonathan Joestar performs his memorable Sunlight Yellow Overdrive, visually similar to the one he uses against Bruford the Black in Chapter 29, with an added combo leading up to the climactic barrage.
  • Will A. Zeppeli performs a move similar to Ripple of the Sun (Taiyou no Hamon) as he strikes the opponent with his little finger and readies his Ripple, but then instead of performing the Zoom Punch, he jumps at the opponent similarly to how he attacked Dio in Chapter 25 and ends the move with a Sunlight Yellow Overdrive, filling the opponent with the Ripple.
  • Robert E. O. Speedwagon throws his Buzzsaw Hat at the opponent with accuracy and it hurts the opponent with its blades, a reference to how he fought Jonathan in Chapter 9. Speedwagon then exclaims that it sounds like "steel is cutting into bone" and grins as the opponent is sent away.
  • Dio Brando performs the freezing technique he used against Dire in Chapter 38, beginning with a short beat down before shattering his victim while laughing.

  • Joseph Joestar performs the Ripple Clacker Volley, in which he stuns the opponent with a hidden rope, pulls from his back his signature clackers filled with Ripple energy, and then slingshots them into his opponent from all directions before a last powerful strike, similar to how he defeated Esidisi in Chapter 80.
  • Caesar A. Zeppeli launches a multitude of bubble lenses which ambush the opponent and fry them with multiple redirected beams of light; this is a functional version of the technique Caesar performed against Wamuu in his last fight in Chapter 92.
  • Lisa Lisa uses her scarf to ensnare the victim before beating them senseless, a nod to how she defeated Wired Beck in Chapter 94.
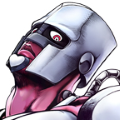
  • Rudol von Stroheim charges and blasts his Ultraviolet Radiation Beam at the opponent similarly to how he used it against Kars in Chapter 108. He then proceeds to activate and fire his Abdominal Machine Gun at the opponent, ending the move with a laughter of mockery.
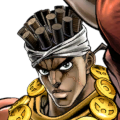
  • Wamuu performs his Final Mode: Gathering Gale, which turns his horn into a giant wind-based drill, which he slaughters his opponent with.
  • Esidisi's move consists of him sticking his blood vessels inside the opponent from multiple directions and pumping them full of his boiling blood, lighting them ablaze, similarly to how he fought Joseph in Chapter 80.
  • Kars performs a series of cuts through the opponent with his Light Blades. He then pauses for a moment, and after they fall down, he rushes forward for an instant finishing blow with a delayed effect on them.
    • As the Ultimate Life Form, Kars hits the opponent twice with his blades, dropping them to the ground. He then exclaims that since he had now tamed the sun, he may as well use the power of the Ripple. Kars then charges it briefly before conducting a powerful Ripple attack by merely touching his opponent, a nod to Chapter 109.

  • Jotaro Kujo commands Star Platinum to punch the enemy, and then exclaims that he will smash the opponent's head. Star Platinum then proceeds to deliver a mighty barrage of punches, and ends the move with a strike the resembles the way he crushed DIO's skull.
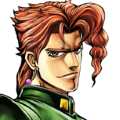
  • Noriaki Kakyoin performs the memorable “20m Radius Emerald Splash”, in which he creates a large web of Hierophant Green's string, before launching the opponent into it and ricocheting them over the entire web as he shoots many emeralds all over the screen, ending with a point-blank Emerald Splash.
  • Old Joseph Joestar has Hermit Purple wrap the opponent, with Joseph slamming them down hard into the ground hard before reeling them in for a powerful Ripple-charged chop to the neck.
  • Muhammad Avdol performs his Crossfire Hurricane Special, where he decimates the opponent with several of his ankh-shaped fire blasts.
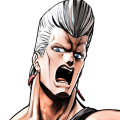
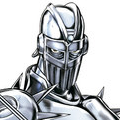
  • Jean Pierre Polnareff performs a very fast assault with Silver Chariot’s afterimages that attacks the opponent from all sides, before skewering them completely.
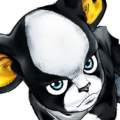
  • Iggy calls The Fool to summon a massive sand wave that smashes the opponent into the air many times, before Iggy himself dives forward and bites the opponent on the nose, similar to his victory over Pet Shop. In his alternate costume, when Iggy dives into the opponent, he instead clamps onto their head and then farts directly into their face, similar to what he did to Polnareff frequently.
  • Hol Horse shoots a glass bottle over his opponent as to allow J. Geil's Stand, Hanged Man, to stab them in the shoulder, while Hol Horse shoots the opponent in the forehead, similar to how the two defeated Avdol.
  • N'Doul calls Geb to hit the opponent in the face, before dragging them away while continuing hitting them. N'Doul then exclaims that he is aware of the enemy's location, and that it's time to finish them, commanding Geb to deliver a powerful strike from below. N'Doul then laughs as he says the opponent's sounds have disappeared.
  • Mariah electrifies the opponent as it is shown they have stepped on Bastet. She then reveals that she has stuffed her top with screws and bolts, which fly towards the opponent and magnetize them, attracting a nearby car that falls at the opponent and explodes as Mariah does her signature laughter.
  • Pet Shop flies around as he summons Horus, that freezes the opponent. Pet Shop then flies at the enemy with an icy spike inside his beak, performing a strike that shatters the frozen adversary.
  • Vanilla Ice summons Cream to carve a violent closing spiral on the opponent before thrashing them relentlessly.
  • DIO walks toward the opponent exclaiming that he will show them his true power. Time is then stopped by The World and it delivers a single but powerful punch that sends the enemy away, a reminiscent of how DIO killed Kakyoin in Chapter 255.

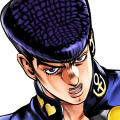
  • Josuke Higashikata has Crazy Diamond actually heal the enemy to their maximum health before throwing a "DORA" barrage at them, similar to how he defeated Yuya Fungami.
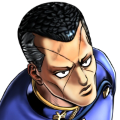
  • Okuyasu Nijimura has him use The Hand to repeatedly attack the opponent with its power, and after a final hit, he grins, with a flowerpot flying out of nowhere and hitting him in the face, causing a sliver of damage to himself as well, similar to how Okuyasu defeated himself against Josuke.
  • Jotaro Kujo (Part 4) performs the exact same move as his Part 3 counterpart; He commands Star Platinum to punch the enemy, and then exclaims that he will smash the opponent's head. Star Platinum then proceeds to deliver a mighty barrage of punches, and ends the move with a strike the resembles the way he crushed DIO's skull.
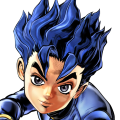
  • Koichi Hirose has Echoes Act 1 pelt the victim with a barrage of deafening sounds, Act 2 knock them high into the air, and finishes with Act 3 beating them up with 3 Freeze and inflicting his increased gravity on them, causing them to fall down hard.
  • Rohan Kishibe has Heaven's Door turns a small section of the opponent's face into "material" before Rohan rips out a page. The damage is relatively small, but he seals the opponent's special moves for 5 count of the battle timer.
  • Shigechi has Harvest swarming and covering the opponent head-to-toe, each individual Harvest beating them up before they all punch simultaneously to send the opponent flying.
  • Yukako Yamagishi uses Love Deluxe to expand and control her hair into covering the enemy and beating them by slamming them to the ground a few times.
  • Akira Otoishi has imaginary spot lights shine on Akira wailing on his guitar as if he were performing at a concert, all while Red Hot Chili Pepper endlessly beats his opponent to the rhythm.
  • Yoshikage Kira has Killer Queen perform a downward chop at the opponent that primes them. Then, after blowing them up into the air multiple times, Killer Queen triggers one final explosion while Kira adjusts his tie.
  • Kosaku Kawajiri uses Bites The Dust, where Kira brings out Hayato, who subsequently runs from him and potentially into the opponent. By then the camera zooms into the opponent's eye, where the image of Killer Queen is in it as Hayato screams shortly before the opponent is detonated from the inside, activating the time loop. The round timer rewinds ten seconds and Kosaku regains some health. If the opponent has gone through a transformation (i.e. Gold Experience Requiem, Ultimate Life Form, Made In Heaven), they are reverted back to their previous states. 

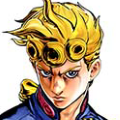
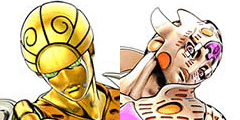
  • Giorno Giovanna has Golden Experience perform a harsh and long barrage of punches resulting in a powerful uppercut.
    • With Gold Experience Requiem, Giorno has it nullify everything, dragging the enemy to the state of "point zero" before relentlessly finishing them with a barrage of punches, a nod to how Giorno defeated Diavolo.
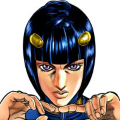
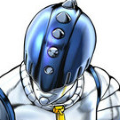
  • Bruno Bucciarati has Sticky Fingers uppercut the opponent into the air from a zipper below them, before both Bruno and Sticky Fingers come out from that same zipper to deliver his famous barrage of punches used against Pesci, ending with him saying "Arrivederci!" ("Farewell!") as the opponent is sent flying.
  • Guido Mista shoots 6 bullets that leave the opponent open, before quick reloading (dropping bullets into the chamber from his hat) and unloading into them, each bullet getting redirected by Sex Pistols multiple times, ending with Sex Pistols kicking the last bullet in group unison straight into the opponent's forehead.
  • Narancia Ghirga has Aerosmith shoot the opponent into the air, after which Narancia says "Volare via!" ("Fly Away!") before Aerosmith drops a bomb on the foe.
  • Pannacotta Fugo calls Purple Haze and commands it to punch the opponent. As he comments on the stand's ferocity, Purple Haze delivers a punch barrage that breaks one of its capsules, releasing the virus into the opponent and having it consume them.
  • Trish Una has Spice Girl punch the ground, its power making the enemy disoriented. Spice Girl then strikes the enemy twice; first up and then down, having them bounce up and suffer through a barrage of punches.
  • Diavolo has King Crimson knock down the opponent and then erase time, leaving behind an image of his opponent before King Crimson emerges behind the victim and chops into their clavicle.

  • Jolyne Cujoh runs at the enemy and kicks them into the air, before kicking them consecutively and bringing Stone Free to deliver a brutal strike to their face.
  • Ermes Costello has Kiss punch the opponent, then kick them away. She then places two of her stickers in herself, duplicating her and her stand's arms before delivering a barrage of punches until the opponent is sent away.
  • Narciso Anasui has Diver Down phase into the opponents' body, destroying them from the inside before delivering a final kick that pierces them.
  • Weather Report has his stand dash at the opponent, grabbing and lifting them up while performing a series of aerial attacks. As the opponent is dropped to the ground, Weather summons dark clouds that hover over the opponent before striking them with lightning.
  • Enrico Pucci has Whitesnake pull a disc out of the opponent, sealing Style-related moves from them until the disc is retrieved.
  • New Pucci has C-Moon punch the ground, altering gravity, before delivering a massive attack to the opponent's stomach, sending them away as they are crushed by force.
    • With Made in Heaven, Pucci has the stand attack from all sides with its unbelievable speed, then punches the opponent at their stomach.

  • Johnny Joestar has himself thrown off his horse, activating Tusk Act 4, after which he shoots his opponent before Tusk flies in and starts punching them repeatedly, before bearing through the opponent with an enlarged Tusk Act 4 head appearing behind the opponent, similar to how he attacked Funny Valentine.
  • Gyro Zeppeli performs a Steel Ball attack with Ball Breaker infusing itself with the Steel Ball, invoking the Super Spin, lifting the target into the air as a result as Ball Breaker comes out from behind them.
  • Diego Brando slashes the opponent, before delivering a series of multiple hits with his bare hands that shred the opponent all culminating in a massive blow.
  • Funny Valentine pulls the opponent to a parallel world and throws them at their alternate version, creating a paradox and obliterating both of them as they dissolve into Menger Sponges, like he did against Diego Brando and Wekapipo.
  • Diego Brando (AU) has The World stop time. Diego then throws many knives at the opponent and time resumes to move as they hit them.

  • Josuke Higashikata has Soft & Wet's soap bubble steal the friction from his opponent's body, then after a barrage of attacks, Soft & Wet hits them one final time, sending him spinning out and colliding with the stage wall.
  • Joshu Higashikata has Nut King Call dismantle the opponent as Joshu comments over his surprise in being able to do just that.

Special Dual Heat Attacks

Some specific character combinations, however, have Special Dual Heat Attacks, with their own unique name and cinematic animations, usually recreating scenes from the manga or completely new scenarios. Teams with Special DHA's are listed below:

  • "Here comes my Ripple!" (例の波紋でいくか, Rei no Hamon de Iku ka, lit. Let Us Use That Aforementioned Ripple) Jonathan Joestar & Will Anthonio Zeppeli: The two of them attack the opponent's head, sequentially with a Ripple-charged Zoom Punch from Jonathan and a Sendo Wave Kick from Zeppeli, before they charge up and run up to the opponent and unleash a double Sendo Ripple Overdrive-enhanced Zoom Punch into them, the two reciting the phrase commonly associated with Overdrives.

  • "Dual Ripple!" (ふたつの波紋, Futatsu no Hamon, lit. Double Ripple) Joseph Joestar & Caesar Anthonio Zeppeli: The two start off by attacking the opponent from opposite sides with a series of Ripple-charged punches and kicks from Joseph and an array of Ripple-infused bubbles from Caesar, before Joseph invites Caesar to initiate the Positive/Negative Overdrive they used on Suzi Q to save her from from Esidisi's control, attacking the enemy from both sides with said move and shocking them with extreme power.
  • "This master and student's beat will cut you deep!" (刻むぜ師弟のビート, Kizamu ze Shitei no Bīto, lit. Etch With the Beat of the Teacher and Student) Joseph Joestar & Lisa Lisa: Running up to the opponent, Lisa Lisa strikes with multiple Ripple-powered kicks and scarf swing, before Joseph ties up the opponent with a rope he had laid during her assault. They then channel a Ripple surge into the Red Stone of Aja, causing it to launch a deadly beam at the helpless opponent.

  • "Use the edge of the ring—just like sumo." (土俵際のかけひき, Dohyōgiwa no Kakehiki, lit. Sumo Tactics) Jotaro Kujo & Noriaki Kakyoin: Kakyoin holds the opponent in place with Hierophant Green, allowing Jotaro and Star Platinum to pull them in by Hierophant Green's tail and unleash a barrage of punches that sends them flying. Kakyoin appears once more behind the enemy mid-air to deliver an Emerald Splash. Throughout the whole attack, Jotaro and Kakyoin converse about Sumo, referencing the events in the Wheel of Fortune chapters.
  • "Let's put the final nail in the coffin." (いくぜダメ押し, Iku ze Dameoshi, lit. Let's Finish It) Jotaro Kujo & Jean Pierre Polnareff: Jotaro and Polnareff summon Star Platinum and Silver Chariot to take turns attacking the opponent. Star Platinum follows with an uppercut, and the two of them begin yelling out their Stand Cries ("ORAORAORA!" and "HORAHORAHORA!") while pummeling and stabbing the opponent, respectively. This attack references how they defeat Alessi in Chapter 209.
  • "It's not cheating if the secret doesn't get out!" (バレなきゃイカサマじゃあない, Barenakya Ikasama jaa Nai, lit. It's Not Cheating If You Don't Get Caught) Jotaro Kujo & Old Joseph Joestar: Joseph jumps into the air and tries to snare the opponent with Hermit Purple, only to miss. Briefly shocked and emoting his iconic "OH MY GOD!" as Jotaro expresses disappointment, he drops the facade to reveal that he had tied the opponent with a rope during his previous attack, subsequently sending a Ripple current through the rope to shock them as Jotaro and Star Platinum move in to barrage them into submission. The name of this attack is a reference to a line said by Jotaro against Telence T. D'Arby.
  • "Double Bind!" (ダブルバインド, Daburu Baindo) Old Joseph Joestar & Muhammad Avdol: Avdol fires an attack from Magician's Red that surrounds the opponent before Joseph strikes them with a Ripple-empowered Hermit Purple over his wrist throwing them into the air; they both capture the opponent with their respective abilities, before coming together and firing their Stands at the opponent overhead as they're burnt using a combination of the Ripple and Magician's Red's fire.
  • "Flame Rapier" (炎のレイピア, Honō no Reipia) Jean Pierre Polnareff & Muhammad Avdol: Avdol binds the opponent with Red Bind, then Magician's Red sets fire to Silver Chariot's rapier. Polnareff thanks him as Silver Chariot assaults the trapped enemy with its red-hot blade and activates an explosion when the rush ends.
  • "Mad Dance of Sand and Swords" (剣と砂の乱舞, Ken to Suna no Ranbu) Jean Pierre Polnareff & Iggy: Polnareff calls for Iggy's assistance only to turn around and see him taking a nap; Angry, Polnareff furiously attacks the opponent with Silver Chariot and jumps into the air, before Iggy ultimately joins him as the two deliver a finishing blow with their Stands diving through.

  • "Hey, are we gonna do this, or what?" (おい、やんのかよ, Oi, Yanno ka yo, lit. Hey, Do You Wanna Fight?) Josuke Higashikata & Okuyasu Nijimura: Okuyasu has The Hand bring their opponent closer by eliminating a wide space in front of them, leaving them staggered. After Josuke and Okuyasu briefly and excitedly share comments, The Hand and Crazy Diamond pummel their target with a dual Stand barrage followed by a joint uppercut that sends them high into the air.
  • "Dorara Rush ×2" (ドララのラッシユ×2, Dorara no Rasshu Kakeru Ni) Josuke Higashikata & Koichi Hirose: Koichi has Echoes ACT2 place SFX of Crazy Diamond's Stand Cry ("DORARARA!!") directly under the opponent's feet. He then prompts Josuke to attack, watching as he jumps high into the air until he is directly above the opponent. The SFX then activates, creating artificially-made fists to attack from below as Crazy Diamond punches the opponent from above, hitting them from both sides.
  • "I really hate this guy…" (スゲー嫌いだよ、こいつ…, Sugē Kirai dayo Koitsu…) Josuke Higashikata & Rohan Kishibe: Rohan uses Heaven's Door to write within the opponent "My body will fly forwards at 70 km/hr." as he begins to tell Josuke something; revealing soon after that he hates him. The opponent is sent flying at Josuke in an attempt to cause a collision, forcing him to use Crazy Diamond to pummel them away.
  • "We're best friends!" (僕たちは親友, Boku-tachi wa Shin'yū) Koichi Hirose & Rohan Kishibe: Koichi uses Echoes 3 Freeze to make the opponent heavier, before Rohan uses Heaven's Door to write in the opponent "My weight will increase 10-fold.", combining the effects and multiplying their weight to such a degree that it causes them to slam face-first and sink into the ground with enough force to generate a crater.
  • "Invincible Heroine" (無敵のヒロイン, Muteki no Hiroin) Koichi Hirose & Yukako Yamagishi: Koichi uses 3 Freeze to make the opponent heavier, then Yukako wraps them in her hair before attempting to fling them around. Despite struggling with the increased weight of the opponent, she successfully slams them into the ground four times before raising them extremely high up into the air and launching them into the ground one more time hard enough to generate a shockwave.

  • "Double Arrivederci" (ダブルアリーヴェデルチ, Daburu Arīvederutchi) Giorno Giovanna & Bruno Bucciarati: Giorno has Gold Experience punch the opponent away and onto the ground, before Bucciarati has Sticky Fingers place a zipper on the ground. The zipper rapidly closes and two ride it to close the distance on their target, before they leap into the air. In unison, both Giorno and Bucciarati inform the opponent of their resolve before Gold Experience and Sticky Fingers pummel their target while letting out their Stand Cries. The two Stands glow with golden and blue auras, respectively, and finish their assault with a joint uppercut that sends the opponent high into the air, while both users bid them an "Arrivederci".
  • "True preparation!!" (『覚悟』とは!!, Kakugo to wa!, lit. This Is "Resolve"!!) Giorno Giovanna & Guido Mista: Mista, claiming that his true resolve has just begun, aggressively fires away at the opponent, each shot getting redirected by Sex Pistols multiple times to hit them at different angles. Giorno subsequently appears and jumps high into the air until he is directly above the opponent. Following up on Mista's statement by telling him that true resolve "isn't about self-sacrifice", Giorno proceeds to stomp down on the target several times with Gold Experience, the final kick hitting with the impact to launch him off and create a shockwave. Both attacks are references to the two's battle against Ghiaccio.
  • "I'm gonna send you flying!" (ブッ飛ばしてやるぜーッ!, Buttobashite yaru zē!!) Narancia Ghirga & Guido Mista: Mista unloads an entire clip at the opponent, each bullet carried by Sex Pistols and kicked into them at different angles; Narancia follows up by having Aerosmith unleash an extended barrage of machine-gun bullets into the opponent, turning upward to spear and carry them into the air as it's ridden by the Pistols. Performing a somersault, Aerosmith ends the attack by firing at the airborne opponent from above and sending them crashing into the ground while Sex Pistols cheer.
  • "Two people, two short fuses!" (短気な2人, Tanki na Futari, lit. Two Short-Tempered People) Narancia Ghirga & Pannacotta Fugo: Fugo has Purple Haze assault the opponent, firing its Virus Capsules at them after sending them flying. He then prompts Narancia to attack, with the two watching as Aerosmith shoots both the opponent and the capsules surrounding them, causing the capsules to break open and the target to completely melt.

  • "We're gonna beat your ass!" (あたしたちがぶちのめす, Atashi-tachi ga Buchinomesu) Jolyne Cujoh & Ermes Costello: Ermes uses Kiss' stickers to create multiple arms for Jolyne and Stone Free. Having done so without warning, Ermes is reprimanded by Jolyne who knows that the stickers' removal will cause her pain. Ermes reminds Jolyne that they are in the middle of a fight, forcing Stone Free to angrily pummel the opponent with an extra set of fists and blowing them back as Ermes laughs.
  • "The momentum's on our side!" (風はこちらへ吹いているわ!, Kaze wa Kochira e Fuiteiru wa, lit. The Wind Is Blowing Here!) Jolyne Cujoh & Weather Report: Stone Free assaults the opponent as Weather Report creates an opposing gale that keeps the opponent in place. Stone Free's fists ultimately overpower the gale and the enemy is sent flying into Weather Report, setting them on fire via friction.

  • "GO! GO! GO!" (GOッ!GO!!GO!, Gō! Gō!! Gō!) Johnny Joestar & Gyro Zeppeli: The two riding on their horses, Gyro throws a Steel Ball while Johnny shoots a Nail Bullet, both infused with the Super Spin. As a result, Ball Breaker and Tusk ACT4 fly side-by-side towards the opponent. After Tusk briefly pummels the target, both Stands fly through their midsection as the power of the two Super Spins generate a massive energy explosion.

  • "We're friends, right?" (俺たちは仲間だよな…?, Ore-tachi wa Nakama da yo na...?) Josuke Higashikata (JoJolion) & Joshu Higashikata: Josuke and Joshu discuss their "friendship" status as Soft & Wet delivers a punch that downs the opponent. Joshu and Nut King Call hastily move in to finish them off, but fails to notice a bubble by Soft & Wet that steals the ground's friction, making him slip and spin out of control. Accelerating to high-speeds, Joshu is only stopped when he inevitably crashes into the downed opponent as Josuke humorously looks on.

  • "The Sickest and the Strongest" (最凶と最強, Saikyō to Saikyō, lit. The Fiercest and the Strongest) Dio Brando & DIO: Dio freezes the opponent and attempts to unleash Space Ripper Stingy Eyes, quickly interrupted by DIO stopping time and pummeling them with The World into the air. DIO resumes time as to allow Dio to fire off the attack, tilting his head to the side to avoid getting hit and watches as the beams obliterate the frozen opponent.
  • "Gotta be cool, at my age." (カッコつけたいお年頃, Kakko-tsuketai Otoshigoro) Josuke Higashikata & Old Joseph Joestar: Josuke & Crazy Diamond pummel the target, with the final punch sending them high into the air. Old Joseph then comes from behind Josuke and uses Hermit Purple to bind the airborne opponent. Yanking on his Stand and pulling them in, Old Joseph then charges and delivers a forceful Ripple-infused downward chop to blast the target away once more, leaving Josuke impressed.
  • "Surpassing Existence!" (越えるべき存在, Koerubeki Sonzai, lit. There Should Be More Than This) Giorno Giovanna & DIO: DIO summons The World to batter the opponent, before being joined by Giorno and Gold Experience. After exchanging looks, both of them yell out their shared Stand Cry in unison and attack their target with steadily increasing power, before delivering a combined powerful strike that sends the opponent reeling.
  • "The Perfect Angle" (ちょっといい角度, Chotto Ii Kakudo, lit. The Best Angle) Jolyne Cujoh & Jotaro Kujo: Star Platinum and Stone Free send the opponent into the air with a dual uppercut, before Jolyne wraps them in a cocoon made of Stone Free's string. After Jotaro confirms the best angle to hit, they pummel it with both of their Stands.
  • "Rulers of Time and Gravity" (時と重力の支配者, Toki to Jūryoku no Shihaisha, lit. The Rulers of Time and Gravity) New Moon Pucci & DIO: This DHA is only available with Pucci using Made in Heaven. DIO stops time and throws a barrage of knives. As time resumes, Pucci speeds up the knives' flight using Made in Heaven to make them hit their target with more power. Pucci then uses MiH's power to allow DIO the ability to get close to the enemy with extreme haste and deliver a singular punch that launches them off.

Characters

Playable


Ripple
Ripple
Ogre Street
Vampire

Stand
Stand/Ripple
Stand
Stand
Stand
Stand
Stand
Stand
Stand
Stand
Stand/Vampire
Stand/Vampire

Stand
Stand
Stand
Stand
Stand
Stand
Stand
Stand
Stand
Stand

Stands

Template:EOH Stands

Non-playable Characters

Characters that only exist in menus, Stage Gimmicks, special abilities, or the story mode.

  • George Joestar I (CV: Masashi Sugawara)- Appears in Jojo Glossary and as a support in Story Mode.
  • Erina Joestar - Appears as a support in Story Mode.
  • Tonpetty (CV: Tamio Ōki)- Appears as a support in Story Mode.
  • Dire - Appears as a support in Story Mode.
  • Kempo Master (CV: Itaru Yamamoto)-appears as one of Speedwagon's assists.
  • Tattoo (CV: Hiroaki Tajiri)-appears as one of Speedwagon's assists.

  • Santana (CV: Kenji Nomura)- Appears as a support in Story Mode.
  • Old Robert E. O. Speedwagon - Appears as the narrator of Mode Select.
  • Messina - Appears as one of the narrators in Free Battle and in the background of the Air Supplena Island stage.
  • Loggins - Appears as one of the narrators in Free Battle and in the background of the Air Supplena Island stage.

  • Old Joseph Joestar (CV: Unsho Ishizuka)- Appears as the narrator of Story Select, although he is also playable.
  • Death Thirteen (CV: Ikue Ohtani)- Appears as a Support in Story Mode and a stage gimmick in Nightmare World.
  • Alessi (CV: Masaya Onosaka)- Appears as a support in Story Mode.
  • Rubber Soul (CV: Shinji Kawada)- Appears as a support in Story Mode.
  • Enya the Hag (CV: Reiko Suzuki)- Appears as an enemy NPC in a beat-em-up mini-game against zombies.
  • Hanged Man (CV: Takuya Kirimoto)- Appears as a support in Story Mode.
  • Daniel J. D'Arby (CV: Banjō Ginga)- Appears as the opponent in a poker mini-game.
  • Gray Fly (CV: Katsumi Chō)- Appears as a support in Story Mode.

  • Yuya Fungami (CV: Kanbara Daichi )- Appears as a support in Story Mode.
  • Aya Tsuji (CV: Kaoru Mizuhashi)- Appears as the narrator of Customize and as a support in Story Mode.
  • Tonio Trussardi - Appears as a support in Story Mode.
  • Tamami Kobayashi - Appears as a support in Story Mode.
  • Ken Oyanagi - Appears as a support in Story Mode.
  • Reimi Sugimoto - Appears in Morioh Situation Finish and as a support in Story Mode.
  • Hayato Kawajiri - Appears in Kosaku's DHA and in the Manga Cutscene in Chapter 3.
  • Yoshihiro Kira - Appears in Kosaku's special ability.

  • Leone Abbacchio - Appears as a support in Story Mode, in the Manga Cutscene in Chapter 2, and in the post-credits image.
  • Illuso (CV: Kazuya Nakai)- Appears as a support in Story Mode.
  • Tiziano - Appears as a support in Story Mode.
  • Squalo (CV: Norihisa Mori)- Appears as a support in Story Mode.
  • Melone (CV: Kenji Nojima)- Appears as the narrator of Options.
  • Risotto Nero (CV: Takaya Kuroda)- Appears as a support in Story Mode.
  • Pesci (CV: Shinya Fukumatsu)- Appears as a stage gimmick in Naples Station and as a support in Story Mode.
  • Prosciutto (CV: Takuma Terashima)- Appears as a stage gimmick in Naples Station and as a support in Story Mode.
  • Cioccolata - Appears as a support in Story Mode.

  • Viviano Westwood (CV: Takaya Hashi)- Appears as a support in Story Mode.
  • Emporio Alniño (CV: Junko Kitanishi)- Appears as the narrator of Gallery, as an NPC, a stage gimmick in Green Dolphin Street Prison and in the Manga Cutscene in Chapter 6.
  • Foo Fighters - Appears as a support in Story Mode.
  • Gwess (CV: Takako Honda)- Appears as a stage gimmick in Green Dolphin Street Prison.
  • Sports Maxx (CV: Kosuke Toriumi)- His Stand appears as a stage gimmick in Green Dolphin Street Prison.
  • Miuccia Miuller (CV: Akeno Watanabe)- Appears as a support in Story Mode.
  • Rikiel (CV: Takashi Kondo)- Appears as a support in Story Mode.

  • Steven Steel - Appears as the narrator of Online, a Support in Story Mode and in the Manga Cutscene in Chapter 7.
  • Lucy Steel - Appears as a support in Story Mode and in the Manga Cutscene in Chapter 7.
  • Pocoloco - Appears as a support in Story Mode.
  • Wekapipo - Appears as a support in Story Mode.
  • Axl RO (CV: Taku Yashiro)- Appears as a support in Story Mode.
  • Sandman (CV: Hirofumi Nojima)- Appears in the Manga Cutscene in Chapter 7 and as a support in Story Mode.
  • Benjamin Boom Boom (CV: Kazuhiro Yamaji)- Appears as a support in Story Mode.
  • Hot Pants (CV: Megumi Toyoguchi)- Appears as a support in Story Mode.
  • Ringo Roadagain - Appears as a support in Story Mode and in the Manga Cutscene in Chapter 7.
  • Sugar Mountain - Appears as a support in Story Mode.
  • D-I-S-C-O - Appears in the Manga Cutscene in Chapter 7.

  • Yasuho Hirose - Appears in the Manga Cutscene in Chapter 8 and as a support in Story Mode.
  • Tsurugi Higashikata (CV: Yuka Iguchi)- Appears as a stage gimmick in Higashikata House and in the Manga Cutscene in Chapter 8.
  • Norisuke Higashikata IV (CV: Jūrōta Kosugi)- Appears as the narrator of the Shop and in the Manga Cutscene in Chapter 8. He is also in the background of the Higashikata House stage.
  • Daiya Higashikata (CV: Saori Hayami) - Appears in the Manga Cutscene in Chapter 8, in the background in Higashikata House and as a support in Story Mode.
  • Hato Higashikata - Appears in the background in Higashikata House and in the Manga Cutscene in Chapter 8.
  • Jobin Higashikata - Appears in the background in Higashikata House and in the Manga Cutscene in Chapter 8.
  • Mitsuba Higashikata - Appears in the Manga Cutscene in Chapter 8.
  • Kyo Nijimura - Appears in the Manga Cutscene in Chapter 8.
  • Yotsuyu Yagiyama (CV: Matsukaze Masaya)- Appears as a support in Story Mode.

Stages

Stages are designed as large, dynamic 3D environments with varying altitudes. Much like All Star Battle, most contain gimmicks, hazards, and situation finishes. When a certain Situation Finish is performed on the correct character on the corresponding stage, a colored manga panel is displayed.

  • Joestar Mansion (ジョースター邸, Jōsutā-tei)
    • Stage Gimmick 1: When players are close to broken windows, Zombies can grab and hurt them and leave them open to attacks.
    • Stage Gimmick 2: Throughout the match, the raging fires will grow in intensity and cause harm.
    • Situation Finish: Loser is thrown onto the Love Goddess's statue, recreating Dio's first defeat.

  • Air Supplena Island (エア・サプレーナ島, Ea Sapurēna-tō)
    • Stage Gimmick: The spikes on the stage cause gradual damage to every character except Ripple user (until their stamina meter runs out), vampire, and Pillar Men characters. Big damage is taken if characters are knocked down onto them.

  • Nightmare World (悪夢世界(ナイトメア・ワールド), Naitomea Wārudo)
    • Stage Gimmick: Death Thirteen appears and attacks the players. It has a health bar of its own and can be attacked and defeated by the players.
  • Cairo Street Rooftops (カイロ市街屋上, Kairo Shigai Okujō)
    • Stage Gimmick: Players knocked into the neon "AIR" sign will cause the individual letters to malfunction and fall forward, dealing additional damage to the victim and electrocuting anybody in range.
    • Situation Finish: Loser is sent crashing into a water tower, recreating Kakyoin's death scene. If Kakyoin himself is the victim, the manga panel showing his death appears, and his body is left there for the rest of the match.

  • Boing-Boing Cape (ボヨヨン岬, Boyoyon-misaki)
    • Stage Gimmick 1: Anyone that falls off the cliff may be bounced back up due to the SFX created by Echoes ACT2, recreating Koichi's saving of Yukako.
    • Stage Gimmick 2: Various "bouncing" SFX created by Echoes ACT2 can bounce players to various locations around the stage.
    • Stage Gimmick 3: Various "sizzling" SFX created by Echoes ACT2 can harm and knock back characters who touch it, potentially into the "bouncing" SFX.
  • Morioh (杜王町, Moriō-cho)
    • Stage Gimmick 1: Players can ride and attack from Rohan's motorbike, allowing quick traversal of the map. The bike can also be picked up and thrown as an explosive, inflicting heavy damage and setting the target area on fire.
    • Stage Gimmick 2: Cafe Deux Magots serves an espresso to players who stop by at the glowing table, restoring health.
    • Situation Finish: The hands from Reimi's Alley grab the loser and drag them into the abyss.

  • Naples Station (ネアポリス駅, Neaporisu-eki)
    • Stage Gimmick 1: Prosciutto patrols the area, attacking anyone who comes near with their respective Stands. Grateful Dead ages everyone on stage, slowing them down to a walk. Ice trays found around the stage can nullify the effect.
    • Stage Gimmick 2: After Prosciutto is defeated, Pesci will come out of the train and snare anyone in his field of view with Beach Boy, leaving them vulnerable to opponents and slamming them into the side of the train if they do not escape.
  • Colosseum (コロッセオ, Korosseo)
    • Stage Gimmick 1: Mr.President's key can be found lying about the stage. Anyone who picks it up can enter Coco Jumbo, also slowly wandering the stage, in order to restore health and heal status ailments.
    • Stage Gimmick 2: Chariot Requiem appears after a certain amount of time and causes any players within range to fall asleep and be left vulnerable for some time. The soul that is its weakness will follow a random character, frequently switching. Destroying it will banish Requiem.

  • Green Dolphin Street Prison (G.D.st 刑務所, Gurīn Dorufin Sutorīto Keimusho)
    • Stage Gimmick 1: Gwess's Goo Goo Dolls can shrink opponents, making them take more damage, but must be paid using money found around the map first. Shrunken characters can enter the grates in the map, allowing escape from pursuers.
    • Stage Gimmick 2: Emporio's ability lets players teleport around the map.
    • Stage Gimmick 3: Sports Maxx's Limp Bizkit sets an invisible zombie alligator out into the prison, attacking whoever gets in its way. Has its own health bar.
  • Cape Canaveral (ケープ・カナベラル, Kēpu Kanaberaru)
    • Stage Gimmick: At a certain point during the natural progression of the battle the gravity of the stage shifts and turns it on its side, completely changing the map.

  • Rocky Mountain Town (ロッキー山脈麓の村, Rokkī-sanmyaku Fumoto no Mura)
    • Stage Gimmick: Several dinosaurs created by Diego can attack the players.

These Stages only appear in Story Mode.

  • Cairo Bridge (Chapter 1)
  • Cairo Street (Chapter 1 & Final)
  • Cairo Airport (Chapter 1 & Final)
  • Philadelphia Coastline (Chapter 7)
  • Heaven DIO's Stage (Chapter 9 & 10)
  • Destroyed Cairo Bridge (Chapter Final)

Gallery

Template:EOHGallery

Trailers

Trivia

  • The games' cover is an homage to the cover of the seventeenth volume of the series. Moreover, several character postures directly reference artwork and other famous drawings by Araki.
  • A demo was presented at Jump Festa 2015 with 7 characters: Joseph Joestar, Caesar Zeppeli, Rudol von Stroheim, Jotaro Kujo, Noriaki Kakyoin, Josuke Higashikata, and Diego Brando. It was released afterwards on PSN for PS4 only.[4]
  • Unlike the previous game, most of the pre-Part 4 character's voice actors, default color scheme and clothing match their anime counterparts.
    • Some characters outside the anime, prior to Part 4's anime debut were also recast as a result of their voice actors being used in the anime.
  • In an interview with CyberConnect2's boss, Hiroshi Matsuyama, he made a point in saying the game had no paid DLC or microtransactions.[3]
  • Jotaro Kujo and his Part 4's self, Enrico Pucci and his New Moon form, Diego Brando and THE WORLD Diego cannot team up, presumably due to the characters not being involved around the storyline's chapters, unlike both Part 2/younger and Part 3/older Joseph Joestars, Dio Brando and his Part 3 DIO form, and Yoshikage Kira and his Kosaku Kawajiri disguise.
  • In the Naples Station stage, there is a sign displaying Araki's previous work, Gorgeous Irene.
  • Under the effects of Prosciutto's The Grateful Dead in the Naples Station stage, the icons for the characters visibly get older with wrinkles and white hair. However, Dio, the Pillar Men, and Stroheim do not age.
  • Despite the fingers of his right hand being in-tact, D'Arby still uses his left hand to pick up and hold his cards in this game.
  • Joseph has a model without Caesar's headband for story mode, but it is not usable in any other modes.

Unused Content

  • An interview details the process that went into deciding what characters to feature in the game, with the developer saying that there were 120 characters put up for consideration and the list was gradually narrowed down to the 52 that made it into the game.[5]
    • Leone Abbacchio made it into beta testing, but there were difficulties in making Moody Blues viable in gameplay, particularly with how they planned on making it replay other characters' attacks. His model remains in the game and he appears in an image in the credits of the story mode.
    • Ringo Roadagain, Tarkus, Bruford, various denizens of Morioh, and others were also considered as characters.
  • The game may have originally been intended to be a sequel to All Star Battle, as a few unused files in the game's data and the main folder directory for sound effects and music are titled "ASB2".
    • DIO's original Great Heat Attack from ASB with his steamroller model was left intact, as well as files for his GHA's unique interaction with Jotaro despite the attack no longer appearing in Eyes of Heaven.
    • Some characters have new voices recorded for Stand Clashes (Rush Mode) which was featured in ASB, but is not a feature in Eyes of Heaven.
  • Part 6 Jotaro has several unused voice clips and interactions with other characters within the game's data, suggesting he was intended to either be an alternate costume for Part 4 Jotaro or a separate character altogether. There is also an unused image of his shocked face which all the other characters have, including Tequila Joseph and Weather Report (Wes Bluemarine).[6] In the actual game, he only appears in an image in the credits. Unlike Abbacchio, his model is not included in the game's data.
  • Weather Report has an unused alternate costume of his cloud uniform from the Lang Rangler battle.
  • The special Heritage for the Future outfits for Jotaro and Polnareff from All Star Battle were not included. In ASB, their filenames were "3jtr51" and "3pln21". In the data of Eyes of Heaven, the filenames for the new costumes for Jotaro and Polnareff do not replace these numbers but come after them. For example, after "3pln11", the next outfit for Polnareff is "3pln31" rather than "3pln21".
    • Similarly, Pannacotta Fugo's outfit from Purple Haze Feedback was removed in Eyes of Heaven. It was previously named "5fgo11", but the costumes in EoH skip from "5fgo01" (regular) to "5fgo21" (new costume of his younger appearance).
  • The Inspector from Phantom Blood as well as King Nothing and Yotsuyu Yagiyama from JoJolion have unused models.
  • All characters have voices for GoGoGo Finishers recorded despite the mechanic only appearing in the first and second demos of the game for a small number of characters, before being removed in the full game.
  • Several unique voice lines of characters reacting to their partner getting Retired in battle are included in the files, but only a few can be heard in the game.
 
Cairo street stage
  • A few generic battle intros and unique interactions for some characters were not used.
  • There are voice files of the narrator saying "2P Wins", "3P Wins", and "4P Wins", suggesting that either a free-for-all mode and-or local multiplayer was planned.
  • The streets of Cairo were going to be an additional playable stage like the stage featured in ASB, rather than only the rooftops of buildings in Cairo.

Localization

  • Lisa Lisa is listed as being born in 1988 in one of the Glossary entries, despite her being born around 1888. In the original Japanese game, it is correctly listed as 1888.
  • In Jean Pierre Polnareff's Ability Tree, there is a typo saying Style Action: "Hermit Purple!" effect Time Extension when instead it should say "Off comes the Armor!"
  • Originally Stroheim's default outfit was the Nazi uniform, with the cyborg one being his alternate. Over in the West, the Nazi costume has been completely removed and his default outfit is now the cyborg one.[7]
  • In the Support Items shop, the "A burning rock is falling from the sky and heading straight toward me..." item, which has the effect of nullifying the extra damage received from Combo Breakers, contains a major error listing its description as "Earn 2x JoJo Points after the battle."; This effect belongs to the "I'm in the prime of my life right now! Ehee hee!" item.

See also

References

Site Navigation