Windknight's Lot: Difference between revisions
Paisley Park (talk | contribs) m →Site Navigation: clean up |
No edit summary |
||
| (47 intermediate revisions by 15 users not shown) | |||
| Line 1: | Line 1: | ||
{{Location |
{{Location Infobox |
||
|title |
|title = Windknight's Lot |
||
|image |
|image = {{Tabber |
||
Manga |
|Manga|[[File:Wingknights.png|{{ImageSize}}]] |
||
|Anime|[[File:WindK.png|{{ImageSize}}]] |
|||
|-| |
|||
|Film|[[File:PBMovie-WindknightsCastle.jpg|{{ImageSize}}]] |
|||
}} |
|||
|-| |
|||
|ja_kanji = {{ruby|風の騎士たちの町|ウインドナイツ・ロット}} |
|||
Film = [[File:294204 249658075076655 2057495224 n.jpg|{{ImageSize}}]] |
|||
|namesake = {{W|'Salem's Lot}}{{Ref-Note|The original title of [[Chapter 21]], {{Nihongo|"Cursed Town"|呪われた町|Norowareta Machi}}, in which Windknight's Lot is introduced, is the same as the Japanese title of ''{{W|'Salem's Lot}}''.}} {{S|{{W|Stephen King}} novel}} |
|||
</tabber> |
|||
|ja_romaji = Uindonaitsu Rotto |
|||
|ja_kanji = {{ruby|風の騎士たちの町|ウインドナイツ・ロット}} |
|||
|engname |
|engname = Wind Knights Lot |
||
|type = {{W|Hamlet (place)|Hamlet}} |
|||
|namesake = {{W|'Salem's Lot}} ({{W|Stephen King}} novel)<ref>{{Cite}}</ref> |
|||
|ja_romaji = Uindonaitsu Rotto |
|||
|type = {{W|Hamlet (place)|Hamlet}} |
|||
|population = 517<ref name=C21>{{Ch|Chapter 21}}</ref><br />452<ref name=C41>{{Ch|Chapter 41}}</ref> |
|population = 517<ref name=C21>{{Ch|Chapter 21}}</ref><br />452<ref name=C41>{{Ch|Chapter 41}}</ref> |
||
|place |
|place = {{W|England}}; South of {{W|London}} {{Flag|UK}} |
||
|mangadebut = |
|mangadebut = [[Chapter 21]] |
||
|animedebut = |
|animedebut = [[Episode 5]] |
||
|colors |
|colors = PhantomBlood |
||
}} |
|||
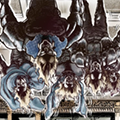
}}{{Nihongo|'''Windknight's Lot'''|{{ruby|風の騎士たちの町|ウインドナイツ・ロット}}|Uindonaitsu Rotto}} is a small town featured in the first part of ''[[JoJo's Bizarre Adventure]]'', ''[[Phantom Blood]]''. |
|||
{{Hatnote|This page is for the location. For the musical number of the same name, see [[Windknight's Lot (Song)|here]].}} |
|||
{{Nihongo|'''Windknight's Lot'''|{{ruby|風の騎士たちの町|ウインドナイツ・ロット}}|Uindonaitsu Rotto}} is a small town featured in the first part of the ''[[JoJo's Bizarre Adventure]]'' series, ''[[Phantom Blood]]''. |
|||
It is located south of London, |
It is located south of London, about a day away by horse. Most of the battle between [[Jonathan Joestar]] and [[Dio Brando]]'s [[zombie]]s takes place here, with the final battle between Dio and Jonathan set in a castle on a hill nearby. The town had 452 citizens, but after Dio's sudden takeover, 73 of them are transformed into zombies. The trial of the [[77 Rings]] was held here during the Middle Ages for training knights. |
||
== |
==Geography== |
||
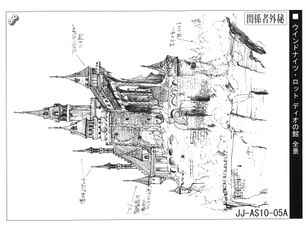
[[File:DioCastle.png|thumb|300px| |
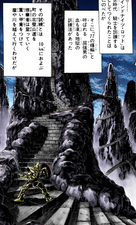
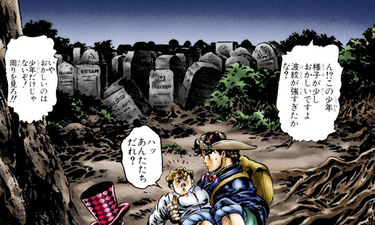
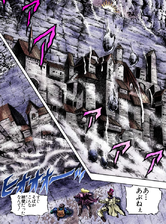
[[File:DioCastle.png|thumb|300px|Windknight's Lot, with Dio's castle visible atop the nearby hill.]]Windknight's Lot is surrounded on three sides by inaccessible mountains. The southern side has a cliff that overlooks the sea. The town was built in the middle ages as a practice ground for royal knights. Coal is excavated via an extensive railway system dug by prisoners. The residents of this place are normal people who live by fishing and agriculture. |
||
The town was built in the middle ages as a practice ground for the royal knights. Coal is excavated via an extensive railway system dug by prisoners. The residents of this place are normal people who live by fishing and agriculture. |
|||
Dio had moved into the empty castle by the graveyard, up on one of the hills east of town, while recovering from his first battle with Jonathan. Since then, he has been sucking the blood out of the town's citizens and turning them into Zombies. |
|||
===Entrance=== |
===Entrance=== |
||
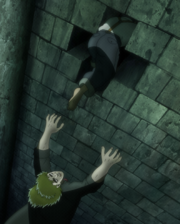
The only way into the town is on a single wagon road that goes through a tunnel in one of the mountains. The tunnel is approximately 300 meters long, and has a single rusty sword stuck into the inner wall. The sword is actually a disguised lever that, when pulled, reveals a secret passage way leading to several other pathways. These pathways were created during the Middle Ages to serve as convenience for the Royal Knights during times of war. The tunnel had been evacuated over 500 years before the setting of ''[[Phantom Blood]]''. |
The only way into the town is on a single wagon road that goes through a tunnel in one of the mountains. The tunnel is approximately 300 meters long, and has a single rusty sword stuck into the inner wall. The sword is actually a disguised lever that, when pulled, reveals a secret passage way leading to several other pathways. These pathways were created during the Middle Ages to serve as convenience for the Royal Knights during times of war. The tunnel had been evacuated over 500 years before the setting of ''[[Phantom Blood]]''. |
||
=== |
===Chamber of the Two-Headed Dragon=== |
||
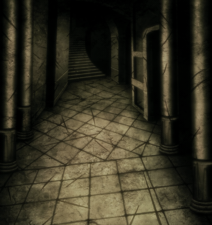
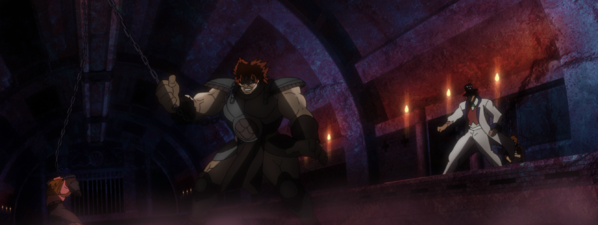
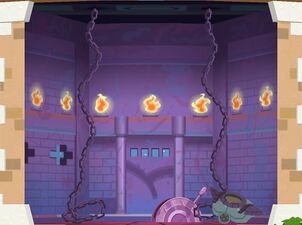
The {{Nihongo|'''Chamber of the Two-Headed Dragon'''|双首竜の間|Sōshuryū no Ma}} was a training ground where warriors learned how to kill. Filled with traps, it was used for deathmatches between the knights, the most notable combatant being [[Tarkus]]. One type of deathmatch was the {{Nihongo|'''Chain Neck Deathmatch'''|チェーン{{Ruby|首輪|ネック}}デスマッチ|Chēn Nekku Desumatchi}}, in which both warriors are trapped each in one neck brace connected to the ceiling through a chain, each collar with one key that opens the other one. The only way to free oneself is to kill the opponent or decapitate him in order to pick the key to his own collar. As the room contains a mechanism to automatically chain whoever enters the room, one could lure the desired opponent into the room and trap them inside. |
|||
To prevent escape in the middle of the fight, the steel door to the room is locked when both fighters have their necklaces. The only way to open the door |
To prevent escape in the middle of the fight, the steel door to the room is locked when both fighters have their necklaces. The only way to open the door is to pull a lever present inside. This also prevents others outside from interrupting the deathmatch, as the door is strong enough to withstand several attacks. |
||
[[Ripple]] users have difficulty in this challenge because the necklace chokes them, making it hard to maintain their breathing. They also can't channel their Ripple through the chain, as |
[[Ripple]] users have difficulty in this challenge because the necklace chokes them, making it hard to maintain their breathing. They also can't channel their Ripple through the chain, as it is connected to the ceiling instead of the opponent. |
||
===Graveyard and Castle=== |
|||
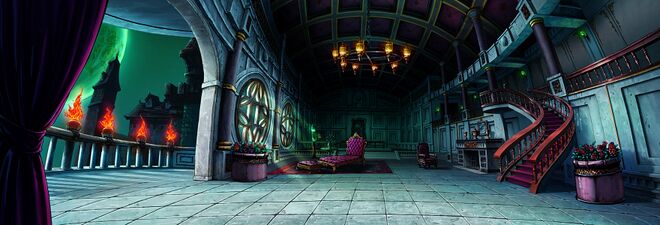
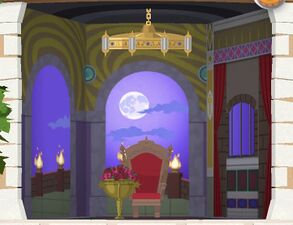
On the right side of the path after the entrance tunnel, a steep cliff overlooks a lake. Atop this cliff is the town's graveyard, where Jonathan and company encounter a revitalized Dio and battle his zombie servant [[Bruford]]. The graveyard is marked by several tall rock formations. A Victorian-era castle, where Dio resides during his time in the town, overlooks the graveyard. The [[Stone Mask]] hangs upon the wall of one of its rooms. On the top floor, an attic with an ornate window serves as the backdrop for Dio's conversation with [[Poco's Sister|Poco's sister]] and the following battle with [[Doobie]]. The attic contains a door to a large hall with a chandelier and several pots of roses. Jonathan and Dio's climactic confrontation takes place in this hall, with Dio ultimately being thrown off one of the room's balconies. |
|||
==Residents== |
==Residents== |
||
{{SwitchAv}} |
|||
{{CBox|Title=Residents of Windknight's Lot|bg=PB3|bg2=white| |
|||
{{-}} |
|||
{{Char|Name=Poco's Dad|Av=Poco father Av.png|Color=PB|Color2=PB2}}{{Char|Name=Poco|Av=PocoAv.png|Av2=PocoAvAnim.png|Color=PB|Color2=PB2}}{{Char|Name=Poco's Sister|Av=PocoSisterAv.png|Av2=PocosisAvAnim.png|Color=PB|Color2=PB2}}{{Char|Name=Dio Brando|Av=DioBrandoAv.png|Av2=DioAvAnim1.png|Color=PB|Color2=PB2}}{{Char|Name=Bruford|Av=BrufordAv.png|Av2=BrufordAvAnim.png|Color=PB|Color2=PB2}}{{Char|Name=Tarkus|Av=TarkusAv.png|Av2=TarkusAvAnim.png|Color=PB|Color2=PB2}}{{Char|Name=Jeff Back|Av=NoPicAv.png|Color=PB|Color2=PB2}}{{Char|Name=Dan Hamar|Av=NoPicAv.png|Color=PB|Color2=PB2}}{{Char|Name=Darnley|Av=NoPicAv.png|Color=PB|Color2=PB2}}{{Char|Name=Harry|Av=NoPicAv.png|Color=PB|Color2=PB2}}{{Char|Name=Poco's Bullies|Av=Poco Bullies Av.gif|Color=PB|Color2=PB2}}{{Char|Name=Executioner|Av=Executioner Av.png|Color=PB|Color2=PB2}}{{Char|Name=Adams|Av=AdamsAv.png|Av2=AdamsAvAnim.png|Color=PB|Color2=PB2}}{{Char|Name=Doobie|Av=DoobieAv.png|Av2=DoobieAvAnim.png|Color=PB|Color2=PB2}}{{Char|Name=Page, Jones, Plant, and Bornnam|SName=Page/Jones/Plant/Bornnam|Av=PageJonesPlantBornnamAv.gif|Av2=PageJonesPlantBornnamAvAnim.gif|Color=PB|Color2=PB2}}{{Char|Name=Ceiling Zombies|Av=Ceiling Zombies Av.png|Color=PB|Color2=PB2}}{{Char|Name=Zombie Mother|Av=Zombie Mothers Av.png|Color=PB|Color2=PB2}}{{Char|Name=Chimera Zombies|Av=Chimera Zombies Av.gif|Color=PB|Color2=PB2}}{{Char|Name=Executed Zombies|Av=Executed Zombies Av.gif|Color=PB|Color2=PB2}}}} |
|||
{{CBox|Title=Residents of Windknight's Lot|bg=PB3|bg2=PB2| |
|||
{{Char|Name=Poco's Dad|Av=Poco father Av.png|Av2=PocosDadAvAnim.png|Color=PB|Color2=PB2}} |
|||
{{Char|Name=Poco|Av=PocoAv.png|Av2=PocoAvAnim.png|Color=PB|Color2=PB2}} |
|||
{{Char|Name=Poco's Sister|Av=PocoSisterAv.png|Av2=PocosisAvAnim.png|Color=PB|Color2=PB2}} |
|||
{{Char|Name=Dio Brando|Av=DioBrandoAv.png|Av2=DioAvAnim1.png|Color=PB|Color2=PB2}} |
|||
{{Char|Name=Bruford|Av=BrufordAv.png|Av2=BrufordAvAnim.png|Color=PB|Color2=PB2}} |
|||
{{Char|Name=Tarkus|Av=TarkusAv.png|Av2=TarkusAvAnim.png|Color=PB|Color2=PB2}} |
|||
{{Char|Name=Jeff Back|Av=NoPicAv.png|Color=PB|Color2=PB2}} |
|||
{{Char|Name=Dan Hamar|Av=NoPicAv.png|Color=PB|Color2=PB2}} |
|||
{{Char|Name=Darnley|Av=NoPicAv.png|Color=PB|Color2=PB2}} |
|||
{{Char|Name=Harry|Av=NoPicAv.png|Color=PB|Color2=PB2}} |
|||
{{Char|Av=NoPicAv.png|Name=Harry's Daughter|Color=PB|Color2=PB2}} |
|||
{{Char|Av=Old Gossipers Av.gif|Name=Old Gossipers|Color=PB|Color2=PB2}} |
|||
{{Char|Name=Poco's Bullies|Av=Poco Bullies Av.gif|Av2=PocoBulliesAvAnim.gif|Color=PB|Color2=PB2}} |
|||
{{Char|Name=Executioner|Av=Executioner Av.png|Av2=ExecutionerAvAnim.png|Color=PB|Color2=PB2}} |
|||
{{Char|Name=Adams|Av=AdamsAv.png|Av2=AdamsAvAnim.png|Color=PB|Color2=PB2}} |
|||
{{Char|Name=Doobie|Av=DoobieAv.png|Av2=DoobieAvAnim.png|Color=PB|Color2=PB2}} |
|||
{{Char|Name=Page, Jones, Plant, and Bornnam|Av=PageJonesPlantBornnamAv.gif|Av2=PageJonesPlantBornnamAvAnim.gif|Color=PB|Color2=PB2}} |
|||
{{Char|Name=Ceiling Zombies|Av=Ceiling Zombies Av.png|Av2=CeilingZombiesAvAnim.png|Color=PB|Color2=PB2}} |
|||
{{Char|Name=Zombie Mother|Av=Zombie Mothers Av.png|Av2=ZombieMotherAnimeAv.png|Color=PB|Color2=PB2}} |
|||
{{Char|Name=Zombie Mother's Baby|Av=MotherBabyAv.png|Av2=MotherBabyAnimeAv.png|Color=PB|Color2=PB2}} |
|||
{{Char|Name=Chimera Zombies|Av=Chimera Zombies Av.gif|Av2=ChimeraZombiesAvAnim.gif|Color=PB|Color2=PB2}} |
|||
{{Char|Name=Executed Zombies|Av=Executed Zombies Av.gif|Av2=ExecutedZombiesAvAnim.gif|Color=PB|Color2=PB2}} |
|||
{{Char|Av=NoPicAv.png|Name=Matthew Lindsay|Color=PB|Color2=PB2|Stands=[[JoJo's Bizarre Adventure: The Animation|Anime]]}} |
|||
}} |
|||
==Chapters / Episodes== |
|||
{{Appearance|BG=PB|BG2=PB2 |
|||
|Chapters = |
|||
*{{Ch|Chapter 21}} |
|||
*{{Ch|Chapter 24}} |
|||
*{{Ch|Chapter 25}} |
|||
*{{Ch|Chapter 26}} |
|||
*{{Ch|Chapter 27}} |
|||
*{{Ch|Chapter 28}} |
|||
*{{Ch|Chapter 29}} |
|||
*{{Ch|Chapter 30}} |
|||
*{{Ch|Chapter 31}} |
|||
*{{Ch|Chapter 32}} |
|||
*{{Ch|Chapter 33}} |
|||
*{{Ch|Chapter 34}} |
|||
*{{Ch|Chapter 35}} |
|||
*{{Ch|Chapter 36}} |
|||
*{{Ch|Chapter 37}} |
|||
*{{Ch|Chapter 38}} |
|||
*{{Ch|Chapter 39}} |
|||
*{{Ch|Chapter 40}} |
|||
*{{Ch|Chapter 41}} |
|||
|Episodes = |
|||
*{{Ep|Episode 4}} |
|||
*{{Ep|Episode 5}} |
|||
*{{Ep|Episode 6}} |
|||
*{{Ep|Episode 7}} |
|||
*{{Ep|Episode 8}} |
|||
*{{Ep|Episode 9}} |
|||
}} |
|||
==Video Games== |
|||
===[[Phantom Blood (PS2 Game)]]=== |
|||
Windknight's Lot appears throughout the majority of the [[Phantom Blood (PS2 Game)|''Phantom Blood'' PS2 game]]'s Story Mode. The tunnel leading into town, the labyrinth hidden inside the tunnel, the town's graveyard, the shore and bottom of the lake where [[Jonathan Joestar|Jonathan]] fights [[Bruford]], the knights' training grounds, the Chamber of the Two-Headed Dragon, the outskirts of the town, [[Doobie]]'s room, and the hall where Jonathan fights [[Dio Brando|Dio]] all appear as distinct battlegrounds. |
|||
{{-}} |
|||
{{ExpandButton}} |
|||
{{GameStage|PBPS2|9|header=true}} |
|||
{{GameStage|PBPS2|10}} |
|||
{{GameStage|PBPS2|11}} |
|||
{{GameStage|PBPS2|12}} |
|||
{{GameStage|PBPS2|13}} |
|||
{{GameStage|PBPS2|14}} |
|||
{{GameStage|PBPS2|15}} |
|||
{{GameStage|PBPS2|16}} |
|||
{{GameStage|PBPS2|17}} |
|||
{{GameStage|PBPS2|18}} |
|||
{{GameStage|PBPS2|19}} |
|||
{{GameStage|PBPS2|20}} |
|||
{{GameStage|PBPS2|21}} |
|||
{{GameStage|PBPS2|22}} |
|||
===[[All-Star Battle]] (PS3)=== |
|||
{{Box3|bg={{Color|PB}} |
|||
|Title= Phantom Blood |
|||
|STitle= ''{{White2|Phantom Blood}}'' |
|||
|{{nihongo|'''Dio's Castle'''|ディオの館|Dio no Yakata}}: [[Windknight's Lot]] |
|||
[[File:DioCastleASB.jpg|1000px]] |
|||
{{#if:{{{ASBR|}}}|{{ASBStageInfo |
|||
|BG=PB3 |
|||
|GimmickVid=ASBR Dio's Castle Stage Gimmick.mp4 |
|||
|GimmickDesc=A chandelier falls from the ceiling, damaging anyone directly underneath it. |
|||
|FinishVid=ASBR Dio's Castle Situation Finish.mp4 |
|||
|FinishDesc=If hit towards the stage's balcony, the loser is sent flying off it, recreating Dio's defeat in his battle against Jonathan in his castle. |
|||
}} |
|||
|*'''Stage Gimmick''': A chandelier falls from the ceiling, damaging anyone directly underneath it. |
|||
*'''Situation Finish''': If hit towards the stage's balcony, the loser is sent flying off it, recreating Dio's defeat in his battle against Jonathan in his castle. |
|||
}} |
|||
}} |
|||
===[[All-Star Battle R]] (Various)=== |
|||
{{Box3|bg={{Color|PB}} |
|||
|Title= Phantom Blood |
|||
|STitle= ''{{White2|Phantom Blood}}'' |
|||
|{{nihongo|'''Dio's Castle'''|ディオの館|Dio no Yakata}}: [[Windknight's Lot]] |
|||
[[File:DioCastleASB.jpg|1000px]] |
|||
{{ASBStageInfo |
|||
|BG=PB3 |
|||
|GimmickVid=ASBR Dio's Castle Stage Gimmick.mp4 |
|||
|GimmickDesc=A chandelier falls from the ceiling, damaging anyone directly underneath it. |
|||
|FinishVid=ASBR Dio's Castle Situation Finish.mp4 |
|||
|FinishDesc=If hit towards the stage's balcony, the loser is sent flying off it, recreating Dio's defeat in his battle against Jonathan in his castle. |
|||
}} |
|||
|*'''Stage Gimmick''': A chandelier falls from the ceiling, damaging anyone directly underneath it. |
|||
*'''Situation Finish''': If hit towards the stage's balcony, the loser is sent flying off it, recreating Dio's defeat in his battle against Jonathan in his castle. |
|||
}} |
|||
{{ASBRGlossary/presets1|Dio's Castle}} |
|||
==Gallery== |
==Gallery== |
||
{{Tabber |
|||
|Manga| |
|||
<gallery> |
<gallery> |
||
Windknight 77 rings path.png|Path of the [[77 Rings]] trial |
|||
DioCaastleASB.jpg|Dio's Castle as a stage in ''[[JoJo's Bizarre Adventure: All Star Battle|All Star Battle]]'' |
|||
Tunnel entrance.png|Windknight's Lot tunnel entrance |
|||
Chamber_anime_ref.jpg|Anime reference: Room of Dragon Decapitation |
|||
Tunnel corridors.png|Corridors of the tunnel entrance |
|||
Castle_anime_ref.jpg|Anime reference: Dio's castle |
|||
Windknight cemetery.png|Windknight's Lot cemetery |
|||
Windknight training grounds.png|Windknight's Lot knight training grounds |
|||
File:tunnel corridors.png|Corridors of the tunnel entrance |
|||
File:tunnel entrance.png|Windknight's Lot tunnel entrance |
|||
File:windknight training grounds.png|Windknight's Lot knight training grounds |
|||
File:windknight 77 rings path.png|Path of the 77 rings trial |
|||
</gallery> |
</gallery> |
||
|Anime| |
|||
{{Tabber |
|||
==Video Games== |
|||
|Story| |
|||
Dio's castle in Windknight's Lot appears as a stage that can be battled on in ''[[JoJo's Bizarre Adventure: All Star Battle]]''. |
|||
<gallery> |
|||
*'''Stage Hazard''': A chandelier falls from the ceiling, damaging whoever is directly underneath it. |
|||
LF377.png|Windknight's Lot tunnel entrance blocked off by [[Jack the Ripper]] |
|||
*'''Situation Finish''': Loser is sent flying off the balcony (recreating Dio's defeat in his battle against Jonathan in his castle). |
|||
PBep4-25.png|Corridors of the tunnel entrance |
|||
PBep6-10.png|[[Speedwagon]] helping [[Poco]] enter Windknight's Lot knight training grounds |
|||
PBep6-27.png|Chamber of the Two-Headed Dragon |
|||
PBep7-26.png|Ditto |
|||
PBep7-27.png|Bird's view on Windknight's Lot |
|||
PBep8-19.png|Poco's house |
|||
</gallery> |
|||
|Design Sheets| |
|||
<gallery> |
|||
Chamber anime ref.jpg|Anime reference: Chamber of the Two-Headed Dragon |
|||
Castle anime ref.jpg|Anime reference: Dio's castle |
|||
</gallery> |
|||
}} |
|||
|Games| |
|||
{{Tabber |
|||
|All-Star Battle| |
|||
<gallery> |
|||
DioCaastleASB.jpg|Dio's Castle as a stage in {{ASB}} |
|||
</gallery> |
|||
|Pitter-Patter Pop| |
|||
<gallery> |
|||
PPPChamberofTwoHeadedDragonFurniture.jpg|Chamber of the Two-Headed Dragon, ''[[JoJo's Pitter-Patter Pop!]]'' |
|||
PPPDioCastleFurniture.jpg|Dio's Room, ''[[JoJo's Pitter-Patter Pop!]]'' |
|||
</gallery> |
|||
}} |
|||
|Cards| |
|||
<gallery> |
|||
J-088.jpg|{{ABC}}; Windknight's Lot |
|||
J-089.jpg|Chamber of the Two-Headed Dragon |
|||
</gallery> |
|||
}} |
|||
==Trivia== |
==Trivia== |
||
*Initially, the town is stated to have 517 residents including prisoners.<ref name=C21 /> However, the London Press newspaper later reports that there were 452. It is possible that their count |
*Initially, the town is stated to have 517 residents including prisoners.<ref name="C21" /> However, the London Press newspaper later reports that there were 452. It is possible that their count didn't include prisoners. |
||
==Notes== |
|||
{{Notes}} |
|||
==References== |
==References== |
||
{{References}} |
|||
<references/> |
|||
==Site Navigation== |
==Site Navigation== |
||
| Line 68: | Line 211: | ||
{{Locations}} |
{{Locations}} |
||
{{PhantomBlood}} |
{{PhantomBlood}} |
||
{{Icon|PB}} |
|||
[[Category:Locations]] |
[[Category:Locations]] |
||
Revision as of 03:33, 8 March 2025
Windknight's Lot (
It is located south of London, about a day away by horse. Most of the battle between Jonathan Joestar and Dio Brando's zombies takes place here, with the final battle between Dio and Jonathan set in a castle on a hill nearby. The town had 452 citizens, but after Dio's sudden takeover, 73 of them are transformed into zombies. The trial of the 77 Rings was held here during the Middle Ages for training knights.
Geography

Entrance
The only way into the town is on a single wagon road that goes through a tunnel in one of the mountains. The tunnel is approximately 300 meters long, and has a single rusty sword stuck into the inner wall. The sword is actually a disguised lever that, when pulled, reveals a secret passage way leading to several other pathways. These pathways were created during the Middle Ages to serve as convenience for the Royal Knights during times of war. The tunnel had been evacuated over 500 years before the setting of Phantom Blood.
Chamber of the Two-Headed Dragon
The Chamber of the Two-Headed Dragon (双首竜の間, Sōshuryū no Ma) was a training ground where warriors learned how to kill. Filled with traps, it was used for deathmatches between the knights, the most notable combatant being Tarkus. One type of deathmatch was the Chain Neck Deathmatch (チェーン
Graveyard and Castle
On the right side of the path after the entrance tunnel, a steep cliff overlooks a lake. Atop this cliff is the town's graveyard, where Jonathan and company encounter a revitalized Dio and battle his zombie servant Bruford. The graveyard is marked by several tall rock formations. A Victorian-era castle, where Dio resides during his time in the town, overlooks the graveyard. The Stone Mask hangs upon the wall of one of its rooms. On the top floor, an attic with an ornate window serves as the backdrop for Dio's conversation with Poco's sister and the following battle with Doobie. The attic contains a door to a large hall with a chandelier and several pots of roses. Jonathan and Dio's climactic confrontation takes place in this hall, with Dio ultimately being thrown off one of the room's balconies.
Residents


Chapters / Episodes
- Chapter 21: Jack the Ripper and Zeppeli the Strange, Part 4
- Chapter 24: Ripple Overdrive, Part 2
- Chapter 25: Ripple Overdrive, Part 3
- Chapter 26: Tarkus and the Dark Knight Bruford, Part 1
- Chapter 27: Tarkus and the Dark Knight Bruford, Part 2
- Chapter 28: Tarkus and the Dark Knight Bruford, Part 3
- Chapter 29: Tarkus and the Dark Knight Bruford, Part 4
- Chapter 30: Sleep as a Hero
- Chapter 31: The Knights' Ruins
- Chapter 32: The Medieval Knights' Training Ground for Murder
- Chapter 33: Pluck for Tomorrow and the Successor, Part 1
- Chapter 34: Pluck for Tomorrow and the Successor, Part 2
- Chapter 35: Pluck for Tomorrow and the Successor, Part 3
- Chapter 36: The Three from a Faraway Land, Part 1
- Chapter 37: The Three from a Faraway Land, Part 2
- Chapter 38: The Three from a Faraway Land, Part 3
- Chapter 39: Fire and Ice, Jonathan and Dio, Part 1
- Chapter 40: Fire and Ice, Jonathan and Dio, Part 2
- Chapter 41: Fire and Ice, Jonathan and Dio, Part 3
- JoJo's Bizarre Adventure Episode 4: Overdrive
- JoJo's Bizarre Adventure Episode 5: The Dark Knights
- JoJo's Bizarre Adventure Episode 6: Pluck for Tomorrow
- JoJo's Bizarre Adventure Episode 7: The Successor
- JoJo's Bizarre Adventure Episode 8: Bloody Battle! JoJo & Dio
- JoJo's Bizarre Adventure Episode 9: The Final Ripple!
Video Games
Phantom Blood (PS2 Game)
Windknight's Lot appears throughout the majority of the Phantom Blood PS2 game's Story Mode. The tunnel leading into town, the labyrinth hidden inside the tunnel, the town's graveyard, the shore and bottom of the lake where Jonathan fights Bruford, the knights' training grounds, the Chamber of the Two-Headed Dragon, the outskirts of the town, Doobie's room, and the hall where Jonathan fights Dio all appear as distinct battlegrounds.
Expand/Collapse All
(呪われた町 Norowareta Machi)

(恐怖を我が物とせよ Kyōfu o Wagamono to seyo)

(罠への招待 Wana e no Shōtai)

(血も凍る仮面力 Chi mo Kōru Kamen Pawā)

(暗黒の騎士達 Ankoku no Kishitachi)

(英雄として眠る Eiyū toshite Nemuru)

(双首竜の間へ Sōshuryū no Ma e)

(老師の予言 Rōshi no Yogen)

(怒りをたたきこめ! Ikari o Tatakikome!)

(遥かな国からの3人 Haruka na Kuni kara no 3-nin)

(怪人ドゥービー Kaijin Dūbī)

(

(血戦!JoJo&Dio Kessen! JoJo ando Dio)

(悪鬼の最後 Akuki no Saigo)

All-Star Battle (PS3)

- Stage Gimmick: A chandelier falls from the ceiling, damaging anyone directly underneath it.
- Situation Finish: If hit towards the stage's balcony, the loser is sent flying off it, recreating Dio's defeat in his battle against Jonathan in his castle.
All-Star Battle R (Various)
Gallery
-
 Path of the 77 Rings trial
 -
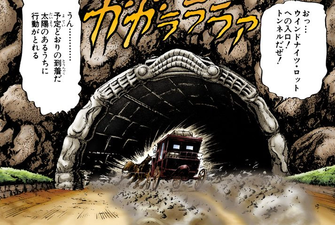 Windknight's Lot tunnel entrance
 -
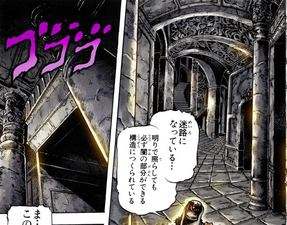 Corridors of the tunnel entrance
 -
 Windknight's Lot cemetery
 -
 Windknight's Lot knight training grounds


-
 Windknight's Lot tunnel entrance blocked off by Jack the Ripper
 -
 Corridors of the tunnel entrance
 -
 Speedwagon helping Poco enter Windknight's Lot knight training grounds
 -
 Chamber of the Two-Headed Dragon
 -
 Ditto
Ditto -
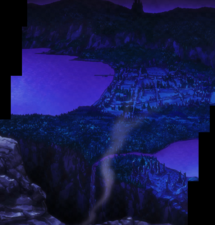 Bird's view on Windknight's Lot
 -
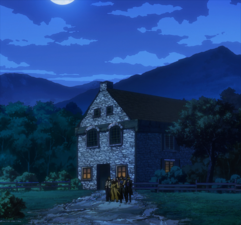 Poco's house


-
 Anime reference: Chamber of the Two-Headed Dragon
 -
 Anime reference: Dio's castle


-
 Dio's Castle as a stage in All-Star Battle
-
 Chamber of the Two-Headed Dragon, JoJo's Pitter-Patter Pop!
 -
 Dio's Room, JoJo's Pitter-Patter Pop!


-
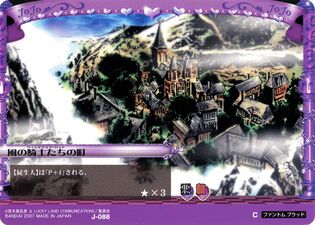 Adventure Battle Card; Windknight's Lot
 -
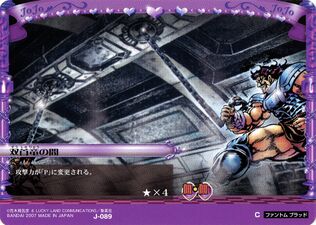 Chamber of the Two-Headed Dragon


Trivia
- Initially, the town is stated to have 517 residents including prisoners.[1] However, the London Press newspaper later reports that there were 452. It is possible that their count didn't include prisoners.
Notes
- ↑ The original title of Chapter 21, "Cursed Town" (呪われた町, Norowareta Machi), in which Windknight's Lot is introduced, is the same as the Japanese title of 'Salem's Lot.
