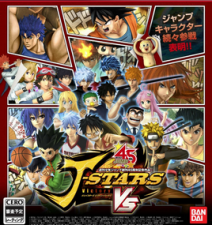
J-Stars Victory VS
J-Stars Victory VS (ジェイスターズ ビクトリーバーサス, Jei Sutāzu Bikutorī Bāsasu) is a tag team fighting game featuring characters from 32 franchises of the Weekly Shonen Jump magazine. The game was created to commemorate the 45th anniversary of Shonen Jump and was released for the PlayStation 3 and PlayStation Vita on March 19, 2014.
A limited edition Anison version of the game was also released on the same day, including 21 anime openings from series in the game which players can set as the theme playing during battles.[1]
J-Stars Victory VS was released for western territories as J-Stars Victory VS+ for the PlayStation 4, PlayStation 3, and PlayStation Vita, with an additional Arcade Mode for the international release. It was released in Europe on June 26, 2015 and in North America on June 30, 2015. The new edition also included game balance adjustments based on feedback from Japanese players.[2]
Summary

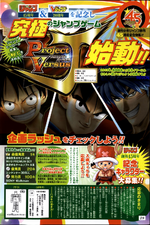
Shueisha and Bandai Namco Entertainment announced the game as Project Versus J in the Weekly Shonen Jump magazine's second issue of 2013, which released on December 10, 2012. Promoted as the "ultimate Jump game", it was announced with Monkey D. Luffy, Son Goku, and Toriko as the first three characters.
Hironobu Kageyama, Akira Kushida, and Hiroshi Kitadani sang the game's theme song "Fighting☆Stars". Those who pre-ordered the game received the J-Stars Victory Book, a volume bound like a Jump Comics book and filled with information and visuals of Jump heroes over the years. A free augmented-reality (AR) app allowed players to see the Jump heroes in their surroundings on the PS Vita.
The localized version of the game, J-Stars Victory VS+, offered a digital compendium art book and set of PlayStation themes as a pre-order bonus.
Gameplay
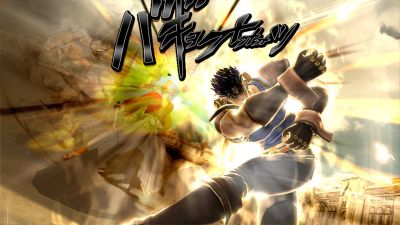
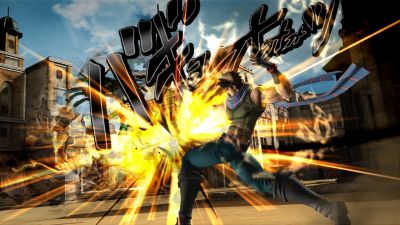
J-Stars Victory VS is a team-based, arena-style fighter that lets up to four players battle against each other in large 3D arenas where players can move in all directions and jump on platforms or buildings. The game features stage destruction, allowing the attacks of players to destroy buildings if they are hit.
Basics

The game is primarily either 1 vs. 1, 2 vs. 2, or 3 vs. 1 with an additional slot for optional support characters. Players are either on a Red team or Blue team. The goal of each battle is for a team to fill up all sections of their Victory Gauge at the top of the screen. Normally, there are 3 notches for each team, though some Story Mode fights may have 2 on each side or only one for the player in difficult matches. When a character's health is drained, the opposing team's Victory Gauge will fill up by one notch.
If the Victory Gauge is not full and a character is defeated, they will re-spawn after a few seconds at a certain spot in the map with invincibility frames for a short time. Battles may also have a timer of 300 seconds if the timer is not set to unlimited. In the event of a time out, the team with more notches filled in their Victory Gauge is the winner. However, if both teams have an equal amount of their Victory Gauge filled, the remaining health of the players determines the outcome.
Fighters can use regular attacks, power attacks, area-based attacks, and finishing moves. Regular attacks are the main part of the battle, and all combos begin with them. Power attacks leave the user open, but they have a big impact if they connect and their power can be increased by charging them up. Area-based attacks allow to hit opponents over a wide area. By using different techniques, the player can lead their team to victory.
Jump's main beliefs and principles of Friendship, Effort, and Triumph play a big role in the game. Each character can be set to one of those types and there are also bonus Friendship, Effort, and Triumph gauges which determine how many characters or items a player can buy in the J-Point shop.
Players may also equip decks with customizable cards they can purchase which each have varying skills to boost their characters' stats and cooldowns.
Victory Burst
In between each Victory Gauge is a Voltage Gauge that determines how close a team is to activating a Victory Burst. The Voltage Gauge is built up as members of a team successfully hit attacks and whenever a Support character is called. When the gauge is fully on one team's side, Victory Burst must be activated by both team members to gain its effects. Once one player presses the button to activate it, a timer depletes until the other player also activates it. Upon entering the Victory Burst state, characters will be granted different bonuses based on their type:
- Friendship - Reduced Stamina spent on actions.
- Effort - Increased defense.
- Triumph - Increased attack.
Moreover, being in the Victory Burst state allows both players to use their Super Special Attack (Ultimate Attack in the localization). While Victory Burst is in effect, the Voltage Gauge will transform into 3 pairs of thunderbolts. The center bolt represents the timer for how long the Victory Burst will remain active. The bolts to the left and right represent 1 stock each of the Ultimate Attack, shared between both members of the team.
Controls
The game uses ten buttons: weak attack, strong attack, special actions, jumping, targeting, guarding, dashing, support, taunt, and Victory Burst/Ultimate Attack. There is a setting in the Game's options mode for "Simple Controls" where combos, guarding, and targeting will be performed automatically. However, this cannot be selected for online battles.
![]() sets the control mode to "Conserve", telling the AI partner to sparingly use their special attacks.
sets the control mode to "Conserve", telling the AI partner to sparingly use their special attacks.
![]() sets the control mode to "Focus", telling the AI partner to attack the same target as the player.
sets the control mode to "Focus", telling the AI partner to attack the same target as the player.
Opening Video

The opening video begins with pages of Weekly Shonen Jump flipping, quickly showing pages of Naruto with shadow clones, Luffy about to punch, and Goku reacting.
It transitions to a shot from behind of all of the protagonists of the series featured in the game running. The camera then switches between slow-motion side shots of various protagonists: Bossun, Gon, and Arale; Naruto, Bobobo, and Hinata; Allen, Tsuna, and Kenshin; Luffy and Seiya; Ryotsu, Taro, and Saiki; Kenshiro, Chitoge, and Oga with Baby Beel on his head; Jonathan, Nube, Jaguar, and Medaka; Lala, Koro-sensei, and Neuro; Gintoki, Luckyman, and Momotaro; Yusuke, Kuroko, and Ichigo. Lastly, it shows Toriko and Goku before zooming out backwards to show a frontward shot of the characters running toward the screen.

Pages flip again, changing the scene to the Hidden Leaf Village. Goku and Toriko are battling on top of a building. Their fists collide and Goku blocks Toriko's "Fork" and "Knife" attacks. Naruto creates shadow clones to hit Luffy away, though Luffy blocks it and dodges his follow-up to land a counter. However, Naruto manages to kick him away. Naruto then appears behind Goku and Toriko, using Rasengan on them. As it's about to hit Goku's back, Luffy comes running and stretches his fist to intercept the blow. Meanwhile, Saiki lifts his glasses in the background, while Bobobo and Koro-sensei are atop other buildings. Gintoki and Ryotsu race through the streets on their scooter and bicycle. Koro-sensei flies past them, and the two swerve past Jonathan who is standing by a store.
Arale is poking Poop-Boy with a stick while Baby Beel watches with Oga crouching by him. Suddenly, Gintoki and Ryotsu nearly crash into them but manage to evade them causing them to ride up stairs and fly across a building.

Meanwhile, Ichigo is fighting Kenshin in a sword battle. Ichigo uses Getsuga Tensho but Kenshin blows it away. Medaka pushes Lala toward Chitoge and the two hug while an explosion occurs in the background. Ichigo jumps toward Ryotsu, who grabs his arm and throws him toward Gintoki, but Gintoki parries his attack with his sword. Naruto transforms into his Nine-Tails Chakra Mode while Goku transforms into Super Saiyan and fires a Kamehameha. Naruto then creates two shadow clones and jumps to dodge it, causing the Kamehameha to head toward Gintoki and Ichigo. Luffy then transforms into Gear 2nd and jumps in front of them, countering the Kamehameha with his Gum Gum Jet Bazooka, making a large explosion in front of him.
Finally, the pages flip again to show characters doing various poses. Yusuke is with Gon; Oga and Baby Beel are with Tsuna and Reborn; Bobobo is with Saiki; Seiya is with Momotaro; Taro is with Luckyman; Kenshiro is with Nube; Hinata is with Bossun and Kuroko; and Allen is with Jaguar and Neuro. It ends with a flash to the logo.
Anison Edition
The songs included in the Anison edition are the following:
- "We Are!" (One Piece)
- "GO!!!" (Naruto: Shippuden)
- "CHA-LA HEAD-CHA-LA" (Dragon Ball Z)
- "Smile Bomb" (Yu Yu Hakusho)
- "Guts Guts!!" (Toriko)
- "*~asterisk~" (Bleach)
- "departure!" (Hunter × Hunter)
- "JoJo ~The Fate of That Blood~" (JoJo's Bizarre Adventure)
- "Sobakasu" (Rurouni Kenshin)
- "Pegasus Fantasy" (Saint Seiya)
- "Ai wo Torimodose!!" (Fist of the North Star)
- "Dadada" (Beelzebub)
- "Pray" (Gintama)
- "HAPPY CRAZY BOX" (Medaka Box)
- "Katsushika Rhapsody" (Kochikame)
- "Waiwai World" (Dr. Slump)
- "Yogorecchimatta Kanashimi Ni..." (Sakigake!! Otokojuku)
- "Luckyman Song" (Tottemo! Luckyman)
- "Bari Bari Saikyou No. 1" (Hell Teacher Nube)
- "LISTEN TO THE STEREO!!" (Reborn!)
Cast

LaSalle Ishii

Mami Koyama

Katsuyuki Konishi

Tessho Genda

Masako Nozawa

Ryo Horikawa

Ryusei Nakao

Masakazu Morita

Kazuyuki Okitsu

Tomokazu Sugita

Hideyuki Hori

Motoko Kumai

Nozomu Sasaki

Nobuyuki Hiyama

Tessho Genda

Mayumi Tanaka

Ryotaro Okiayu

Mayo Suzukaze

Masanori Ikeda

Mayumi Tanaka

Toshio Furukawa

Kotono Mitsuishi

Fumihiko Tachiki

Megumi Han

Mariya Ise

Junko Takeuchi

Noriaki Sugiyama

Naoya Uchida

Takehito Koyasu

Masakazu Morita

Sho Hayami

Tomokazu Sugita

Yukari Kokubun

Ryotaro Okiayu

Kenji Matsuda

Katsuyuki Konishi

Aki Toyosaki

Shintaro Asanuma

Tomokazu Seki

Unsho Ishizuka

Daisuke Namikawa

Keiji Fujiwara

Fumiko Orikasa

Rie Kugimiya

Mikako Takahashi

Sanae Kobayashi

Takehito Koyasu

Haruka Tomatsu

Kensho Ono

Hiroyuki Yoshino

Ryoko Shiraishi

Tomokazu Sugita

Megumi Ogata

Nao Toyama

Ayumu Murase

Haruki Sayama

Kumiko Nishihara

Ikuya Sawaki

Bin Shimada

Masato Hirano

Hiroko Emori

Raikou Sakamoto

Masaya Onosaka

Daisuke Sakaguchi

Neeko

Miyuki Sawashiro
Game Modes
J-Adventure

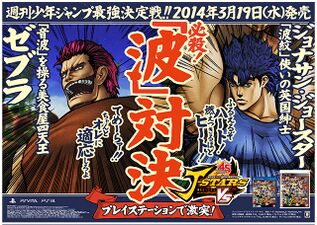
The story mode of J-Stars Victory VS is split into four different modes: Dynamic Arc, Hope Arc, Investigation Arc, and Pursuit Arc. The Dynamic Arc primarily focuses on Monkey D. Luffy, Portgas D. Ace, and Pegasus Seiya. The Hope Arc focuses on Naruto Uzumaki, Yusuke Urameshi, and Gon Freecss. The Investigation Arc focuses on Toriko, Son Goku, and Zebra. The Pursuit Arc focuses on Ichigo Kurosaki, Tatsumi Oga, and Hiei.
Each arc is mostly similar to each other aside from the character interactions. Some arcs may also show additional details of what characters were doing or how they encountered each other which the other arcs do not show.
Throughout their journey, players may encounter areas called "Shrine of Space and Time", allowing them to play scenes from the perspective of other characters who aren't in the main party, such as Gintoki, Bobobo, or the villains.

Using a ship, players can travel around the map recruiting allies, taking on side quests, and progressing the story through main quests. The ship requires multiple upgrades in order to travel to various spots throughout the world, such as requiring a Sail of Charity to enter the Great Open Sea, Propeller Feathers to break through cyclones, a Cannon to break boulders and shoot monsters, a Dragonbone Hull to fly over tall mountains, a Passion Jewel to fly over magma, a Ninja Prow to cleave through glaciers, a Destiny Blimp to reach sky islands, and a Dream Compass to access the Darker Reaches in outer space.
The ships take damage when moving around and fighting battles, which determines the player's starting health in a battle. The ships can either be restored by resting at any town on the map, or by using a Ship Repair Kit. Ships can also be upgraded with various power-up parts to increase their speed and durability. Weight Modifier and Resistance Modifier respectively increase and greatly increase the ship's speed; Reinforced Wire Rope and Strengthening Wax respectively increase and greatly increase the length of time they can sail for; Protective Coat reduces the speed at which a ship takes damage; Rescue Facilities reduces the amount of damage the ship takes after losing in battle; Navigator Binoculars marks the location of support character quests on the mini-map in red; and Wrought Iron Cabin increases the number of J-Points earned after winning a battle.
Plot
Invite from God

The story involves a "Mysterious Voice", proclaiming itself as the "God of the Jump World", inviting the protagonists of each arc to take part in the "Jump Battle Tournament". Luffy and Nami are shipwrecked at Alabasta when the Thousand Sunny suddenly breaks down. Unfazed by their predicament, Luffy's attention is caught by several ships in the bay headed toward the same direction. The God of the Jump World calls out to him and Luffy agrees to join the tournament. Kakashi assigns Naruto to join the tournament as a mission. Naruto doesn't think it's worth it, but Sakura scolds him. He agrees to join once Kakashi informs him that Sasuke might be there. Toriko is together with Coco and Sunny at Vegetable Sky, eating Eight-Headed Snails. Toriko is interested in the tournament when he hears the God will grant any wish since he wants to get the ultimate ingredient, but Coco and Sunny tell him to go alone. In Soul Society, Ichigo is with Yoruichi and Kon when they sense a massive spiritual pressure. Ichigo thinks it's stronger than the Menos Grande, so he decides to go investigate.
Gathering a Team

The main protagonist of the arc starts in a small boat and quickly encounters the first member they would go on to recruit in a nearby boat. Ace agrees to join Luffy if Luffy beats him, Yusuke wonders if Naruto is the source of the mysterious demonic energy Koenma mentioned, Toriko finds Goku starving alone on an island, and Oga asks Ichigo if they can fight for training since Ichigo was skilled enough to notice Baby Beel's spiritual pressure.
They then find their third member on a nearby boat. Seiya reveals himself as one of the Jump Battle Tournament competitors, planning to use his wish for finding his estranged sister. Luffy invites Seiya to join them, but Ace decides to see how powerful he is first. Gon finds Naruto and Yusuke, asking if they've seen Killua since the two got separated. However, Yusuke initially doesn't trust him since some demons disguise as kids, until they fight and he realizes he was wrong. Toriko hears Zebra's Sound Bazooka and Goku runs off to fight him, impressed with Zebra's ki. Ichigo and Oga find Hiei, whose ship broke down. Baby Beel takes a liking to Hiei, who also becomes interested in the baby after learning he's a demon. Hiei decides to join them after seeing how powerful they are. The new member gives each of their team members the Sail of Charity, allowing them to travel to other islands.
Killua ends up at Penguin Village after being separated from Gon. He meets Ryotsu, but the two get into a fight after Ryotsu thinks Killua was disrespecting him for not needing help from a police officer. After beating him, Ryotsu gives him a remote-controlled toy he created. Impressed, Killua asks Ryotsu to become his toy-making mentor.

Koro-sensei, one of the tournament's examiners, suddenly arrives at Mach 20 speed to test each team's strengths. After arriving at the island with Korin's Tower, Luffy goes off running alone to get food. Toriko also tells Goku and Zebra that they should go get food, but the two already left. Luffy bumps into Toriko, who decides to bring Luffy to a good restaurant. When Luffy is satisfied with his meals, Seiya and Ace find him and drag him to the tower before he falls asleep. Yusuke notices Hiei, so their partners introduce themselves to each other before going to register. Goku and Zebra also meet up with Toriko again so they could go register. The God of the Jump World grants each team a Jump Ship and creates fake enemies around the world using data from the heroes for them to fight as qualifiers for the tournament. The heroes must also collect three Hero Emblem Fragment pieces which combine into one, which they may receive while fighting certain examiners.
Bizarre Encounters
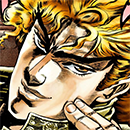
While sailing, Joseph suddenly stops Team Luffy's boat and heads toward them by walking on water with the Ripple. He asks them to help him train before he'll let them pass. Luffy happily agrees and defeats him. Joseph sighs upon his defeat, but understands he needs more training before he'll be strong enough. He allows their ship to move again, wishes them good luck, and bids them farewell. Luffy thinks he's a good guy, but Ace disagrees since a good guy wouldn't pick fights with random people.
Ichigo stops his team's ship when he sees another boat headed toward them, powered by a man's nose hairs. Hiei and Ichigo think they should just ignore him, but Oga claims they could probably still fight even if he's strange. Bobobo reveals himself, wanting to go with them to Korin Tower, but Ichigo refuses to accept him. Bobobo reveals that he was already rejected by a bunch of other teams, so Ichigo decides to take him there if he promises to keep his nose hairs away. They arrive at Korin Tower, only for Bobobo to see that nobody is there. Ichigo tells him the tournament already started. Although he's grateful Ichigo brought him to the tower, he decides to steal Ichigo's ship but loses against the team, who leave him there.
At some point, Killua and Ryotsu travel to Soul Society. Arale and Gatchan appear there, but Killua and Ryotsu notice that Arale isn't walking properly. Ryotsu decides to take a look and is surprised to see that she's a robot. He easily fixes her up with a screwdriver. Fully energizes, Arale runs in circles all over the place, causing damage. Ryotsu and Killua have no choice but to stop her by force. They manage to get her under control, and Ryotsu believes he could use her for getting rich. Eventually, each team arrives at Trick Tower and are greeted by Beans and Leorio. Leorio informs them that they'll need to get Propeller Feathers from Penguin Village to enter the Sanguine Sands. They proceed to the village where Senbei Norimaki installs it onto their ship.

Boa Hancock orders Gintoki to find Luffy, but then Jonathan suddenly appears on their ship. Jonathan apologizes for frightening them and asks if they can battle him since he is training to defeat Dio. Jonathan asks for forgiveness after Hancock rebukes his rude behavior, but he says he feels mysterious waves emanating from the two of them and won't leave unless he can face them. Gintoki agrees to fight him, calling him "Jet Coaster" (the English version uses "Jonathan Toaster" in the Dynamic Arc) before Jonathan corrects him. Gintoki and Hancock win, surprising Jonathan that he lost. Jonathan leaves, claiming he won't bother them any longer as he goes to continue his training.

When each group is about to enter the Sanguine Sands, they are stopped by Gintoki and Hancock. Gintoki needs money to pay his landlord, so he decides to fight each team. When they encounter Team Luffy, Hancock joins Luffy's side without paying Gintoki. She pretends to not know who he is, asking if he's a Stand. Gintoki angrily asks if she's calling him Crazy Diamond or if she's saying that he likes to go to hot springs frequented by ghosts. Luffy has no money, so he can't pay him. Suddenly, Vegeta appears and tells Gintoki that he should take it by force if he wants something. Vegeta wants to steal their Propeller Feathers. However, he is defeated and leaves, claiming that he'll get stronger. Hancock and Luffy then leave Gintoki behind.
Afterward, Gintoki reunites with Kagura and Sadaharu, though at different moments depending on the arc. In the Dynamic and Investigation Arcs, Kagura is with Bobobo and Don Patch. Gintoki decides that if he needs money, he has to go back to Senboukyou and work there, but Kagura initially doesn't want to come with him until Gintoki beats Bobobo. In the Hope and Pursuit Arcs, Gintoki is still with Hancock while Kagura is with Luckyman. Kagura convinces Hancock to swap partners with her when Luckyman defeats Gintoki.
Collecting the Hero Emblem
As each team reaches the Temple of Athena in Sanguine Sands, Medaka enthusiastically greets them, introducing herself as an examiner. When fighting Team Toriko and Team Ichigo, she also asks Vegeta to join her against them, offering to reward Vegeta with a fragment of the emblem should they win. Medaka rewards the team with their first fragment of the Hero Emblem when she is defeated. The teams each head back to Korin's Tower and learn that they have to go to the Mirthful Mountains. They fly to Hakoniwa Academy when Taro suddenly crashes his ship into theirs. Taro demands money but each team defeats him. At the academy, Shiranui informs the group that they'll need a Dragonbone Hull for their ship to cross over the Mirthful Mountains.

The Dragonbone Hull is said to only be found at the Spirit Lava Plains and a large boulder is blocking the way. Tsuna and Reborn arrive, where Reborn informs the group that they can get a cannon from Soul Society to break the boulder. At Soul Society, a member of each team angers Killua by calling him a kid, but Ryotsu scolds him for getting angry at customers. In the Dynamic and Investigation Arcs, Killua and Ryotsu only agree to install a cannon on their ship for free if the team can beat them in a fight. In the Hope and Pursuit Arcs, Killua joins the team and helps them fight against Arale. Ryotsu or Arale loses against each team so Ryotsu installs the cannon. Ryotsu also explains that the Dragonbone Hull isn't in the Spirit Lava Plains; he already installed it for them since the cannon required it. However, they still need a Passion Jewel for the Dragonbone Hull to move.

While sailing to the Spirit Lava Plains, Nube stops each team's ship. He warns them that they're in danger and he's not their enemy, but they all think he's ambushing them. After realizing their mistake, it's already too late, as evil spirits possess the protagonist's two allies. Nube travels with the team leader to find a Sacred Rosary. While the leaders battle their allies to weaken the evil spirits, Nube successfully exorcises them. Nube is invited to join the teams, but he leaves since some of his students have fallen victim to the ghosts and he wants to save them. At the Spirit Lava Plains, the teams use their new cannon to demolish the boulder in their way. They enter the Inferno Crags, where Sanosuke, Kaoru, and Yahiko were trapped. Yahiko gives the team the Passion Jewel as thanks for saving them. As they're about to head to the Mirthful Mountains, they're suddenly ambushed by a dark presence. The dark presence transforms into a clone of Momotaro and starts destroying their ship. However, the real Momotaro appears and helps the team deal with his imposter. After defeating it, Momotaro declines the offer to join their team since he is interested in battling them in the tournament. Meanwhile, Nube is attacked by Taro who tries stealing money from him, but Nube defeats him.
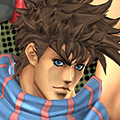
Team Naruto's ship is stopped by Jonathan, who assumes that they are Dio's minions because he saw the dark presence that attacked him sneak onto their ship. Naruto tries explaining that the black beast attacked them too, but Jonathan refuses to listen and attacks them with his Sunlight Yellow Overdrive. Jonathan loses the battle, but Killua gives him first aid, impressed that he only has a few scratches thanks to his Ripple. Jonathan thanks them and apologizes for the misunderstanding. Naruto tells him not to worry since everybody makes mistakes, to which Gon retorts that Naruto does all the time. Jonathan tells Naruto that he should be careful in that case. He takes his leave, hoping to meet them all again.
Team Toriko finds a Hero Fragment shining in the ocean and picks it up. Suddenly, another ship's rudder breaks and nearly crashes into Toriko's ship but Zebra manages to pull their ship away before they collide. On the other ship is Luckyman, who attempts to fight the team for the Hero Fragment. He loses, but they hand the fragment back to him anyways, since they just wanted to fight him for fun. Zebra finds a letter, which Luckyman says is from the Intergalactic League of Heroes, informing him that the Lucky Star is in trouble. However, Zebra shows him how it's just a scam from an imposter. Luckyman considers his encounter with Toriko lucky despite his defeat and leaves, thanking them.
The teams head to Yoshiwara Paradise, where they encounter the second examiners, Reborn and Tsuna. Reborn and Tsuna take on all 3 members of the teams, threatening to force them into the Vongola Family if they lose. When the teams win, Reborn grants them the second Hero Emblem Fragment and temporarily accompanies them with Tsuna as bodyguards. Korin tells them that they'll have to search the world for the final fragment, which Gaara reveals is in the Teardrop Tundra. However, in order to break through the glaciers, their ship needs the Ninja Prow from the Hidden Leaf Village. They are challenged by Saiki there, who gives it to the teams after they defeat him. The teams then head to Tenraikyousintojo, where all the examiners are gathered; Tsuna and Reborn also part ways from the teams to join Medaka and Korosensei. After a 3 vs. 3, the teams win and receive the final Hero Fragment. The God of the Jump World asks the examiners if they can help in the battle against the dark threat, but the examiners don't want to and leave.
Tournament Battles
At some point, Kenshiro and Kenshin meet Momotaro, where Kenshin is surprised to see that Momotaro is headed to the Jump Battle Tournament alone. Kenshin invites him to join them, but Momotaro refuses to unless they prove they're strong. Since Kenshiro and Kenshin beat him, Momotaro joins their team. In every arc besides the Hope Arc, Sasuke meets Toguro and is initially hostile against him. Toguro surprises Sasuke with his ability to keep raising his power, so they form a temporary partnership for the tournament. In the Hope Arc, Toguro teams up with Vegeta instead for similar reasons.
The teams sale back to Korin's Tower, where Korin gives them a Destiny Blimp to attach to their ship, allowing them to fly above the clouds. The Jump Battle Tournament is at the Dark Tournament Stadium. Luffy meets with Toriko, who shares food with him. Luffy bets it would be even better if Sanji cooked it, but Toriko argues Komatsu's is better. Team Ichigo meets with Team Naruto, glad that they both made it past the preliminaries. After Yusuke and Oga challenge each other, Naruto notices Luffy and Toriko. Luffy, Ichigo, Naruto, and Toriko introduce themselves to each other and vow that they'll each win. In the Pursuit Arc, Killua leaves Team Ichigo and joins Team Naruto to be with Gon. Naruto asks Ichigo to let him know if he sees Sasuke.
For the first round of the tournament, the player's team fights Team Kenshiro, consisting of Kenshiro, Momotaro, and Kenshin. Luffy says that he'd be interested in seeing Zoro fight Kenshin, although he thinks Kenshin wouldn't stand a chance. Kenshin is wary of Hiei, feeling that he's even more bloodthirsty than Shishio. The player's team defeats Team Kenshiro and progresses to the semi-finals. In the Hope Arc, they defeat Vegeta and Toguro to progress to the finals. In the other three arcs, they defeat Sasuke and Toguro. Ichigo asks Sasuke about Naruto but Sasuke doesn't care to talk about it. Hiei mocks Toguro for getting weaker. In the finals, Team Luffy fights Team Toriko in the Dynamic and Investigation Arcs, whereas Team Naruto fights Team Ichigo in the Hope and Pursuit Arcs.
True Purpose
After battling in the tournament, the God of the Jump World reveals that the wish he'll grant them is only valid if they save the world from destruction. Their true reason for gathering the heroes together was to save the world against a threat known as the "Dark Phantoms". The Dark Phantoms are wicked beings from the Darker Reaches who were sealed long ago at a terrible cost, but the seals have since lost their power. However, in order to access the Darker Reaches, the heroes must gather three keys that were once used to seal them: the keys of Friendship, Triumph, and Effort.
The heroes travel around the world to find the keys, as others fight off Dark Phantoms in various locations. Nube meets Toguro at Soul Society and realizes he's a demon, but the two end up working together to fight the Dark Phantoms. Taro brings Arale back home to Penguin Village and demands to get paid, but he is interrupted by Dark Phantoms and fights them off with her. Taro leaves when he realizes he stands no chance against Arale, so he wouldn't be able to force them to pay. The Key of Friendship is at the Inferno Crags, but Akainu and Shishio stand in the heroes' way, planning to get the key for themselves. They end up being defeated, so the heroes get the key and escape. Shishio is embarrassed that he managed to be defeated. Akainu decides to capture Shishio instead and turns against him. However, two Dark Phantoms suddenly confront them so the two team up again to fight them. When it's over, Shishio suggests that they can continue their fight now, but Akainu decides to leave instead of wasting his time.
Madara and Aizen find the Key of Triumph at Soul Society, but the heroes beat them and retrieve it. Raoh encounters Freeza and angers him when Raoh claims he only remembers the name of strong people. They decide to fight so they can remember each other's names. As the two prove their strengths to each other, Freeza suggests to team up with him. Raoh obtains the Key of Effort at the Temple of Athena, feeling that he's one step closer to achieving military rule. Freeza asks if Raoh can give him the key, but Raoh doesn't trust him. Freeza plans to keep using him until he gathers all the keys before killing him. However, the heroes arrive and manage to defeat Raoh and Freeza. Raoh gives them the key since they earned it, declaring that he has no regrets.
Final Battle

With the three keys in hand, the heroes receive the Dream Compass from God, allowing them to go to the Darker Reaches. The Dark Phantoms transform into each character in the main trio of the arc. In each battle, the Dark Phantoms complain about how Friendship, Triumph, and Effort are useless concepts that humans believe in. The protagonists defeat them and convince them to change their ways, saving them from the darkness and dragging them into the world of light.
With the world saved, the God of the Jump World wants to grant the heroes a wish, but none of them individually want any wishes to be granted. However, they collectively decide that they would like to wish for another Jump tournament to be hosted later so all of them can be together again, even if there's no prize for it. The God of the Jump World agrees and rewards them for their achievement by raining down food on them so they can have a feast.
Victory Road
Victory Road is a mode where players can select their team and fight through a variety of predetermined battles to conquer an area. As the player progresses through each area, the difficulty of the battles increase. Some battles may have optional challenges which reward the player with J-Points for achieving them. Characters can be changed at any time. You cannot freely choose battles in each area until you clear the continent, which means completing all of the battles in each area.
Arcade

Arcade is only available in J-Stars Victory VS+. Players can select a difficulty level and fight through six battles. There are eight different arcade courses a player can choose. Initially, only the "Technique", "Brave", and "Strong" courses are unlocked.
- Technique (Difficulty: 8★): This is a course where players can fight against characters who have mastered their techniques and use tricky attacks.
- Brave (Difficulty: 9★): This is a course where players can fight against characters who can take flexible approaches to battle in any given situation.
- Strong (Difficulty: 10★): This is a course where players can fight against characters who are known for their great power and physique.
- Elite (Difficulty: 12★): This is a course where players can fight against characters who appeared around 2010. Unlocked by clearing all three initial courses.
- Master (Difficulty: 13★): This is a course where players can fight against characters who appeared around 2000. Unlocked by clearing all three initial courses.
- Extreme (Difficulty: 14★): This is a course where players can fight against characters who appeared during the 1980s and 1990s. Unlocked by clearing all three initial courses.
- Random (Difficulty: 8★): This is a course where players can fight against random characters. Unlocked by clearing any course.
- Ultimate (Difficulty: 16★): This is a course where players can only fight the best of the best. Unlocked by clearing all courses within a certain time. When certain conditions are met, special "WARNING" battles can be initiated. Winning these allows the player to earn time bonuses to shorten the time of the next battle.
Versus
The Free Battle mode allows players to either fight against the computer or another player in offline 1 vs. 1 or 2 vs. 2 matches, optionally including a support character as well. If two players are playing offline, the battles will be in splitscreen.
Online Battle mode allows players to fight against each other but it is limited to 2 vs 2 only, with or without a support character. Players can either have another player as their partner or the computer. The partners of players can only be online rather than local.
J-Customize

Players can see a list of their J-Stars cards here or create up to five decks with cards. 10 cards can be equipped per deck, though two of the slots are limited to cards consisting of the characters in each main trio team from J-Adventure mode: Luffy, Ace, Seiya, Naruto, Yusuke, Gon, Toriko, Goku, Zebra, Ichigo, Oga, and Hiei.
Aside from the J-Adventure cards, all cards have both a positive effect and negative effect. However, there are 26 different groups which cards can belong to. If three cards of a certain group are lined up in a deck, players will get a "Combination Bonus", meaning that all of the negative effects are cancelled out.
J-Point Shop
Players can use the J-Points (JP) they earned to purchase various things, such as Battle Characters, Support Characters, J-Adventure and J-Customize items, and J-Stars cards. More characters will be available for purchase when the player increases their friendship gauge. More J-Adventure and J-Customize items are available to purchase when the player increases their victory and effort gauges.
J-Stars cards are bought using special Bronze, Silver, or Gold coins, which can be purchased in the shop.
Gallery
In the Gallery Mode, players can view character profiles, models, and voices. It also displays a list of all of their interactions with other characters in the game, depending on which ones the player has seen already. There is also an option to view or delete saved battle replay data.
Options
The Options Mode allows players to change battle control settings, display settings, and sound settings. There is a BGM editor allowing players to replace a song in the game with a song stored on their PlayStation's HDD, though these replaced songs cannot be played online. Lastly, there is a Cross-Save option to upload or download game progress data to or from PSN, allowing users to play the game on other consoles they may own. However, online battle records cannot be uploaded.
J-Stars Quiz
The loading screens alternate between showing in-game tips and showing a minigame called "J-Stars Quiz". These quizzes display a specific trivia question based on each series in the game. Players must quickly press one of the four buttons shown on the screen to answer the question. If answered correctly, the player receives extra J-Points.
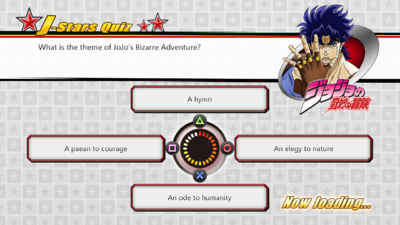
A: An ode to humanity
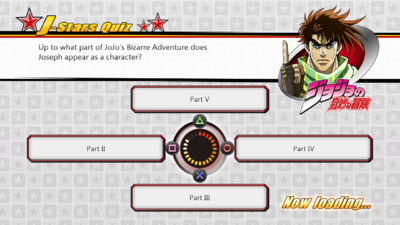
A: Part IV


Characters
There are 39 playable characters in the game. Only Luffy, Toriko, Naruto, Gintoki, Goku, and Ichigo are available at the start. The rest of the characters must be unlocked through the Story Mode or purchased in the Store using the in-game currency.
Additionally, there are 13 different characters who are only available as support. These characters appear on the screen and perform an action such as an attack or recovering the player's health before disappearing. None of the support characters are available at first. They all need to be unlocked in Story Mode or purchased with the in-game currency in the Store. All of the playable characters can be used as support as well.


Miscellaneous
All the characters who make a cameo appearance either in Story Mode or as part of some character's moveset.


Unused Content
Incomplete data for Jotaro Kujo, DIO, Dai from Dragon Quest: The Adventure of Dai, and Yoh Asakura from Shaman King are within the game files, suggesting that they were going to be included before being scrapped during development. Jotaro, DIO, and Dai were going to be playable, whereas Yoh was going to be a support character. Jotaro and Star Platinum's animations and a partial moveset is also included.
Jotaro, DIO, and Dai would later become playable in Jump Force, with Jonathan and Joseph being absent.
Stages
There are 12 stages that can be battled on. In story mode, the map features even more locations where the NPCs reside. There are also additional inaccessible locations on the map which characters may comment on when passing by them, such as Skypiea from One Piece.


Reception
The Japanese magazine Famitsu gave the game 32/40, with all four reviewers giving the game 8/10.
Trailers
Gallery
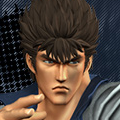
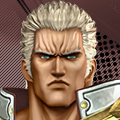
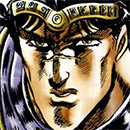
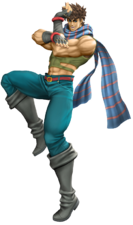
Jonathan Joestar's render
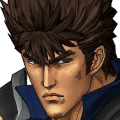
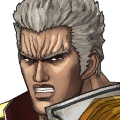
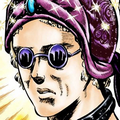
Joseph Joestar's render


J-Stars Victory VS Logo
J-Stars Victory VS+ Logo
Jonathan's Luck & Pluck Sword
Jonathan's Sunlight Yellow Overdrive
Joseph's Clacker Volley
Announcement scan
Jonathan and Joseph Confirmed
Concept Box Art
Zebra and Jonathan promo
Gintoki and Joseph promo
Joseph and Bobobo in the credits


Trivia
- In the game's third trailer, both Jonathan and Joseph appear as the rivals of Gintoki Sakata (from the Gintama franchise), with their battle named "Kettou vs Amatou" (Kettou meaning "family lineage" and Amatou meaning "a person who loves candy").
- The game pokes fun at how Joseph shares his voice actor with Gintoki within the special intro animations for each character:
- When against Gintoki, Joseph will say, "I know what you're going to say next: "You're right! This guy is a bit like me...!"", with Gintoki responding accordingly (though the line is inconsistently translated between the two characters).
- When with Gintoki, Gintoki will say, "Here's your next line: "Th-This is my s-special party trick..." Say it!", with Joseph responding accordingly.
- This particular phrase is possibly also a reference to when Esidisi predicted Joseph's line during their fight, and Joseph said the same line in disappointment.
- Jonathan's interaction with Bobobo (from Bobobo-bo Bo-bobo) is likely due to Dio and Bobobo sharing the same voice actor, Takehito Koyasu. Jonathan says "Let the darkness of history sink to the depths!!" and Bobobo replies "The history of the afro will always sink!".
- In the Dynamic Arc of J-Adventure mode, after Hancock asks if Gintoki is a Stand, his dialogue references the Ghost Ryokan arc of Gintama which parodies JoJo as the ghosts are referred to as Stands.
- Unlike some other characters in the game, both Jonathan and Joseph's attacks heavily feature Japanese sound effects commonly seen in manga. This was presumably done to capture the series's unique use of onomatopoeia and match the style of the anime.
- Both Jonathan and Joseph are the only playable characters from the same franchise to appear on the game's cover.
- The appearance of some characters are taken from their most popular sagas instead of their current or latest ones at the time the game was launched. For example, this includes Seiya (from Sanctuary Saga), Yusuke (from Dark Tournament Saga), Ichigo and Rukia (from Aizen Saga), and Goku and Vegeta (from Cell Saga). Some others are taken from the current anime saga at the moment instead of the current manga saga. This includes Joseph Joestar (from Battle Tendency), Toriko and Zebra (from Four Beast Saga), Gon and Killua (from the Chimera Ant Saga), and Naruto, Sasuke, and Madara (from Ten-Tails Saga).
Notes
- ↑ The avatars for these mentioned-only characters are not from the game and are only for illustrative purposes.
References
- ↑ Official Website - Special (Archived)
- ↑ "Fighting Game J-Stars Victory VS+ is a Fun Eye-Candy Filled Fan Service", IGN, December 23, 2014.


