JJL Chapter 74: Difference between revisions
Paisley Park (talk | contribs) m →References: clean up, replaced: <references /> → {{References}} |
m Text replacement - "}}{{Char|" to "}} {{Char|" |
||
| (12 intermediate revisions by 8 users not shown) | |||
| Line 1: | Line 1: | ||
{{Chapter Infobox |
|||
{{Chapter_box |
|||
|title = Ozon Baby's Pressure, Part 2 |
|title = Ozon Baby's Pressure, Part 2 |
||
|colors = JoJolion |
|colors = JoJolion |
||
|image = {{Tabber |
|image = {{Tabber |
||
|Digital Color|[[File:JJL_Chapter_74.png|{{ImageSize}}]] |
|Digital Color|[[File:JJL_Chapter_74.png|{{ImageSize}}]] |
||
|Tankobon|[[File:JJL Chapter 74 Tankobon.jpg|{{ImageSize}}]] |
|||
|Magazine|[[File:JJL_Chapter_74 Magazine.jpg|{{ImageSize}}]] |
|Magazine|[[File:JJL_Chapter_74 Magazine.jpg|{{ImageSize}}]] |
||
}} |
}} |
||
| Line 11: | Line 12: | ||
|ja_romaji = Ozon Beibī no Kaatsu Sono 2 |
|ja_romaji = Ozon Beibī no Kaatsu Sono 2 |
||
|page = 47 |
|page = 47 |
||
| |
|sdate = March 19, 2018<ref>[https://ultra.shueisha.co.jp/nowonsale/201804/ Ultra Jump Official Website]</ref> |
||
|uj = April 2018 |
|uj = April 2018 |
||
|prev = {{Ch2|JJL Chapter 73}} |
|prev = {{Ch2|JJL Chapter 73}} |
||
|next = {{Ch2|JJL Chapter 75}} |
|next = {{Ch2|JJL Chapter 75}} |
||
}} |
|||
| ⚫ | |||
{{Quote|{{Nihongo|The fruit forces these men to make a choice...|果実は男達に決断を迫る――}}|Tagline}} |
|||
| ⚫ | {{nihongo|'''Ozon Baby's Pressure, Part 2'''|オゾン・ベイビーの加圧 その②|Ozon Beibī no Kaatsu Sono 2}}, originally titled {{Nihongo|'''Poor Tom and Ozon Baby, Part 3'''|プアー・トムとオゾン・ベイビー その③|Puā Tomu to Ozon Beibī Sono 3}} in the [[Ultra Jump|UJ]] release, is the 74th chapter of ''[[JoJolion]]'' and the 921st chapter of the ''[[JoJo's Bizarre Adventure]]'' manga. |
||
==Summary== |
==Summary== |
||
| Line 30: | Line 33: | ||
==Appearances== |
==Appearances== |
||
{{CBox|Title=Characters|bg=JJL3|bg2=JJL2| |
{{CBox|Title=Characters|bg=JJL3|bg2=JJL2| |
||
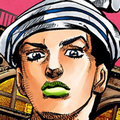
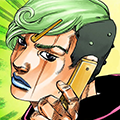
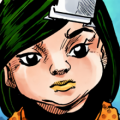
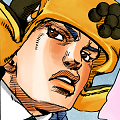
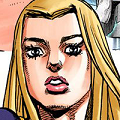
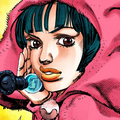
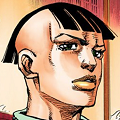
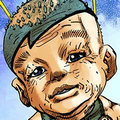
{{Char|Name=Josuke Higashikata (JoJolion)|SName=Josuke Higashikata|Av=Josuke8Av.png|Color=JJL|Color2=JJL2}} |
|||
{{Char|Name=Josuke Higashikata (JoJolion)|SName=Josuke Higashikata|Av=Josuke8Av.png|Color=JJL|Color2=JJL2}}{{Char|Name=Jobin Higashikata|Av=JobinAv.png|Color=JJL|Color2=JJL2}}{{Char|Name=Tsurugi Higashikata|Av=TsurugiAv.png|Color=JJL|Color2=JJL2}}{{Char|Name=Rai Mamezuku|Av=RaiAv.png|Color=JJL|Color2=JJL2}}{{Char|Name=Hato Higashikata|Av=HatoAv.png|Color=JJL|Color2=JJL2}}{{Char|Name=Daiya Higashikata|Av=DaiyaAv.png|Color=JJL|Color2=JJL2}}{{Char|Name=Norisuke Higashikata IV|Av=NorisukeAv.png|Status={{Mo}}|Color=JJL|Color2=JJL2}}{{Char|Name=Joshu Higashikata|Av=JoshuAv.png|Status={{Mo}}|Color=JJL|Color2=JJL2}}{{Char|Name=Poor Tom|Av=PoorTomAv.png|Color=JJL|Color2=JJL2}}{{Char|Name=Iwasuke|Av=IwasukeAv.png|Status={{Mo}}|Color=JJL|Color2=JJL2}}{{Char|Name=Holy Joestar-Kira|Av=Holy8Av.png|Status={{Mo}}|Color=JJL|Color2=JJL2}}{{Char|Name=Yoshikage Kira (JoJolion)|SName=Yoshikage Kira|Av=Kira8Av.png|Status={{Mo}}|Color=JJL|Color2=JJL2}} |
|||
{{Char|Name=Jobin Higashikata|Av=JobinAv.png|Color=JJL|Color2=JJL2}} |
|||
{{Char|Name=Tsurugi Higashikata|Av=TsurugiAv.png|Color=JJL|Color2=JJL2}} |
|||
{{Char|Name=Rai Mamezuku|Av=RaiAv.png|Color=JJL|Color2=JJL2}} |
|||
{{Char|Name=Hato Higashikata|Av=HatoAv.png|Color=JJL|Color2=JJL2}} |
|||
{{Char|Name=Daiya Higashikata|Av=DaiyaAv.png|Color=JJL|Color2=JJL2}} |
|||
{{Char|Name=Norisuke Higashikata IV|Av=NorisukeAv.png|Status={{Mo}}|Color=JJL|Color2=JJL2}} |
|||
{{Char|Name=Joshu Higashikata|Av=JoshuAv.png|Status={{Mo}}|Color=JJL|Color2=JJL2}} |
|||
{{Char|Name=Poor Tom|Av=PoorTomAv.png|Color=JJL|Color2=JJL2}} |
|||
{{Char|Name=Iwasuke|Av=IwasukeAv.png|Status={{Mo}}|Color=JJL|Color2=JJL2}} |
|||
{{Char|Name=Holy Joestar-Kira|Av=Holy8Av.png|Status={{Mo}}|Color=JJL|Color2=JJL2}} |
|||
{{Char|Name=Yoshikage Kira (JoJolion)|SName=Yoshikage Kira|Av=Kira8Av.png|Status={{Mo}}|Color=JJL|Color2=JJL2}} |
|||
}} |
}} |
||
{{CBox|Title=Stands|bg=JJL3|bg2=JJL2| |
{{CBox|Title=Stands|bg=JJL3|bg2=JJL2| |
||
{{Char|Name=Soft & Wet|Av=Soft&WetAv.png|Color=JJL|Color2=JJL2}} |
|||
{{Char|Name=Soft & Wet|Av=Soft&WetAv.png|Color=JJL|Color2=JJL2}}{{Char|Name=Ozon Baby|Av=OzonBabyAv.png|Color=JJL|Color2=JJL2}}{{Char|Name=Speed King|Av=SpeedKingAv.png|Color=JJL|Color2=JJL2}}{{Char|Name=Paper Moon King|Av=PaperMoonKingAv.png|Color=JJL|Color2=JJL2}}{{Char|Name=Doggy Style|Av=DoggyStyleAv.png|Color=JJL|Color2=JJL2}} |
|||
{{Char|Name=Ozon Baby|Av=OzonBabyAv.png|Color=JJL|Color2=JJL2}} |
|||
{{Char|Name=Speed King|Av=SpeedKingAv.png|Color=JJL|Color2=JJL2}} |
|||
{{Char|Name=Paper Moon King|Av=PaperMoonKingAv.png|Color=JJL|Color2=JJL2}} |
|||
{{Char|Name=Doggy Style|Av=DoggyStyleAv.png|Color=JJL|Color2=JJL2}} |
|||
}} |
|||
==Author's Comment== |
|||
{{Note|Part=JJL|Name=Author's Comment|Link=Author's Note/JoJolion |
|||
|Translation={{AN|JJL Chapter 74}} |
|||
|Transcript={{ANJ|JJL Chapter 74}} |
|||
}} |
}} |
||
| Line 48: | Line 72: | ||
{{Part 8 Chapters}} |
{{Part 8 Chapters}} |
||
[[Category:Part 8 Chapters]] |
[[Category:Part 8 Chapters]] |
||
{{DEFAULTSORT:JJL Chapter 074}} |
|||
{{DISPLAYTITLE:''JoJolion'' - Chapter 74}} |
{{DISPLAYTITLE:''JoJolion'' - Chapter 74}} |
||
{{JoJolion}} |
{{JoJolion}} |
||
Latest revision as of 15:53, 13 February 2025
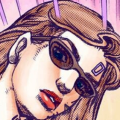
Ozon Baby's Pressure, Part 2 (オゾン・ベイビーの加圧 その②, Ozon Beibī no Kaatsu Sono 2), originally titled Poor Tom and Ozon Baby, Part 3 (プアー・トムとオゾン・ベイビー その③, Puā Tomu to Ozon Beibī Sono 3) in the UJ release, is the 74th chapter of JoJolion and the 921st chapter of the JoJo's Bizarre Adventure manga.
Summary
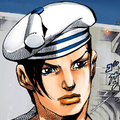
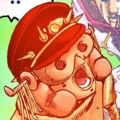
As Jobin and Tsurugi are trapped in their storage room, Daiya and Hato lay unconscious just outside, as they have suffered the brunt of Ozon Baby's power after opening the storage room's door to investigate the ruckus. Assuming that the same is happening to his father and Joshu, Jobin convinces Tsurugi to cooperate with him in order to kill Poor Tom. Explaining the dangers of exposing oneself to very high pressure to his son, Jobin devises a plan that will permit them to act without leaving their shelter.
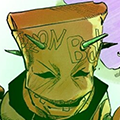
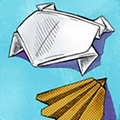
Meanwhile, Poor Tom is in bed with the women he met in a parking lot earlier. The woman's phone suddenly rings, and she passes it to Poor Tom, who answers the call. It is Jobin who shows him the Higashikata orchard on fire and exposing Poor Tom's plan to still retrieve the Locacaca. Panicking, Poor Toom immediately heads for the Higashikata's estate. Witnessing the fire, Tsurugi exclaims that the fruit will burn but Jobin is certain that the impending doom of the branch will spur everyone into action. Thus, he instructs his son to create an origami fire truck which he soaks in oil and sets on fire, fueling the blaze. He then waits for Josuke and the plant appraiser's response.
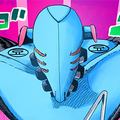
Meanwhile, Josuke and Mamezuku suffer from Ozon Baby's power inside their tunnel. While Mamezuku tells Josuke to close the hatch, Josuke argues that the enemy is outside and must know their positions. However, Mamezuku stipulates that their tunnel is a well-guarded secret and that the attack should be an automatic one. When Josuke peeks through the porthole, he sees the fire burning the orchard, to the duo's astonishment. Josuke guesses that something is amiss between the enemy Stand and the fire.
In their shed, Jobin reassures Tsurugi about Iwasuke's safety, and asks him to create origami that can fly. At the same time, Josuke decides to go outside with Mamezuku, using Soft & Wet's bubbles as a protective shield to stave off the decompression. Disregarding Mamezuku's suggestions to flee to safety, Josuke reaffirms his goals. Partly impressed, Mamezuku decides to step outside first inside a bubble. Strolling outside, the plant appraiser explains that the branch must be handled with care and he alone can do it. Jobin and Tsurugi spot Mamezuku through a phone transformed into an origami crane as he approaches the branch and lifts his arm, preparing to take it.
However, Mamezuku suddenly stops and looks aside. It is Poor Tom who has snuck into the garden and is holding his lego house. Having confirmed his suspicion about the hybrid Locacaca's presence, he tells the appraiser that he has a choice to make. Making a split second decision, Mamezuku uses both arms to respectively seize the branch and tie Poor Tom with a wire rope. The hidden branch has been revealed to every faction present.
Appearances


Author's Comment
Gallery
-
 Ultra Jump April 2018

References
Site Navigation
