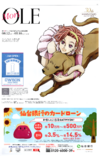
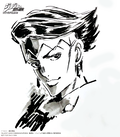
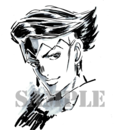
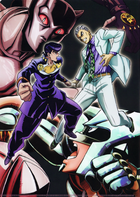
Anime Gallery/2016-2020: Difference between revisions
Jump to navigation
Jump to search
Content deleted Content added
mNo edit summary |
No edit summary |
||
| (16 intermediate revisions by 2 users not shown) | |||
| Line 1: | Line 1: | ||
{{Ed|Anime Gallery/2016-2020}} |
{{Ed|Anime Gallery/2016-2020}} |
||
{{Table2List}} |
{{Table2List}} |
||
{{Table2 |
|||
|image=<gallery mode=nolines widths=50> |
|||
Yupon JotaroGlitter.jpg |
|||
Yupon KakyoinGlitter.jpg |
|||
Yupon PolnareffGlitter.jpg |
|||
Yupon JosephPart3Glitter.jpg |
|||
Yupon AvdolGlitter.jpg |
|||
Yupon IggyGlitter.jpg |
|||
</gallery> |
|||
|date=February 3, 2016 |
|||
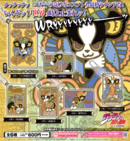
|desc= '''[[Medicos Entertainment]] - Wonder Festival 2016 [Winter]<br>Chimi-Chara Glitter Acrylic Badge<ref>https://x.com/medicos_et_j/status/694841907176828928</ref><br>{{S|Acrylic Badge}}''' |
|||
---- |
|||
Art: [[Yupon]] |
|||
|image2=[[File:WonderFest2016WinterBadges.jpg|120px]] |
|||
}} |
|||
{{Table2 |
{{Table2 |
||
|image=[[File:Iggy Bizarre Cosplay 3.png|130px]] |
|image=[[File:Iggy Bizarre Cosplay 3.png|130px]] |
||
| Line 10: | Line 25: | ||
}} |
}} |
||
{{Table2 |
{{Table2 |
||
|image={{Switch |
|||
|image=[[File:Part4Promo.jpg|120px]] |
|||
|Tab1=1|[[File:Part4Promo.jpg|120px]] |
|||
|Tab2=2|<gallery mode=nolines widths=90> |
|||
P4Anime maincast.png |
|||
YukakoMoriole.jpg |
|||
</gallery> |
|||
}} |
|||
|date=March 17, 2016 |
|date=March 17, 2016 |
||
|desc= '''[[Diamond is Unbreakable (Anime)|Diamond is Unbreakable]] '''<br>{{S|Promotional Artwork}}''' |
|desc= '''[[Diamond is Unbreakable (Anime)|Diamond is Unbreakable]] '''<br>{{S|Promotional Artwork}}''' |
||
| Line 197: | Line 218: | ||
Art: [[Terumi Nishii]] |
Art: [[Terumi Nishii]] |
||
|image2=[[File:Kosaku & Killer Queen Key visual.png|120px]] |
|image2=[[File:Kosaku & Killer Queen Key visual.png|120px]] |
||
}} |
|||
{{Table2 |
|||
|image=<gallery mode=nolines widths=50> |
|||
Yupon Josuke.png |
|||
Yupon Okuyasu.png |
|||
Yupon Koichi.png |
|||
Yupon Rohan.png |
|||
Yupon JotaroPart4.png |
|||
</gallery> |
|||
|date=September 16, 2016 |
|||
|desc= '''[[Diamond is Unbreakable (Anime)|JoJo's Bizarre Adventure: Diamond is Unbreakable]] in J-WORLD TOKYO<ref>https://jojo-animation.com/du/news/index01250000.html</ref><br>{{S|Blanket Illustration}}''' |
|||
---- |
|||
Art: [[Yupon]] |
|||
|image2=[[File:DU J-WORLD Blanket.jpg|120px]] |
|||
}} |
}} |
||
{{Table2 |
{{Table2 |
||
| Line 280: | Line 315: | ||
}} |
}} |
||
{{Table2 |
{{Table2 |
||
|image={{Switch |
|||
|image=[[File:DU Anime Volume6Box.jpg|140px]] |
|||
|Tab1=1|[[File:DU Anime Volume6Box.jpg|140px]] |
|||
|Tab2=2|[[File:MoriOLE Reimi Cover Ad.png|100px]] |
|||
}} |
|||
|date=November 23, 2016 |
|date=November 23, 2016 |
||
|desc= '''[[Diamond is Unbreakable (Anime)|Diamond is Unbreakable]] [[Home Video Releases|Blu-ray Volume 6]]<br>{{S|Cover Illustration}}''' |
|desc= '''[[Diamond is Unbreakable (Anime)|Diamond is Unbreakable]] [[Home Video Releases|Blu-ray Volume 6]]<br>{{S|Cover Illustration}}''' |
||
| Line 581: | Line 619: | ||
Art: [[Shunichi Ishimoto]] <br />Painted by: Yuki Sato <br />Finished by: Puavaranukroh Taweeporn |
Art: [[Shunichi Ishimoto]] <br />Painted by: Yuki Sato <br />Finished by: Puavaranukroh Taweeporn |
||
|image2=[[File:AnimageAugust2017.png|120px]] |
|image2=[[File:AnimageAugust2017.png|120px]] |
||
}} |
|||
{{Table2 |
|||
|image=<gallery mode=nolines widths=80> |
|||
Yupon JosukeAmusementPark.jpg |
|||
Yupon CrazyDiamondAmusementPark.png |
|||
Yupon KiraAmusementPark.jpg |
|||
Yupon KillerQueenAmusementPark.png |
|||
</gallery> |
|||
|date=July 15, 2017 |
|||
|desc= '''[[Escape from JoJo's Bizarre Amusement Park]]'''<br>{{S|Pins/Stickers}}''' |
|||
---- |
|||
Art: [[Yupon]] |
|||
|image2=[[File:Part 4 Esape from JoJo Pins.png|175px]] |
|||
}} |
}} |
||
{{Table2 |
{{Table2 |
||
| Line 678: | Line 729: | ||
Art: [[Masahiko Komino]] |
Art: [[Masahiko Komino]] |
||
|image2=[[File:Nurie sample3.jpg|100px]] |
|image2=[[File:Nurie sample3.jpg|100px]] |
||
}} |
|||
{{Table2 |
|||
|image=[[File:Escape Hotel Badges.png|175px]] |
|||
|date=November 2, 2017 |
|||
|desc= '''[[Escape from JoJo's Bizarre Mansion]]<br>{{S|Stickers/Badges}}''' |
|||
---- |
|||
Art: [[Yupon]] |
|||
|image2=[[File:Escape Hotel Badges.png|175px]] |
|||
}} |
}} |
||
{{Table2 |
{{Table2 |
||
| Line 742: | Line 801: | ||
Art: ??? |
Art: ??? |
||
|image2=[[File:Iggy Bizarre Cosplay 5.1.png|140px]] |
|image2=[[File:Iggy Bizarre Cosplay 5.1.png|140px]] |
||
}} |
|||
{{Table2 |
|||
|image=[[File:Yupon Kira.png|100px]] |
|||
|date=December 20, 2017 |
|||
|desc= '''[[Diamond is Unbreakable (Anime)|Diamond is Unbreakable]] - {{W|Comiket|Comiket 93}}<ref>https://x.com/medicos_et_j/status/943391701128716290</ref><br>{{S|Acrylic Badge}}''' |
|||
---- |
|||
Art: [[Yupon]] |
|||
|image2=[[File:Comiket93 AcrylicBadges.jpg|120px]] |
|||
}} |
|||
{{Table2 |
|||
|image=<gallery mode=nolines widths=50> |
|||
Yupon JotaroDIOsMansion.jpg |
|||
Yupon KakyoinDIOsMansion.jpg |
|||
Yupon IggyDIOsMansion.jpg |
|||
Yupon PolnareffDIOsMansion.jpg |
|||
Yupon DIODIOsMansion.jpg |
|||
Yupon TelenceDIOsMansion.jpg |
|||
Yupon VanillaIceDIOsMansion.jpg |
|||
</gallery> |
|||
|date=January 26, 2018 |
|||
|desc= '''[[Invitation to DIO's Mansion]]<ref>https://x.com/jworldtokyo/status/956723910753492993</ref><br>{{S|Minigame Prizes}}''' |
|||
---- |
|||
Art: [[Yupon]] |
|||
|image2=[[File:Mansion ball prizes.jpg|120px]] |
|||
}} |
}} |
||
{{Table2 |
{{Table2 |
||
| Line 774: | Line 857: | ||
Art: [[Shunichi Ishimoto]]<br>Background: [[Reki Taki]] |
Art: [[Shunichi Ishimoto]]<br>Background: [[Reki Taki]] |
||
|image2=[[File:ArtDeli.jpg|120px]] |
|image2=[[File:ArtDeli.jpg|120px]] |
||
}} |
|||
{{Table2 |
|||
|image=<gallery mode=nolines widths=80> |
|||
Yupon KakyoinDIOsMansionF-MEGA.jpg |
|||
Yupon TelenceDIOsMansionF-MEGA.jpg |
|||
</gallery> |
|||
|date=March 9, 2018 |
|||
|desc= '''[[Invitation to DIO's Mansion]]<ref>https://x.com/jworldtokyo/status/971944117402939392</ref><br>{{S|Minigame Prizes}}''' |
|||
---- |
|||
Art: [[Yupon]] |
|||
|image2=[[File:Mansion kak merch 2.jpg|100px]] |
|||
}} |
}} |
||
{{Table2 |
{{Table2 |
||
| Line 944: | Line 1,038: | ||
</gallery> |
</gallery> |
||
|date=December 21, 2018 |
|date=December 21, 2018 |
||
|desc= '''OIOI X [[Medicos Entertainment]] |
|desc= '''OIOI X [[Medicos Entertainment]] Figure Exhibition in Marui<br>{{S|Acrylic Stand}}''' |
||
---- |
---- |
||
Art: [[Shinichi Machida]] |
Art: [[Shinichi Machida]] |
||
| Line 964: | Line 1,058: | ||
Art: [[Shinichi Machida]] |
Art: [[Shinichi Machida]] |
||
|image2=[[File:PashFeb2019.jpg|120px]] |
|image2=[[File:PashFeb2019.jpg|120px]] |
||
}} |
|||
{{Table2 |
|||
|image=<gallery mode=nolines widths=59> |
|||
Yupon GiornoJ-WORLD.jpg |
|||
Yupon BrunoJ-WORLD.jpg |
|||
Yupon AbbacchioJ-WORLD.jpg |
|||
Yupon MistaJ-WORLD.jpg |
|||
Yupon NaranciaJ-WORLD.jpg |
|||
Yupon FugoJ-WORLD.jpg |
|||
</gallery> |
|||
|date=January 16, 2019 |
|||
|desc= '''[[Golden Wind (Anime)|JoJo's Bizarre Adventure: Golden Wind]] in J-WORLD TOKYO<br>{{S|Goods Illustration}}''' |
|||
---- |
|||
Art: [[Yupon]] |
|||
|image2=[[File:GoldenWind_J-WORLD_Badges.jpg|175px]] |
|||
}} |
}} |
||
{{Table2 |
{{Table2 |
||
| Line 984: | Line 1,093: | ||
</gallery> |
</gallery> |
||
|date=February 28, 2019 |
|date=February 28, 2019 |
||
|desc= '''OIOI X [[Medicos Entertainment]] |
|desc= '''OIOI X [[Medicos Entertainment]] Figure Exhibition in Marui<br>{{S|Acrylic Stand}}''' |
||
---- |
---- |
||
Art: [[Shinichi Machida]] |
Art: [[Shinichi Machida]] |
||
| Line 1,033: | Line 1,142: | ||
}} |
}} |
||
{{Table2 |
{{Table2 |
||
|image={{Switch|Tab1=1| |
|image={{Switch|Tab1=1|<gallery mode=nolines widths=50> |
||
Man In the Mirro Acrylic.png |
|||
|Tab2=2|[[File:JoJo Cafe-2.png|140px]]}} |
|||
JoJoCafeFormaggioAcrylic.png |
|||
Baby Face Acrylic.png |
|||
JoJoCafeRisottoAcrylic.png |
|||
JoJoCafeProsciuttoAcrylic.png |
|||
Beach Boy Acrylic.png |
|||
JoJoCafeGhiaccioAcrylic.png |
|||
</gallery> |
|||
|Tab2=2|[[File:JoJo Cafe-1.png|140px]] |
|||
|Tab3=3|[[File:JoJo Cafe-2.png|140px]]}} |
|||
|date=April 12, 2019 |
|date=April 12, 2019 |
||
|desc= '''[[Golden Wind (Anime)|JoJo Cafe]] "Golden Wind Campaign in Harajauku" '''<br>{{S|Cover Illustration}}''' |
|desc= '''[[Golden Wind (Anime)|JoJo Cafe]] "Golden Wind Campaign in Harajauku" '''<br>{{S|Cover Illustration}}''' |
||
| Line 1,042: | Line 1,160: | ||
}} |
}} |
||
{{Table2 |
{{Table2 |
||
|image= <gallery mode=nolines widths= |
|image= <gallery mode=nolines widths=50> |
||
Metallica Acrylic.png |
Metallica Acrylic.png |
||
White Album Acrylic.png |
White Album Acrylic.png |
||
TheGratefulDead.png |
|||
Grateful Dead Acrylic.png |
|||
LittleFeat.png |
|||
Littel Feet Acrylic.png |
|||
Babyface.png |
|||
Baby Face Acrylic.png |
|||
ManintheMirror.png |
|||
Man In the Mirro Acrylic.png |
|||
Beach Boy |
Beach Boy Infobox Anime.png |
||
</gallery> |
</gallery> |
||
|date=April 12, 2019 |
|date=April 12, 2019 |
||
| Line 1,055: | Line 1,173: | ||
---- |
---- |
||
Art: ??? |
Art: ??? |
||
|image2=[[File: |
|image2=[[File:JoJoCafe Collab Goods.jpg|120px]] |
||
}} |
|||
{{Table2 |
|||
|image=<gallery mode=nolines widths=59> |
|||
Yupon Giorno.jpg |
|||
Yupon GoldExperience.jpg |
|||
Yupon Bruno.jpg |
|||
Yupon StickyFingers.jpg |
|||
Yupon Abbacchio.jpg |
|||
Yupon MoodyBlues.jpg |
|||
Yupon Mista.jpg |
|||
Yupon SexPistols.jpg |
|||
Yupon Narancia.jpg |
|||
Yupon Aerosmith.jpg |
|||
Yupon Fugo.jpg |
|||
Yupon PurpleHaze.jpg |
|||
Yupon Trish.png |
|||
Yupon SpiceGirl.png |
|||
</gallery> |
|||
|date=April 12, 2019 |
|||
|desc= '''[[Golden Wind (Anime)|JoJo Cafe]] "Golden Wind Campaign in Harajauku"<br>Acrylic Figure Stand Chimi-Chara ver.'''<br>{{S|Acrylic Stand}}''' |
|||
---- |
|||
Art: [[Yupon]] |
|||
|image2=[[File:JoJoCafe Collab Goods.jpg|120px]] |
|||
}} |
}} |
||
{{Table2 |
{{Table2 |
||
| Line 1,219: | Line 1,360: | ||
}} |
}} |
||
{{Table2 |
{{Table2 |
||
|image={{Switch|Tab1=1|[[File:CMB5.jpg| |
|image={{Switch|Tab1=1|[[File:CMB5.jpg|120px]] |
||
|Tab2=2|[[File:ChimiMegaBuddyIllustration2.jpg| |
|Tab2=2|[[File:ChimiMegaBuddyIllustration2.jpg|120px]]}} |
||
|date=July 26, 2019 |
|date=July 26, 2019 |
||
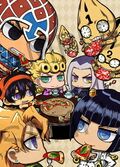
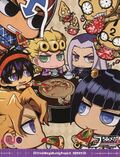
|desc= '''[[Chimi Mega Buddy!]] JoJo's Bizarre Adventure: [[Vento_Aureo|Golden Wind]] — [[Giorno Giovanna]] & [[Bruno Bucciarati]] Set {{S|MEGATREA SHOP and PREMIUM BANDAI exclusive}}<ref>http://megatreshop.shop40.makeshop.jp/shopdetail/000000000682/</ref><br>{{S|Illustration Sheet}}''' |
|desc= '''[[Chimi Mega Buddy!]] JoJo's Bizarre Adventure: [[Vento_Aureo|Golden Wind]] — [[Giorno Giovanna]] & [[Bruno Bucciarati]] Set {{S|MEGATREA SHOP and PREMIUM BANDAI exclusive}}<ref>http://megatreshop.shop40.makeshop.jp/shopdetail/000000000682/</ref><br>{{S|Illustration Sheet}}''' |
||
---- |
---- |
||
Art: [[Yupon]] |
Art: [[Yupon]] |
||
|image2=[[File:CMB.jpg| |
|image2=[[File:CMB.jpg|175px]] |
||
}} |
}} |
||
{{Table2 |
{{Table2 |
||
| Line 1,490: | Line 1,631: | ||
---- |
---- |
||
Art: ???<br>Background: [[Reki Taki]] |
Art: ???<br>Background: [[Reki Taki]] |
||
|image2=[[File:EscapeMuseumPoster.jpg|120px]] |
|||
}} |
|||
{{Table2 |
|||
|image= [[File:Scatola.png|60px]][[File:Skatra sub.png|100px]] |
|||
|date=January 24, 2020 |
|||
|desc= [[Escape from JoJo's Bizarre Museum]] <br>{{S|Main Illustration}} |
|||
---- |
|||
Art: ??? |
|||
|image2=[[File:EscapeMuseumPoster.jpg|120px]] |
|image2=[[File:EscapeMuseumPoster.jpg|120px]] |
||
}} |
}} |
||
| Line 1,577: | Line 1,726: | ||
}} |
}} |
||
{{Table2 |
{{Table2 |
||
|image=<gallery mode=nolines widths=59> |
|||
|image=[[File:JoJo World.png|120px]] |
|||
Jonathan-Inherited-Soul.jpg |
|||
|date=December 16, 2020 |
|||
Joseph-Inherited-Soul.jpg |
|||
|desc= '''[[JOJO WORLD]] <br>{{S|Promotional Artwork}}''' |
|||
Jotaro-Inherited-Soul.jpg |
|||
---- |
|||
Josuke-Inherited-Soul.jpg |
|||
Art: [[Megumi Itoi]] |
|||
Giorno-Inherited-Soul.jpg |
|||
|image2=[[File:JOJO World Infobox.png|120px]] |
|||
</gallery> |
|||
}} |
|||
{{Table2 |
|||
|image=[[File:Jonathan-Inherited-Soul.jpg|120px]] |
|||
|date=October 1, 2020 |
|date=October 1, 2020 |
||
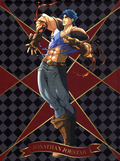
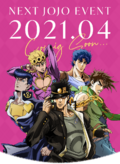
|desc= '''[[JOESTAR The Inherited Soul]] Event<ref name="JTIS">https://jojo-portal.com/news/info/1/</ref><br>{{S|Key Visual}} |
|desc= '''[[JOESTAR The Inherited Soul]] Event<ref name="JTIS">https://jojo-portal.com/news/info/1/</ref><br>{{S|Key Visual}} |
||
---- |
---- |
||
Art: [[Kenji Yokoyama]]<br>Art Corrections: [[Megumi Itoi]] |
Art: [[Kenji Yokoyama]] {{S|Jonathan, Joseph & Giorno}} & [[Shin Hyung Woo]] {{S|Jotaro & Josuke}}<br>Art Corrections: [[Megumi Itoi]] |
||
|image2=[[File:JoJo April 4th 2021 Teaser.png|120px]][[File:Joestars Parts 1-5 April 4th 2021 Event.jpg|120px]] |
|image2=[[File:JoJo April 4th 2021 Teaser.png|120px]][[File:Joestars Parts 1-5 April 4th 2021 Event.jpg|120px]] |
||
}} |
}} |
||
{{Table2 |
{{Table2 |
||
|image=[[File: |
|image=[[File:JoJo World.png|120px]] |
||
|date=December |
|date=December 16, 2020 |
||
|desc= '''[[ |
|desc= '''[[JOJO WORLD]] <br>{{S|Promotional Artwork}}''' |
||
---- |
---- |
||
Art |
Art: [[Megumi Itoi]] |
||
|image2=[[File: |
|image2=[[File:JOJO World Infobox.png|120px]] |
||
}} |
}} |
||
{{Table2 |
{{Table2 |
||
Latest revision as of 12:35, 15 April 2025
| Artwork | Date | Original Use | Source Image |
|---|
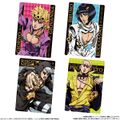
Chimi-Chara Glitter Acrylic Badge[1] (Acrylic Badge) Art: Yupon |
 |
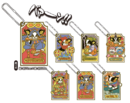 |
(Rubber Keychain) Art: ??? |
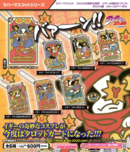 |
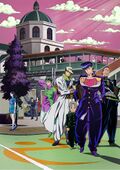
(Promotional Artwork) Art: ??? Background: Reki Taki |
 |
 |
(Rubber Keychain) Art: ??? |
 |
  |
(Main Illustration) Art: Masahiko Komino & Takako Shimizu |
 |
 |
(Poster) Art: Shunichi Ishimoto |
 |
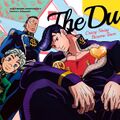 |
(Cover Illustration) Art: Terumi Nishii |
 |
 |
(Cover Illustration) Art: ??? |
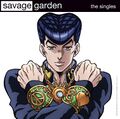 |
  |
(Promotional Illustration) Art: Kohei Ashiya |
 |
(Cover Illustration) Art: Terumi Nishii |
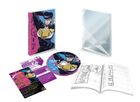 |
(Banner Illustration) Art: Terumi Nishii |
(Banner Illustration) Art: Terumi Nishii |
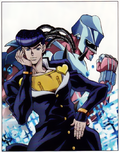 |
(Poster) Art: Terumi Nishii |
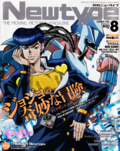 |
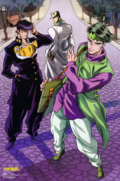 |
(Poster) Art: Ryo Yamauchi Background: Reki Taki |
 |
 |
(Cover Illustration) Art: Terumi Nishii |
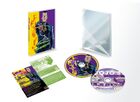 |
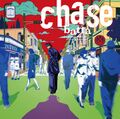 |
(Cover Illustration) Art: Shunichi Ishimoto Background: Reki Taki |
 |
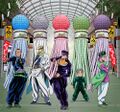 |
(Poster) Art: ??? Background: Reki Taki |
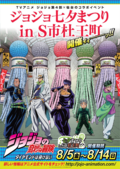 |
 |
(Towel Illustration) Art: ??? |
 |
 |
(Towel Illustration) Art: ??? |
 |
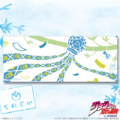 |
(Towel Illustration) Art: ??? |
 |
 |
(Tapestry) Art: ??? |
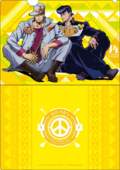 |
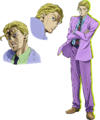 |
(Promotional Artwork) Art: Terumi Nishii |
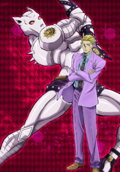 |
 |
(Cover Illustration) Art: Terumi Nishii |
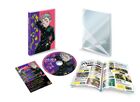 |
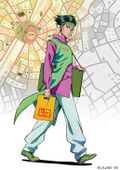 |
(Promotional Artwork) Art: ??? |
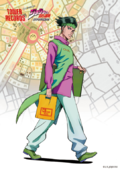 |
 |
(Promotional Artwork) Art: Terumi Nishii |
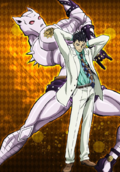 |
(Blanket Illustration) Art: Yupon |
 |
 |
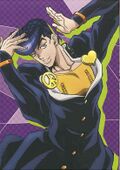
(Cover Illustration) Art: Terumi Nishii |
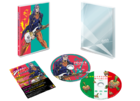 |
 |
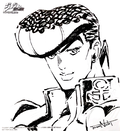
(Cover Illustration) Art: ??? |
 |
 |
(Promotional Artwork) Art: Terumi Nishii |
 |
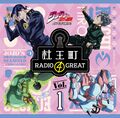 |
(Cover Illustration) Art: Megumi Itoi |
 |
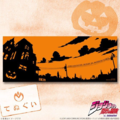 |
(Towel Illustration) Art: ??? |
 |
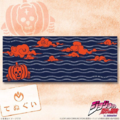 |
(Towel Illustration) Art: ??? |
 |
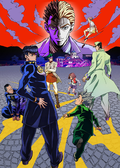 |
(Promotional Artwork) Art: Terumi Nishii |
 |
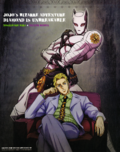 |
(Poster) Art: ??? |
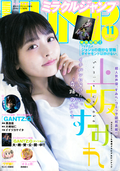 |
(Cover Illustration) Art: Shunichi Ishimoto |
 |
 |
(Cover Illustration) Art: Terumi Nishii |
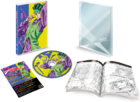 |
(Cover Illustration) Art: Terumi Nishii |
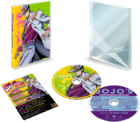 |
  |
(Rubber Keychain) Art: ??? |
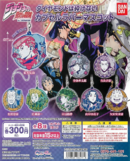 |
 |
(Poster) Art: Terumi Nishii & Mitsuko Baba |
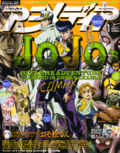 |
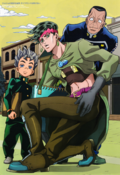 |
(Poster) Art: Yu Matsuo Art Corrections: Terumi Nishii |
 |
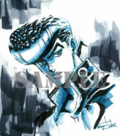 |
(Illustration) Art: Terumi Nishii |
 |
 |
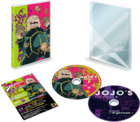
(Cover Illustration) Art: Terumi Nishii |
 |
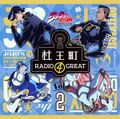
(Cover Illustration) Art: ??? |
 |
 |
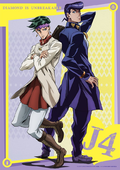
(Cover Illustration) Art: Megumi Itoi |
 |
 |
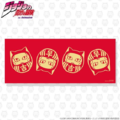
(Tapestry) Art: ??? |
 |
 |
(Towel Illustration) Art: ??? |
 |
 |
(Towel Illustration) Art: ??? |
 |
 |
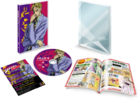
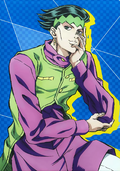
(Cover Illustration) Art: Terumi Nishii |
 |
 |
(Cover Illustration) Art: ??? |
 |
(Promotional Artwork) Art: Terumi Nishii |
 |
 |
(Cover Illustration) Art: Megumi Itoi |
 |
 |
(Tapestry) Art: ??? |
 |
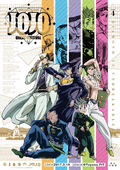 |
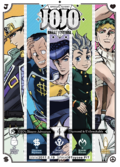
(Poster) Art: Terumi Nishii |
 |
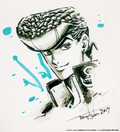 |
(Illustration) Art: Terumi Nishii |
 |
 |
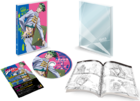
(Cover Illustration) Art: Terumi Nishii |
 |
 |
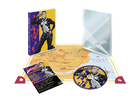
(Cover Illustration) Art: Terumi Nishii |
 |
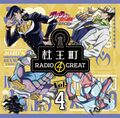 |
(Cover Illustration) Art: Megumi Itoi |
 |
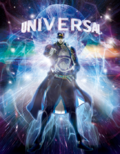 |
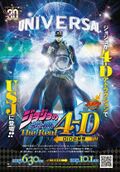
(Promotional Artwork) Art: ??? |
  |
 |
(Cover Illustration) Art: Terumi Nishii |
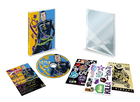 |
 |
(Cover Illustration) Art: Terumi Nishii |
 |
 |
(Tapestry) Art: Ryo Yamauchi Art Corrections: Terumi Nishii |
 |
(Promotional Artwork) Art: ??? Background: Reki Taki |
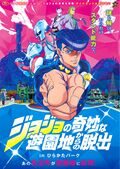 |
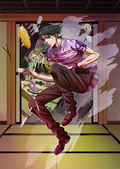 |
(Promotional Artwork) Art: Shunichi Ishimoto Background: Reki Taki |
 |
 |
(Cover Illustration) Art: Terumi Nishii |
 |
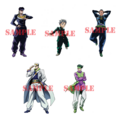 |
(Cover Illustration) Art: Yu Matsuo |
 |
(Promotional Artwork) Art: Yoko Uchida |
 |
 |
(Cover Illustration) Art: ??? |
 |
(Promotional Artwork) Art: Terumi Nishii |
 |
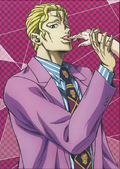 |
(Cover Illustration) Art: ??? |
 |
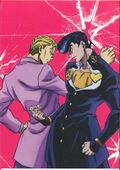  |
(Cover Illustration) Art: ??? |
 |
  |
(Cover Illustration) Art: ??? |
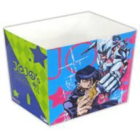 |
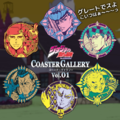 |
(Coaster Illustrations) Art: ??? |
 |
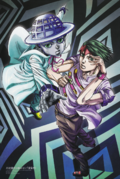 |
(Poster) Art: Shunichi Ishimoto Painted by: Yuki Sato Finished by: Puavaranukroh Taweeporn |
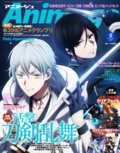 |
(Pins/Stickers) Art: Yupon |
 |
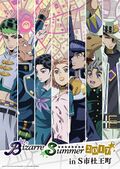 |
(Poster) Art: ??? |
 |
 |
(Poster) Art: Takako Shimizu |
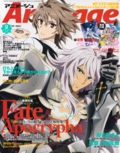 |
 |
(Tapestry) Art: ??? |
 |
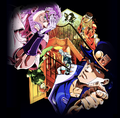 |
(Promotional Artwork) Art: Masahiko Komino Background: Reki Taki |
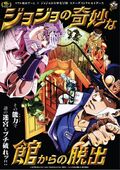 |
(Poster) Art: Takako Shimizu Finished & Special Effects by: Puavaranukroh Taweeporn |
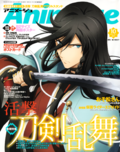 |
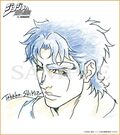 |
(Promotional Artwork) Art: Takako Shimizu |
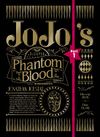 |
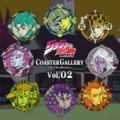 |
(Coaster Illustrations) Art: ??? |
 |
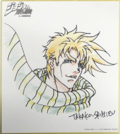 |
(Promotional Artwork) Art: Takako Shimizu |
 |
(Cover Illustration) Art: Takako Shimizu |
 |
(Cover Illustration) Art: Takako Shimizu |
 |
 |
(Poster) Art: Masahiko Komino |
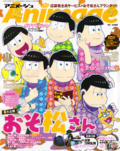 |
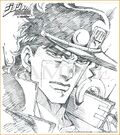 |
(Promotional Artwork) Art: Masahiko Komino |
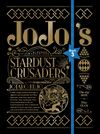 |
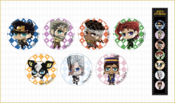 |
(Stickers/Badges) Art: Yupon |
 |
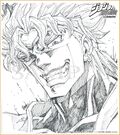 |
(Promotional Artwork) Art: Masahiko Komino |
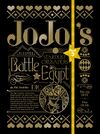 |
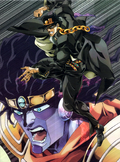 |
(Cover Illustration) Art: Masahiko Komino |
 |
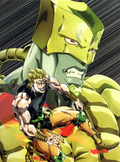 |
(Cover Illustration) Art: Masahiko Komino |
 |
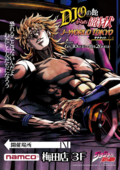   |
(Poster) Art: Shunichi Ishimoto |
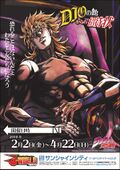 |
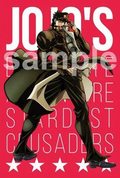 |
(Poster) Art: Shunichi Ishimoto |
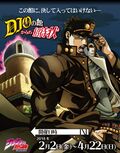 |
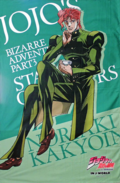 |
(Poster) Art: Shunichi Ishimoto |
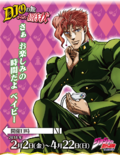 |
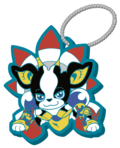 |
(Rubber Keychain) Art: ??? |
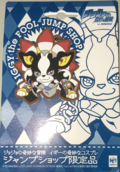 |
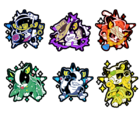 |
(Rubber Keychain) Art: ??? |
 |
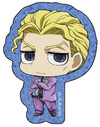 |
(Acrylic Badge) Art: Yupon |
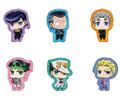 |
(Minigame Prizes) Art: Yupon |
 |
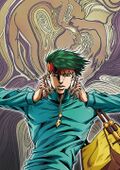 |
(Promotional Artwork) Art: Shunichi Ishimoto Coloring: Puavaranukroh Taweeporn Color Corrections: Yasufumi Soejima |
 |
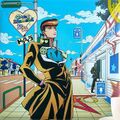 |
(Poster) Art: Shunichi Ishimoto Background:Reki Taki |
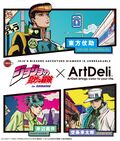 |
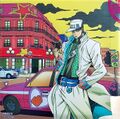 |
(Poster) Art: Shunichi Ishimoto Background: Reki Taki |
 |
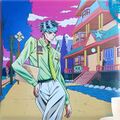 |
(Poster) Art: Shunichi Ishimoto Background: Reki Taki |
 |
(Minigame Prizes) Art: Yupon |
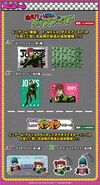 |
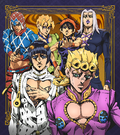 |
(Promotional Artwork) Art: Takahiro Kishida |
 |
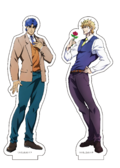 |
(Acrylic Stand) Art: ??? |
 |
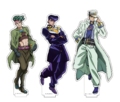 |
(Acrylic Stand) Art: ??? |
 |
 |
(Promotional Artwork) Art: Takahiro Kishida |
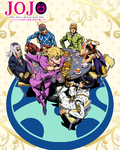 |
(Promotional Artwork) Art: ??? Art Corrections: Shunichi Ishimoto |
 |
(Promotional Artwork) Art: ??? Art Corrections: Shunichi Ishimoto |
 |
(Poster) Art: Shinichi Machida |
 |
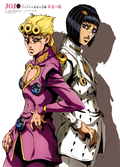 |
(Poster) Art: Nozomi Tachibana Art Corrections: Shunichi Ishimoto |
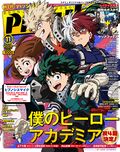 |
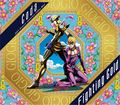 |
(Cover Illustration) Art: Shinichi Machida Art Corrections: Shunichi Ishimoto Background: Reki Taki |
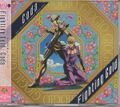 |
(Poster) Art: Shinichi Machida Background: Reki Taki |
 |
 |
(Poster) Art: Shinichi Machida |
 |
  |
(Acrylic Stand) Art: Megumi Itoi |
 |
(Acrylic Stand) Art: Megumi Itoi |
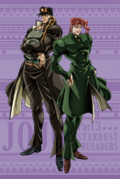 |
(Acrylic Stand) Art: ??? Art Corrections: Shunichi Ishimoto |
 |
(Acrylic Stand) Art: ??? |
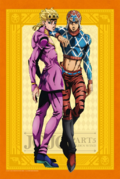 |
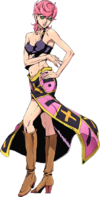 |
(Promotional Artwork) Art: Takahiro Kishida |
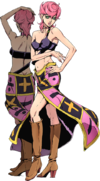 |
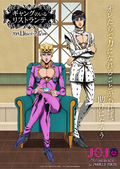 |
(Cover Illustration) Art: Shinichi Machida |
 |
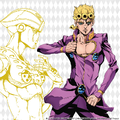 |
(Cover Illustration) Art: Takahiro Kishida |
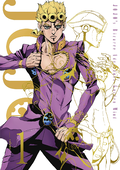 |
(Acrylic Stand) Art: Shinichi Machida |
  |
 |
(Poster) Art: Shinichi Machida |
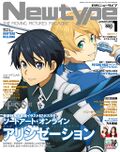 |
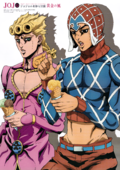 |
(Poster) Art: Shinichi Machida |
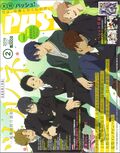 |
(Goods Illustration) Art: Yupon |
 |
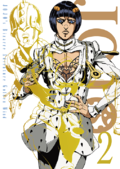 |
(Cover Illustration) Art: Takahiro Kishida |
 |
(Acrylic Stand) Art: Shinichi Machida |
(Poster) Art: Shinichi Machida Background: Reki Taki |
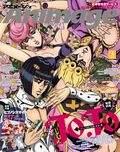 |
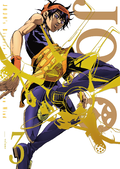 |
(Cover Illustration) Art: Takahiro Kishida |
 |
(Promotional Artwork) Art: Takahiro Kishida |
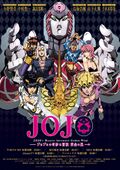 |
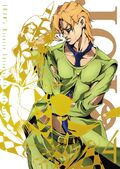 |
(Cover Illustration) Art: Takahiro Kishida |
 |
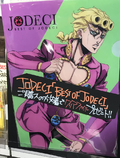 |
(Cover Illustration) Art: Shinichi Machida |
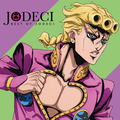 |
(Cover Illustration) Art: ??? |
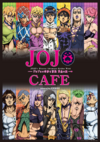 |
(Acrylic Stand) Art: ??? |
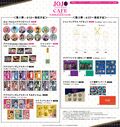 |
Acrylic Figure Stand Chimi-Chara ver. (Acrylic Stand) Art: Yupon |
 |
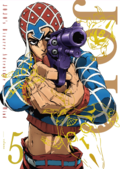 |
(Cover Illustration) Art: Takahiro Kishida |
 |
 |
(Rubber Keychain) Art: ??? |
 |
 |
(Promotional Artwork) Art: Rina Morita |
 |
 |
(Promotional Artwork) Art: Shinji Nagata |
 |
 |
(Promotional Artwork) Art: Kenji Yokoyama |
 |
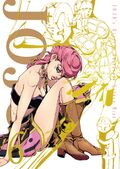 |
(Cover Illustration) Art: Takahiro Kishida |
 |
 |
(Promotional Artwork) Art: Daisuke Tsumagari |
 |
 |
(Promotional Artwork) Art: Yui Kinoshita |
 |
 |
(Promotional Artwork) Art: Kiko Morifuji |
 |
 |
(Promotional Artwork) Art: Natsue Chibayama |
 |
 |
(Promotional Artwork) Art: Hironori Tanaka |
 |
 |
(Promotional Artwork) Art: Yuta Shinohara |
 |
  |
(Promotional Artwork) Art: ??? |
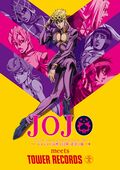 |
 |
(Promotional Artwork) Art: Masamichi Ishiyama |
 |
 |
(Promotional Artwork) Art: Yukitoshi Houtani |
 |
 |
(Promotional Artwork) Art: Shunichi Ishimoto |
 |
 |
(Promotional Artwork) Art: Yasutoshi Iwasaki |
 |
 |
(Promotional Artwork) Art: Haruka Tanaka |
 |
 |
(Promotional Artwork) Art: Haruka Tanaka |
 |
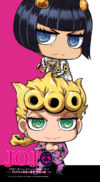 |
(Box Artwork) Art: Yupon |
 |
(Illustration Sheet) Art: Yupon |
 |
 |
(Promotional Artwork) Art: Shunichi Ishimoto |
 |
 |
(Promotional Artwork) Art: Shunichi Ishimoto |
 |
 |
(Cover Illustration) Art: Shinichi Machida |
 |
 |
(Acrylic Stand) Art: ??? |
 |
 |
(Cover Illustration) Art: Takahiro Kishida |
 |
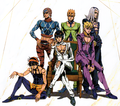 |
(Main Illustration) Art: Shinichi Machida |
 |
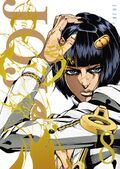 |
(Cover Illustration) Art: Takahiro Kishida |
 |
(Card Illustrations) Art: Shinichi Machida |
 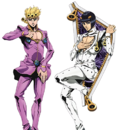 |
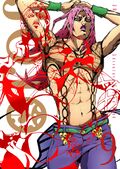 |
(Cover Illustration) Art: Takahiro Kishida |
 |
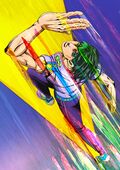 |
(Promotional Artwork) Art: Shunichi Ishimoto |
 |
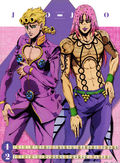 |
(Inside Illustration) Art: Shinichi Machida |
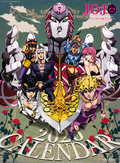 |
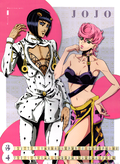 |
(Inside Illustration) Art: Shinichi Machida |
 |
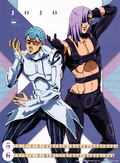 |
(Inside Illustration) Art: Shinichi Machida |
 |
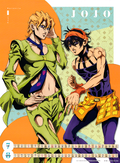 |
(Inside Illustration) Art: Shinichi Machida |
 |
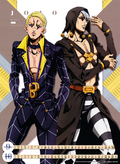 |
(Inside Illustration) Art: Shinichi Machida |
 |
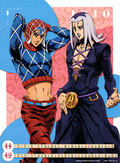 |
(Inside Illustration) Art: Shinichi Machida |
 |
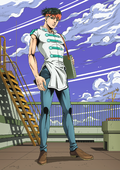 |
(Promotional Artwork) Art: Shunichi Ishimoto Background: Reki Taki |
 |
(Acrylic Stand) Art: Shinichi Machida |
 |
(Acrylic Stand) Art: Shinichi Machida |
 |
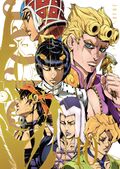 |
(Cover Illustration) Art: Takahiro Kishida |
 |
(Cover Illustration) Art: ??? |
 |
  |
(Cover Illustration) Art: Shinichi Machida |
 |
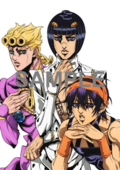 |
(Cover Illustration) Art: ??? |
 |
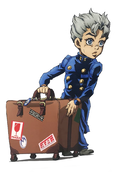 |
(Render) Art: ??? |
 |
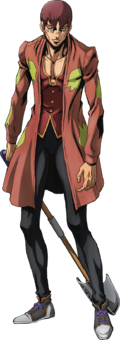 |
(Render) Art: ??? |
 |
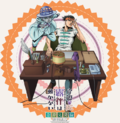 |
(Promotional Artwork) Art: Shunichi Ishimoto Background: Reki Taki |
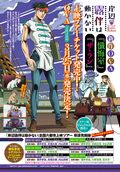 |
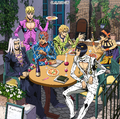 |
(Main Illustration) Art: Shinichi Machida |
 |
(Visuals Cards) Art: Shunichi Ishimoto |
 |
 |
(Poster) Art: Shunichi Ishimoto Background: Reki Taki |
 |
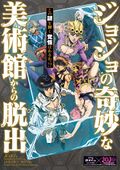 |
(Main Illustration) Art: ??? Background: Reki Taki |
 |
 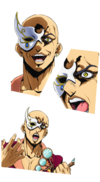 |
(Main Illustration) Art: ??? |
 |
(Acrylic Stand) Art: ??? |
 |
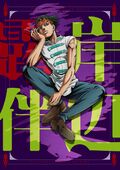 |
(Cover Illustration) Art: Shunichi Ishimoto |
 |
(Acrylic Stand) Art: ??? |
 |
(Card Illustrations) Art: Shunichi Ishimoto |
 |
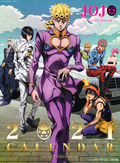 |
(Poster) Art: Nao Naito Art Corrections: Megumi Itoi |
 |
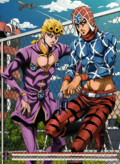 |
(Inside Illustration) Art: Nao Naito Art Corrections: Megumi Itoi |
 |
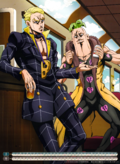 |
(Inside Illustration) Art: Shin Hyung Woo |
 |
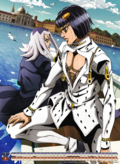 |
(Inside Illustration) Art: Shin Hyung Woo Art Corrections: Megumi Itoi |
 |
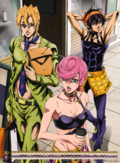 |
(Inside Illustration) Art: Nao Naito Art Corrections: Megumi Itoi |
 |
(Key Visual) Art: Kenji Yokoyama (Jonathan, Joseph & Giorno) & Shin Hyung Woo (Jotaro & Josuke) Art Corrections: Megumi Itoi |
  |
 |
(Promotional Artwork) Art: Megumi Itoi |
 |
 |
(Visual Card) Art: ??? |
References
- ↑ https://x.com/medicos_et_j/status/694841907176828928
- ↑ https://jojo-animation.com/du/news/index01250000.html
- ↑ https://x.com/medicos_et_j/status/943391701128716290
- ↑ https://x.com/jworldtokyo/status/956723910753492993
- ↑ https://x.com/jworldtokyo/status/971944117402939392
- ↑ https://www.megahobby.jp/event/chimimegabp_sp/
- ↑ http://megatreshop.shop40.makeshop.jp/shopdetail/000000000682/
- ↑ https://twitter.com/namachu/status/1194778413715709956
- ↑ https://twitter.com/namachu/status/1195059202349248513
- ↑ https://jojo-portal.com/news/info/1/


