Weiß Schwarz: Difference between revisions
| (26 intermediate revisions by 8 users not shown) | |||
| Line 1: | Line 1: | ||
{{Video Game Infobox |
{{Video Game Infobox |
||
|colors = Game |
|colors = Game |
||
|title = Weiß Schwarz |
|title = ''Weiß Schwarz'' |
||
|image = [[File:ws_logo.png|{{ImageSize}}]] |
|image = [[File:ws_logo.png|{{ImageSize}}]] |
||
| |
|publisher = {{W|Bushiroad}} |
||
|platform = Trading Card Game |
|platform = Trading Card Game |
||
|release = '''''Golden Wind'''''<br/ >Trial Deck:{{vgrelease|JP=June 14, 2019|NA=March 27, 2020}}Booster Packs:{{vgrelease|JP=September 29, 2019|NA=March 27, 2020}}<hr/ >'''''Stardust Crusaders'''''{{vgrelease|JP=August 11, 2023}}<hr/ >'''''Stone Ocean'''''{{vgrelease|JP=August 11, 2023}} |
|release = '''''Golden Wind'''''<br/ >Trial Deck:{{vgrelease|JP=June 14, 2019|NA=March 27, 2020}}Booster Packs:{{vgrelease|JP=September 29, 2019|NA=March 27, 2020}}<hr/ >'''''Stardust Crusaders'''''{{vgrelease|JP=August 11, 2023|NA=October 4, 2024}}<hr/ >'''''Stone Ocean'''''{{vgrelease|JP=August 11, 2023|NA=October 4, 2024}} |
||
|website = [https://en.ws-tcg.com/ Official Site] |
|website = [https://en.ws-tcg.com/ Official Site] |
||
|previous = ''[[Crusade]]'' |
|||
}} |
}} |
||
{{Nihongo|'''Weiß Schwarz'''|ヴァイスシュヴァルツ|Vaisu Shuvarutsu}}, |
{{Nihongo|'''''Weiß Schwarz'''''|ヴァイスシュヴァルツ|Vaisu Shuvarutsu}}, also spelled '''''Weiss Schwarz''''', is a Japanese {{W|Collectible card game}} released by {{W|Bushiroad}} in collaboration with various other popular animation and video game companies. Series are divided into two sides: Weiß, German for "white," and Schwarz, German for "black." |
||
A [[ |
A ''[[Golden Wind (Anime)|Golden Wind]]'' trial deck was released in Japan on June 14, 2019 with booster packs on September 29, 2019.<ref>https://ws-tcg.com/products/jojo_gw_bp/</ref> An English version was released on March 27, 2020. |
||
[[ |
Decks based on ''[[Stardust Crusaders (Anime)|Stardust Crusaders]]'' and ''[[Stone Ocean (Anime)|Stone Ocean]]'' were announced on March 21, 2023 and released on August 11, 2023.<ref>[https://jojo-news.com/2023/03/22/weiss-schwarz-announces-stardust-crusaders-and-stone-ocean-cards/ Weiß Schwarz Announces Stardust Crusaders and Stone Ocean Cards]</ref><ref>https://twitter.com/wstcg/status/1638106055040438272?s=20</ref> English versions of both decks released on October 4, 2024.<ref>[https://en.ws-tcg.com/products/pb-jj2/ Premium Booster JoJo's Bizarre Adventure: Stardust Crusaders]</ref><ref>[https://en.ws-tcg.com/products/pb-jj/ Premium Booster JoJo's Bizarre Adventure: Stone Ocean]</ref> |
||
==Rules & Information== |
==Rules & Information== |
||
| Line 18: | Line 19: | ||
===Deck Building=== |
===Deck Building=== |
||
#A deck must contain exactly 50 cards. |
#A deck must contain exactly 50 cards. |
||
#A deck can only have up to four cards of the same name unless otherwise stated. |
#A deck can only have up to four cards of the same name unless otherwise stated. |
||
#A deck can have up to a maximum of 8 Climax Cards. |
#A deck can have up to a maximum of 8 Climax Cards. |
||
#Decks benefit from cards with matching colors and series. |
#Decks benefit from cards with matching colors and series. |
||
===Card Types=== |
===Card Types=== |
||
====Character Cards==== |
====Character Cards==== |
||
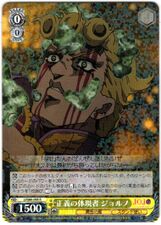
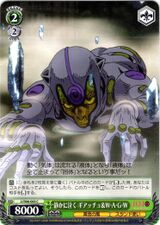
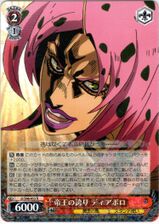
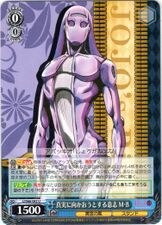
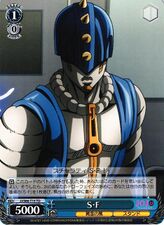
[[File:WS-Diavolo.png|thumb|150px|Character Card]] |
[[File:WS-Diavolo.png|thumb|150px|Character Card]] |
||
These cards feature unique characteristics and attributes based on the series they hail from and are the player's primary means of combat. Each player can place up to five Character Cards from their hand onto the Stage section of the field, three on Center Stage and two in the back. Characters in the Back Stage are invulnerable to direct combat but are also unable to attack, which benefits those who primarily provide buffs. |
These cards feature unique characteristics and attributes based on the series they hail from and are the player's primary means of combat. Each player can place up to five Character Cards from their hand onto the Stage section of the field, three on Center Stage and two in the back. Characters in the Back Stage are invulnerable to direct combat but are also unable to attack, which benefits those who primarily provide buffs. |
||
Power level determines the outcome of battles between two Center Stage Characters, soul points determine the damage dealt, and Level/Cost determines the cost required to summon the Character. During a turn, Characters will either be in upright 'Stand' state which allows them to attack, sideways 'Rest' state, which they are set to after attacking, or upside-down 'Reverse' state, which means they were defeated in battle. |
Power level determines the outcome of battles between two Center Stage Characters, soul points determine the damage dealt, and Level/Cost determines the cost required to summon the Character. During a turn, Characters will either be in upright 'Stand' state which allows them to attack, sideways 'Rest' state, which they are set to after attacking, or upside-down 'Reverse' state, which means they were defeated in battle. |
||
====Event Cards==== |
====Event Cards==== |
||
These cards are typically used during the Main Phrase and can provide a number of different effects, such as changing the power of Characters, searching the deck, or removing cards from the Stage. Similar to Character Cards, a player can play as many Event Cards from their hand as they wish, provided they supply the appropriate cost stated on each card and have the right colors in their Level/Stock area. There is no designated area where an Event card should go, and once they are used they are placed into the Waiting Room unless otherwise stated. |
These cards are typically used during the Main Phrase and can provide a number of different effects, such as changing the power of Characters, searching the deck, or removing cards from the Stage. Similar to Character Cards, a player can play as many Event Cards from their hand as they wish, provided they supply the appropriate cost stated on each card and have the right colors in their Level/Stock area. There is no designated area where an Event card should go, and once they are used they are placed into the Waiting Room unless otherwise stated. |
||
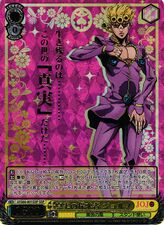
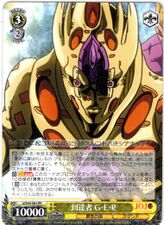
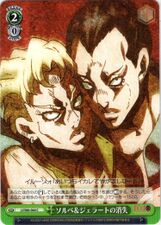
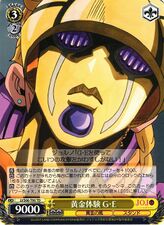
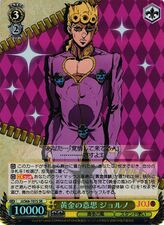
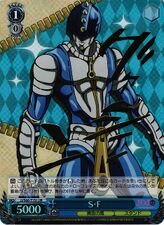
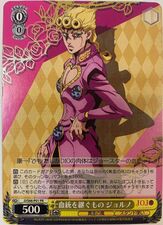
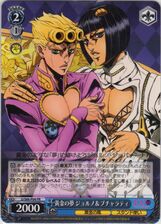
[[File:WS-GiornoGER.png|thumb|150px|Climax Card]] |
[[File:WS-GiornoGER.png|thumb|150px|Climax Card]] |
||
====Climax Cards==== |
====Climax Cards==== |
||
Similar to Event Cards, these cards provide various effects, but only 8 of them are allowed in a deck. Only one Climax Card may be used per turn and must be sent to the Waiting Room during the End Phase. Climax Card effects are either Automatic, which are invoked immediately, or Continuous, which continue to be active until they leave the field. |
Similar to Event Cards, these cards provide various effects, but only 8 of them are allowed in a deck. Only one Climax Card may be used per turn and must be sent to the Waiting Room during the End Phase. Climax Card effects are either Automatic, which are invoked immediately, or Continuous, which continue to be active until they leave the field. |
||
==Gameplay== |
==Gameplay== |
||
{{Scroll Box| |
{{Scroll Box| |
||
===Set Up=== |
===Set Up=== |
||
At the start of the game, players shuffle their decks and place them face-down in the designated area. Players then choose who to go first through whatever means, and draw five cards. Starting with the player who goes first, each player can discard any number of cards in their hand to the Waiting Room and draw the same number of cards from their deck. The main objective of the game is to force your opponent to level up by inflicting seven cards of damage. Once a player hits level 4, they lose the game. |
At the start of the game, players shuffle their decks and place them face-down in the designated area. Players then choose who to go first through whatever means, and draw five cards. Starting with the player who goes first, each player can discard any number of cards in their hand to the Waiting Room and draw the same number of cards from their deck. The main objective of the game is to force your opponent to level up by inflicting seven cards of damage. Once a player hits level 4, they lose the game. |
||
===Phases=== |
===Phases=== |
||
| Line 48: | Line 49: | ||
#Play a Character Card. A player can place a card on the Stage standing up in any stage position of their choice. If a character already exists in a stage position, the existing card is placed in the Waiting Room. There is no limit to how many Character Cards can be played. |
#Play a Character Card. A player can place a card on the Stage standing up in any stage position of their choice. If a character already exists in a stage position, the existing card is placed in the Waiting Room. There is no limit to how many Character Cards can be played. |
||
#Move a character. A player can freely change the stage position of a character or swap it with a character in another position. Character statuses can't be changed. |
#Move a character. A player can freely change the stage position of a character or swap it with a character in another position. Character statuses can't be changed. |
||
#Use a character's ability. A player can activate a character ability on Stage if it's marked with an "ACT" icon. The ability can be activated multiple times if the right costs are paid. |
#Use a character's ability. A player can activate a character ability on Stage if it's marked with an "ACT" icon. The ability can be activated multiple times if the right costs are paid. |
||
====Climax Phase==== |
====Climax Phase==== |
||
The player can play a Climax Card from their hand and place it in the Climax Area. Climax Cards provide powerful effects that last for the rest of the turn. |
The player can play a Climax Card from their hand and place it in the Climax Area. Climax Cards provide powerful effects that last for the rest of the turn. |
||
| Line 54: | Line 55: | ||
====Attack Phase==== |
====Attack Phase==== |
||
Players can choose to attack during this phase by switching characters on the stage to the "rest" position (Note: Only one attack can be made during the first turn). Players then select one of three attack types: |
Players can choose to attack during this phase by switching characters on the stage to the "rest" position (Note: Only one attack can be made during the first turn). Players then select one of three attack types: |
||
*Frontal: Your character attacks the character directly in front of them. |
*Frontal: Your character attacks the character directly in front of them. |
||
*Side: Your character attacks one of the opponent's other characters not in front of it, however, your character's soul points are reduced by the level of the target. |
*Side: Your character attacks one of the opponent's other characters not in front of it, however, your character's soul points are reduced by the level of the target. |
||
*Direct: If no enemy character is present in front of yours, you can choose to attack the other player directly. Doing so increases their soul points by 1 for the duration of the turn. |
*Direct: If no enemy character is present in front of yours, you can choose to attack the other player directly. Doing so increases their soul points by 1 for the duration of the turn. |
||
The attacking player picks up the top card of their deck. They then unleash the effect represented on the Trigger Icon on the top right of the card and place the card face-down in the Stock. The player being attacked can counter-attack by using a special card or ability which is marked with a "BACKUP" icon. |
The attacking player picks up the top card of their deck. They then unleash the effect represented on the Trigger Icon on the top right of the card and place the card face-down in the Stock. The player being attacked can counter-attack by using a special card or ability which is marked with a "BACKUP" icon. |
||
The player who is attacked takes damage equal to the Souls Points of the attacking character. This is represented by the player picking up a number of cards from their deck equal to the soul points and placing them in the Clock Area. If a Climax Card is drawn, place all the cards drawn in the Waiting Room. Compare the Power of the two characters and change the card with more points to "rest" state and the losing card to "reverse" state. Players are free to repeat an attack with all Characters on their stage. |
The player who is attacked takes damage equal to the Souls Points of the attacking character. This is represented by the player picking up a number of cards from their deck equal to the soul points and placing them in the Clock Area. If a Climax Card is drawn, place all the cards drawn in the Waiting Room. Compare the Power of the two characters and change the card with more points to "rest" state and the losing card to "reverse" state. Players are free to repeat an attack with all Characters on their stage. |
||
| Line 65: | Line 66: | ||
===Leveling System=== |
===Leveling System=== |
||
Players that have 7 cards in their Clock Area level up by 1. When this happens, the player selects any 1 card from the top 7 cards in their Clock Area, places it in the Level Area, and discards the remaining 6 to the Waiting Room. All additional cards past the aforementioned top 7 (the 8th and beyond, before discarding) remain on the Clock Area unless the conditions for a subsequent Level Up are met. Note that outside Level 0 Characters and Event cards, most cards cannot be placed unless their level matches the players and their color matches one card in the player's Level or Clock Area. i.e, a Red Level 3 Character can only be placed on the Stage if the player has reached Level 3 and has at least one red card in their Level or Clock Area. |
Players that have 7 cards in their Clock Area level up by 1. When this happens, the player selects any 1 card from the top 7 cards in their Clock Area, places it in the Level Area, and discards the remaining 6 to the Waiting Room. All additional cards past the aforementioned top 7 (the 8th and beyond, before discarding) remain on the Clock Area unless the conditions for a subsequent Level Up are met. Note that outside Level 0 Characters and Event cards, most cards cannot be placed unless their level matches the players and their color matches one card in the player's Level or Clock Area. i.e, a Red Level 3 Character can only be placed on the Stage if the player has reached Level 3 and has at least one red card in their Level or Clock Area. |
||
}} |
}} |
||
| Line 71: | Line 72: | ||
{{Tabber |
{{Tabber |
||
|Golden Wind (Booster Pack)| |
|Golden Wind (Booster Pack)| |
||
<gallery> |
<gallery mode="packed"> |
||
S66-001RR.jpg|Seeker of Truth, Giorno |
S66-001RR.jpg|Seeker of Truth, Giorno |
||
S66-001SSP.jpg|Seeker of Truth, Giorno ''(Super Special)'' |
S66-001SSP.jpg|Seeker of Truth, Giorno ''(Super Special)'' |
||
| Line 90: | Line 91: | ||
S66-011U.jpg|Harbinger of Hope, Polnareff |
S66-011U.jpg|Harbinger of Hope, Polnareff |
||
S66-011J.jpg|Harbinger of Hope, Polnareff ''(JoJo Rare)'' |
S66-011J.jpg|Harbinger of Hope, Polnareff ''(JoJo Rare)'' |
||
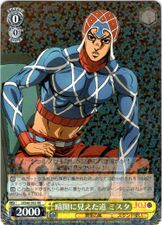
S66-012U.jpg|Bizarre Investigation Request, Koichi & Echoes |
S66-012U.jpg|Bizarre Investigation Request, Koichi & Echoes ACT3 |
||
S66-012J.jpg|Bizarre Investigation Request, Koichi & Echoes |
S66-012J.jpg|Bizarre Investigation Request, Koichi & Echoes ACT3 ''(JoJo Rare)'' |
||
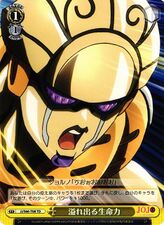
S66-013U.jpg|Abundance of Life, Gold Experience |
S66-013U.jpg|Abundance of Life, Gold Experience |
||
S66-014aU.jpg|6 Together as 1, Sex Pistols |
S66-014aU.jpg|6 Together as 1, Sex Pistols |
||
| Line 166: | Line 167: | ||
S66-059U.jpg|Restless Pursuer, Notorious B.I.G |
S66-059U.jpg|Restless Pursuer, Notorious B.I.G |
||
S66-059J.jpg|Restless Pursuer, Notorious B.I.G ''(JoJo Rare)'' |
S66-059J.jpg|Restless Pursuer, Notorious B.I.G ''(JoJo Rare)'' |
||
S66-060C.jpg|Leaky |
S66-060C.jpg|Leaky-Eye Luca |
||
S66-061C.jpg|Eternal Climax, King Crimson |
S66-061C.jpg|Eternal Climax, King Crimson |
||
S66-062C.jpg|Treat Time, Cioccolata |
S66-062C.jpg|Treat Time, Cioccolata |
||
| Line 232: | Line 233: | ||
</gallery> |
</gallery> |
||
|Golden Wind (Trial Deck)| |
|Golden Wind (Trial Deck)| |
||
<gallery> |
<gallery mode="packed"> |
||
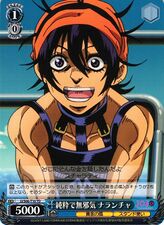
S66-T01.jpg|Bad at Studying, Narancia |
S66-T01.jpg|Bad at Studying, Narancia |
||
S66-T02.jpg|Kind Teacher, Fugo |
S66-T02.jpg|Kind Teacher, Fugo |
||
| Line 264: | Line 265: | ||
</gallery> |
</gallery> |
||
|Stardust Crusaders| |
|Stardust Crusaders| |
||
<gallery mode="packed"> |
|||
Weiß Schwarz Stardust Crusaders Booster Pack.png |
|||
Weiß Schwarz Stardust Crusaders Booster Pack1.png |
|||
Weiß Schwarz Stardust Crusaders Booster Pack2.png |
|||
Weiß Schwarz Stardust Crusaders Booster Pack3.png |
|||
Weiß Schwarz Stardust Crusaders Booster Pack4.png |
|||
Weiß Schwarz Stardust Crusaders Booster Pack5.png |
|||
Weiß Schwarz Stardust Crusaders Booster Pack6.png |
|||
Weiß Schwarz Stardust Crusaders Booster Pack7.png |
|||
Weiß Schwarz Stardust Crusaders Booster Pack8.png |
|||
Weiß Schwarz Stardust Crusaders Booster Pack9.png |
|||
Weiß Schwarz Stardust Crusaders Booster Pack10.png |
|||
Weiß Schwarz Stardust Crusaders Booster Pack11.png |
|||
Weiß Schwarz Stardust Crusaders Booster Pack12.png |
|||
Weiß Schwarz Stardust Crusaders Booster Pack13.png |
|||
Weiß Schwarz Stardust Crusaders Booster Pack14.png |
|||
Weiß Schwarz Stardust Crusaders Booster Pack15.png |
|||
Weiß Schwarz Stardust Crusaders Booster Pack16.png |
|||
Weiß Schwarz Stardust Crusaders Booster Pack17.png |
|||
Weiß Schwarz Stardust Crusaders Booster Pack18.png |
|||
Weiß Schwarz Stardust Crusaders Booster Pack19.png |
|||
Weiß Schwarz Stardust Crusaders Booster Pack20.png |
|||
Weiß Schwarz Stardust Crusaders Booster Pack21.png |
|||
Weiß Schwarz Stardust Crusaders Booster Pack22.png |
|||
Weiß Schwarz Stardust Crusaders Booster Pack23.png |
|||
Weiß Schwarz Stardust Crusaders Booster Pack24.png |
|||
Weiß Schwarz Stardust Crusaders Booster Pack25.png |
|||
Weiß Schwarz Stardust Crusaders Booster Pack26.png |
|||
Weiß Schwarz Stardust Crusaders Booster Pack27.png |
|||
Weiß Schwarz Stardust Crusaders Booster Pack28.png |
|||
Weiß Schwarz Stardust Crusaders Booster Pack29.png |
|||
Weiß Schwarz Stardust Crusaders Booster Pack30.png |
|||
Weiß Schwarz Stardust Crusaders Booster Pack31.png |
|||
Weiß Schwarz Stardust Crusaders Booster Pack32.png |
|||
Weiß Schwarz Stardust Crusaders Booster Pack33.png |
|||
Weiß Schwarz Stardust Crusaders Booster Pack34.png |
|||
Weiß Schwarz Stardust Crusaders Booster Pack35.png |
|||
Weiß Schwarz Stardust Crusaders Booster Pack36.png |
|||
Weiß Schwarz Stardust Crusaders Booster Pack37.png |
|||
Weiß Schwarz Stardust Crusaders Booster Pack38.png |
|||
Weiß Schwarz Stardust Crusaders Booster Pack39.png |
|||
Weiß Schwarz Stardust Crusaders Booster Pack40.png |
|||
Weiß Schwarz Stardust Crusaders Booster Pack41.png |
|||
Weiß Schwarz Stardust Crusaders Booster Pack42.png |
|||
Weiß Schwarz Stardust Crusaders Booster Pack43.png |
|||
Weiß Schwarz Stardust Crusaders Booster Pack44.png |
|||
Weiß Schwarz Stardust Crusaders Booster Pack45.png |
|||
Weiß Schwarz Stardust Crusaders Booster Pack46.png |
|||
Weiß Schwarz Stardust Crusaders Booster Pack47.png |
|||
Weiß Schwarz Stardust Crusaders Booster Pack48.png |
|||
Weiß Schwarz Stardust Crusaders Booster Pack49.png |
|||
Weiß Schwarz Stardust Crusaders Booster Pack50.png |
|||
Weiß Schwarz Stardust Crusaders Booster Pack51.png |
|||
Weiß Schwarz Stardust Crusaders Booster Pack52.png |
|||
Weiß Schwarz Stardust Crusaders Booster Pack53.png |
|||
Weiß Schwarz Stardust Crusaders Booster Pack54.png |
|||
Weiß Schwarz Stardust Crusaders Booster Pack55.png |
|||
Weiß Schwarz Stardust Crusaders Booster Pack56.png |
|||
Weiß Schwarz Stardust Crusaders Booster Pack57.png |
|||
Weiß Schwarz Stardust Crusaders Booster Pack58.png |
|||
Weiß Schwarz Stardust Crusaders Booster Pack59.png |
|||
Weiß Schwarz Stardust Crusaders Booster Pack60.png |
|||
Weiß Schwarz Stardust Crusaders Booster Pack61.png |
|||
Weiß Schwarz Stardust Crusaders Booster Pack62.png |
|||
Weiß Schwarz Stardust Crusaders Booster Pack63.png |
|||
Weiß Schwarz Stardust Crusaders Booster Pack64.png |
|||
Weiß Schwarz Stardust Crusaders Booster Pack65.png |
|||
Weiß Schwarz Stardust Crusaders Booster Pack66.png |
|||
Weiß Schwarz Stardust Crusaders Booster Pack67.png |
|||
Weiß Schwarz Stardust Crusaders Booster Pack68.png |
|||
Weiß Schwarz Stardust Crusaders Booster Pack69.png |
|||
Weiß Schwarz Stardust Crusaders Booster Pack70.png |
|||
Weiß Schwarz Stardust Crusaders Booster Pack71.png |
|||
Weiß Schwarz Stardust Crusaders Booster Pack72.png |
|||
Weiß Schwarz Stardust Crusaders Booster Pack73.png |
|||
Weiß Schwarz Stardust Crusaders Booster Pack74.png |
|||
Weiß Schwarz Stardust Crusaders Booster Pack75.png |
|||
Weiß Schwarz Stardust Crusaders Booster Pack76.png |
|||
Weiß Schwarz Stardust Crusaders Booster Pack77.png |
|||
Weiß Schwarz Stardust Crusaders Booster Pack78.png |
|||
Weiß Schwarz Stardust Crusaders Booster Pack79.png |
|||
Weiß Schwarz Stardust Crusaders Booster Pack80.png |
|||
Weiß Schwarz Stardust Crusaders Booster Pack81.png |
|||
Weiß Schwarz Stardust Crusaders Booster Pack82.png |
|||
Weiß Schwarz Stardust Crusaders Booster Pack83.png |
|||
Weiß Schwarz Stardust Crusaders Booster Pack84.png |
|||
Weiß Schwarz Stardust Crusaders Booster Pack85.png |
|||
Weiß Schwarz Stardust Crusaders Booster Pack86.png |
|||
Weiß Schwarz Stardust Crusaders Booster Pack87.png |
|||
Weiß Schwarz Stardust Crusaders Booster Pack88.png |
|||
Weiß Schwarz Stardust Crusaders Booster Pack89.png |
|||
Weiß Schwarz Stardust Crusaders Booster Pack90.png |
|||
Weiß Schwarz Stardust Crusaders Booster Pack91.png |
|||
Weiß Schwarz Stardust Crusaders Booster Pack92.png |
|||
Weiß Schwarz Stardust Crusaders Booster Pack93.png |
|||
Weiß Schwarz Stardust Crusaders Booster Pack94.png |
|||
Weiß Schwarz Stardust Crusaders Booster Pack95.png |
|||
Weiß Schwarz Stardust Crusaders Booster Pack96.png |
|||
Weiß Schwarz Stardust Crusaders Booster Pack97.png |
|||
Weiß Schwarz Stardust Crusaders Booster Pack98.png |
|||
Weiß Schwarz Stardust Crusaders Booster Pack99.png |
|||
Weiß Schwarz Stardust Crusaders Booster Pack100.png |
|||
Weiß Schwarz Stardust Crusaders Booster Pack101.png |
|||
Weiß Schwarz Stardust Crusaders Booster Pack102.png |
|||
Weiß Schwarz Stardust Crusaders Booster Pack103.png |
|||
Weiß Schwarz Stardust Crusaders Booster Pack104.png |
|||
Weiß Schwarz Stardust Crusaders Booster Pack105.png |
|||
Weiß Schwarz Stardust Crusaders Booster Pack106.png |
|||
Weiß Schwarz Stardust Crusaders Booster Pack107.png |
|||
Weiß Schwarz Stardust Crusaders Booster Pack108.png |
|||
Weiß Schwarz Stardust Crusaders Booster Pack109.png |
|||
Weiß Schwarz Stardust Crusaders Booster Pack110.png |
|||
Weiß Schwarz Stardust Crusaders Booster Pack111.png |
|||
Weiß Schwarz Stardust Crusaders Booster Pack112.png |
|||
Weiß Schwarz Stardust Crusaders Booster Pack113.png |
|||
Weiß Schwarz Stardust Crusaders Booster Pack114.png |
|||
Weiß Schwarz Stardust Crusaders Booster Pack115.png |
|||
Weiß Schwarz Stardust Crusaders Booster Pack116.png |
|||
Weiß Schwarz Stardust Crusaders Booster Pack117.png |
|||
Weiß Schwarz Stardust Crusaders Booster Pack118.png |
|||
Weiß Schwarz JJ-SE41-P01S.png |
|||
</gallery> |
|||
|Stone Ocean| |
|Stone Ocean| |
||
<gallery mode="packed"> |
|||
Weiß Schwarz Stone Ocean Booster Pack.png |
|||
Weiß Schwarz Stone Ocean Booster Pack 1.png |
|||
Weiß Schwarz Stone Ocean Booster Pack 2.png |
|||
Weiß Schwarz Stone Ocean Booster Pack 3.png |
|||
Weiß Schwarz Stone Ocean Booster Pack 5.png |
|||
Weiß Schwarz Stone Ocean Booster Pack 6.png |
|||
Weiß Schwarz Stone Ocean Booster Pack 7.png |
|||
Weiß Schwarz Stone Ocean Booster Pack 8.png |
|||
Weiß Schwarz Stone Ocean Booster Pack 9.png |
|||
Weiß Schwarz Stone Ocean Booster Pack 10.png |
|||
Weiß Schwarz Stone Ocean Booster Pack 11.png |
|||
Weiß Schwarz Stone Ocean Booster Pack 12.png |
|||
Weiß Schwarz Stone Ocean Booster Pack 13.png |
|||
Weiß Schwarz Stone Ocean Booster Pack 14.png |
|||
Weiß Schwarz Stone Ocean Booster Pack 15.png |
|||
Weiß Schwarz Stone Ocean Booster Pack 16.png |
|||
Weiß Schwarz Stone Ocean Booster Pack 17.png |
|||
Weiß Schwarz Stone Ocean Booster Pack 18.png |
|||
Weiß Schwarz Stone Ocean Booster Pack 19.png |
|||
Weiß Schwarz Stone Ocean Booster Pack 20.png |
|||
Weiß Schwarz Stone Ocean Booster Pack 21.png |
|||
Weiß Schwarz Stone Ocean Booster Pack 22.png |
|||
Weiß Schwarz Stone Ocean Booster Pack 23.png |
|||
Weiß Schwarz Stone Ocean Booster Pack 24.png |
|||
Weiß Schwarz Stone Ocean Booster Pack 25.png |
|||
Weiß Schwarz Stone Ocean Booster Pack 26.png |
|||
Weiß Schwarz Stone Ocean Booster Pack 27.png |
|||
Weiß Schwarz Stone Ocean Booster Pack 28.png |
|||
Weiß Schwarz Stone Ocean Booster Pack 29.png |
|||
Weiß Schwarz Stone Ocean Booster Pack 30.png |
|||
Weiß Schwarz Stone Ocean Booster Pack 31.png |
|||
Weiß Schwarz Stone Ocean Booster Pack 32.png |
|||
Weiß Schwarz Stone Ocean Booster Pack 33.png |
|||
Weiß Schwarz Stone Ocean Booster Pack 34.png |
|||
Weiß Schwarz Stone Ocean Booster Pack 35.png |
|||
Weiß Schwarz Stone Ocean Booster Pack 36.png |
|||
Weiß Schwarz Stone Ocean Booster Pack 37.png |
|||
Weiß Schwarz Stone Ocean Booster Pack 38.png |
|||
Weiß Schwarz Stone Ocean Booster Pack 39.png |
|||
Weiß Schwarz Stone Ocean Booster Pack 40.png |
|||
Weiß Schwarz Stone Ocean Booster Pack 41.png |
|||
Weiß Schwarz Stone Ocean Booster Pack 42.png |
|||
Weiß Schwarz Stone Ocean Booster Pack 43.png |
|||
Weiß Schwarz Stone Ocean Booster Pack 44.png |
|||
Weiß Schwarz Stone Ocean Booster Pack 45.png |
|||
Weiß Schwarz Stone Ocean Booster Pack 46.png |
|||
Weiß Schwarz Stone Ocean Booster Pack 47.png |
|||
Weiß Schwarz Stone Ocean Booster Pack 48.png |
|||
Weiß Schwarz Stone Ocean Booster Pack 49.png |
|||
Weiß Schwarz Stone Ocean Booster Pack 50.png |
|||
Weiß Schwarz Stone Ocean Booster Pack 51.png |
|||
Weiß Schwarz Stone Ocean Booster Pack 52.png |
|||
Weiß Schwarz Stone Ocean Booster Pack 53.png |
|||
Weiß Schwarz Stone Ocean Booster Pack 54.png |
|||
Weiß Schwarz Stone Ocean Booster Pack 55.png |
|||
Weiß Schwarz Stone Ocean Booster Pack 56.png |
|||
Weiß Schwarz Stone Ocean Booster Pack 57.png |
|||
Weiß Schwarz Stone Ocean Booster Pack 58.png |
|||
Weiß Schwarz Stone Ocean Booster Pack 59.png |
|||
Weiß Schwarz Stone Ocean Booster Pack 60.png |
|||
Weiß Schwarz Stone Ocean Booster Pack 61.png |
|||
Weiß Schwarz Stone Ocean Booster Pack 62.png |
|||
Weiß Schwarz Stone Ocean Booster Pack 63.png |
|||
Weiß Schwarz Stone Ocean Booster Pack 64.png |
|||
Weiß Schwarz Stone Ocean Booster Pack 65.png |
|||
Weiß Schwarz Stone Ocean Booster Pack 66.png |
|||
Weiß Schwarz Stone Ocean Booster Pack 67.png |
|||
Weiß Schwarz Stone Ocean Booster Pack 68.png |
|||
Weiß Schwarz Stone Ocean Booster Pack 69.png |
|||
Weiß Schwarz Stone Ocean Booster Pack 70.png |
|||
Weiß Schwarz Stone Ocean Booster Pack 71.png |
|||
Weiß Schwarz Stone Ocean Booster Pack 72.png |
|||
Weiß Schwarz Stone Ocean Booster Pack 73.png |
|||
Weiß Schwarz Stone Ocean Booster Pack 74.png |
|||
Weiß Schwarz Stone Ocean Booster Pack 75.png |
|||
Weiß Schwarz Stone Ocean Booster Pack 76.png |
|||
Weiß Schwarz Stone Ocean Booster Pack 77.png |
|||
Weiß Schwarz Stone Ocean Booster Pack 78.png |
|||
Weiß Schwarz Stone Ocean Booster Pack 79.png |
|||
Weiß Schwarz Stone Ocean Booster Pack 80.png |
|||
Weiß Schwarz Stone Ocean Booster Pack 81.png |
|||
Weiß Schwarz Stone Ocean Booster Pack 82.png |
|||
Weiß Schwarz Stone Ocean Booster Pack 83.png |
|||
Weiß Schwarz Stone Ocean Booster Pack 84.png |
|||
Weiß Schwarz Stone Ocean Booster Pack 85.png |
|||
Weiß Schwarz Stone Ocean Booster Pack 86.png |
|||
Weiß Schwarz Stone Ocean Booster Pack 87.png |
|||
Weiß Schwarz Stone Ocean Booster Pack 88.png |
|||
Weiß Schwarz Stone Ocean Booster Pack 89.png |
|||
Weiß Schwarz Stone Ocean Booster Pack 90.png |
|||
Weiß Schwarz Stone Ocean Booster Pack 91.png |
|||
Weiß Schwarz Stone Ocean Booster Pack 92.png |
|||
Weiß Schwarz Stone Ocean Booster Pack 93.png |
|||
Weiß Schwarz Stone Ocean Booster Pack 94.png |
|||
Weiß Schwarz Stone Ocean Booster Pack 95.png |
|||
Weiß Schwarz Stone Ocean Booster Pack 96.png |
|||
Weiß Schwarz Stone Ocean Booster Pack 97.png |
|||
Weiß Schwarz Stone Ocean Booster Pack 98.png |
|||
Weiß Schwarz Stone Ocean Booster Pack 99.png |
|||
Weiß Schwarz Stone Ocean Booster Pack 100.png |
|||
Weiß Schwarz Stone Ocean Booster Pack 101.png |
|||
Weiß Schwarz Stone Ocean Booster Pack 102.png |
|||
Weiß Schwarz Stone Ocean Booster Pack 103.png |
|||
Weiß Schwarz Stone Ocean Booster Pack 104.png |
|||
Weiß Schwarz Stone Ocean Booster Pack 105.png |
|||
Weiß Schwarz Stone Ocean Booster Pack 106.png |
|||
Weiß Schwarz Stone Ocean Booster Pack 107.png |
|||
Weiß Schwarz Stone Ocean Booster Pack 108.png |
|||
Weiß Schwarz Stone Ocean Booster Pack 109.png |
|||
Weiß Schwarz Stone Ocean Booster Pack 120.png |
|||
Weiß Schwarz Stone Ocean Booster Pack 121.png |
|||
Weiß Schwarz Stone Ocean Booster Pack 122.png |
|||
Weiß Schwarz Stone Ocean Booster Pack 123.png |
|||
Weiß Schwarz Stone Ocean Booster Pack 124.png |
|||
Weiß Schwarz Stone Ocean Booster Pack 125.png |
|||
Weiß Schwarz Stone Ocean Booster Pack 126.png |
|||
Weiß Schwarz Stone Ocean Booster Pack 127.png |
|||
Weiß Schwarz Stone Ocean Booster Pack 128.png |
|||
Weiß Schwarz Stone Ocean Booster Pack 129.png |
|||
Weiß Schwarz Stone Ocean Booster Pack 130.png |
|||
Weiß Schwarz Stone Ocean Booster Pack 131.png |
|||
Weiß Schwarz Stone Ocean Booster Pack 132.png |
|||
Weiß Schwarz JJ-SE42-P01S.png |
|||
Weiß Schwarz JJ-SE42-P02.png |
|||
</gallery> |
|||
}} |
}} |
||
===Other=== |
===Other=== |
||
<gallery> |
<gallery mode="packed"> |
||
WS-Giorno.png |
WS-Giorno.png |
||
WS-Diavolo.png |
WS-Diavolo.png |
||
| Line 288: | Line 537: | ||
GW_WS_Cards-Promo.jpg|Announcement Promo #1 |
GW_WS_Cards-Promo.jpg|Announcement Promo #1 |
||
GW_WS_Cards-Promo2.jpg.jpg|Announcement Promo #2 |
GW_WS_Cards-Promo2.jpg.jpg|Announcement Promo #2 |
||
Weiß Schwarz Promo SO AND SC.jpeg|Announcement Promo #1 |
|||
Weiß Schwarz Announcement Promo.jpeg|Announcement Promo #2 |
|||
Weiß Schwarz List of cards signed1.jpeg|List of cards signed Stardust Crusaders |
|||
Weiß Schwarz List of cards signed2.jpeg|List of cards signed Stone Ocean |
|||
Weiß Schwarz Premium Booster Box SC.png|Premium Booster Box |
|||
Weiß Schwarz Premium Booster Box SO.png|Premium Booster Box |
|||
</gallery> |
</gallery> |
||
| Line 294: | Line 549: | ||
==Commercials== |
==Commercials== |
||
{{Vid|https://youtu.be/d05P9QV8n4I}} |
{{Vid|https://youtu.be/d05P9QV8n4I}}[[File:Weiß Schwarz COMMERCIALS SC and SO.mp4|325px|Official Showcase Video]] |
||
==References== |
==References== |
||
{{References}} |
|||
<references/> |
|||
==Site Navigation== |
==Site Navigation== |
||
| Line 303: | Line 558: | ||
{{Merch Navigation}} |
{{Merch Navigation}} |
||
{{Games Navigation}} |
{{Games Navigation}} |
||
{{Italic title}} |
|||
[[Category:Merchandise]] |
[[Category:Merchandise]] |
||
[[Category: |
[[Category:Cards]] |
||
{{Game}} |
{{Game}} |
||
Latest revision as of 02:33, 27 February 2025
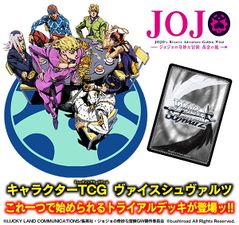
Weiß Schwarz (ヴァイスシュヴァルツ, Vaisu Shuvarutsu), also spelled Weiss Schwarz, is a Japanese Collectible card game released by Bushiroad in collaboration with various other popular animation and video game companies. Series are divided into two sides: Weiß, German for "white," and Schwarz, German for "black."
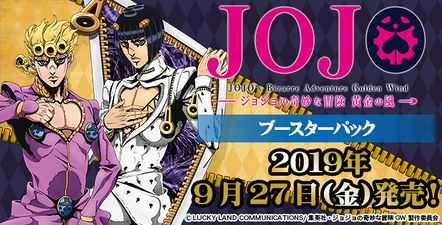
A Golden Wind trial deck was released in Japan on June 14, 2019 with booster packs on September 29, 2019.[1] An English version was released on March 27, 2020.
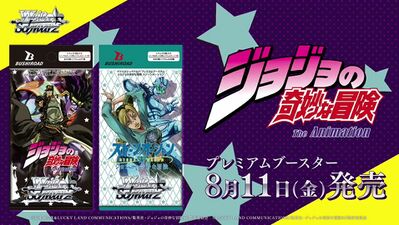
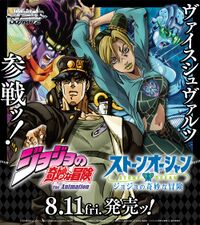
Decks based on Stardust Crusaders and Stone Ocean were announced on March 21, 2023 and released on August 11, 2023.[2][3] English versions of both decks released on October 4, 2024.[4][5]
Rules & Information

Deck Building
- A deck must contain exactly 50 cards.
- A deck can only have up to four cards of the same name unless otherwise stated.
- A deck can have up to a maximum of 8 Climax Cards.
- Decks benefit from cards with matching colors and series.
Card Types
Character Cards

These cards feature unique characteristics and attributes based on the series they hail from and are the player's primary means of combat. Each player can place up to five Character Cards from their hand onto the Stage section of the field, three on Center Stage and two in the back. Characters in the Back Stage are invulnerable to direct combat but are also unable to attack, which benefits those who primarily provide buffs.
Power level determines the outcome of battles between two Center Stage Characters, soul points determine the damage dealt, and Level/Cost determines the cost required to summon the Character. During a turn, Characters will either be in upright 'Stand' state which allows them to attack, sideways 'Rest' state, which they are set to after attacking, or upside-down 'Reverse' state, which means they were defeated in battle.
Event Cards
These cards are typically used during the Main Phrase and can provide a number of different effects, such as changing the power of Characters, searching the deck, or removing cards from the Stage. Similar to Character Cards, a player can play as many Event Cards from their hand as they wish, provided they supply the appropriate cost stated on each card and have the right colors in their Level/Stock area. There is no designated area where an Event card should go, and once they are used they are placed into the Waiting Room unless otherwise stated.

Climax Cards
Similar to Event Cards, these cards provide various effects, but only 8 of them are allowed in a deck. Only one Climax Card may be used per turn and must be sent to the Waiting Room during the End Phase. Climax Card effects are either Automatic, which are invoked immediately, or Continuous, which continue to be active until they leave the field.
Gameplay
Set Up
At the start of the game, players shuffle their decks and place them face-down in the designated area. Players then choose who to go first through whatever means, and draw five cards. Starting with the player who goes first, each player can discard any number of cards in their hand to the Waiting Room and draw the same number of cards from their deck. The main objective of the game is to force your opponent to level up by inflicting seven cards of damage. Once a player hits level 4, they lose the game.
Phases
Stand, Draw, Clock Phase
At the start of a player's turn, all characters that are in the "rest" state are now turned right side up into "standing" state. The player then draws one card from the deck and places one card from their hand onto the Clock Area. They may also skip this clock portion to draw an extra card.
Main Phase
During the Main Phase, a player can perform any of the following given they pay the appropriate costs:
- Play an Event Card. After it's activated, the player places the card in the Waiting Room. There is no limit to the number of Event Cards that can be played during a turn.
- Play a Character Card. A player can place a card on the Stage standing up in any stage position of their choice. If a character already exists in a stage position, the existing card is placed in the Waiting Room. There is no limit to how many Character Cards can be played.
- Move a character. A player can freely change the stage position of a character or swap it with a character in another position. Character statuses can't be changed.
- Use a character's ability. A player can activate a character ability on Stage if it's marked with an "ACT" icon. The ability can be activated multiple times if the right costs are paid.
Climax Phase
The player can play a Climax Card from their hand and place it in the Climax Area. Climax Cards provide powerful effects that last for the rest of the turn.
Attack Phase
Players can choose to attack during this phase by switching characters on the stage to the "rest" position (Note: Only one attack can be made during the first turn). Players then select one of three attack types:
- Frontal: Your character attacks the character directly in front of them.
- Side: Your character attacks one of the opponent's other characters not in front of it, however, your character's soul points are reduced by the level of the target.
- Direct: If no enemy character is present in front of yours, you can choose to attack the other player directly. Doing so increases their soul points by 1 for the duration of the turn.
The attacking player picks up the top card of their deck. They then unleash the effect represented on the Trigger Icon on the top right of the card and place the card face-down in the Stock. The player being attacked can counter-attack by using a special card or ability which is marked with a "BACKUP" icon.
The player who is attacked takes damage equal to the Souls Points of the attacking character. This is represented by the player picking up a number of cards from their deck equal to the soul points and placing them in the Clock Area. If a Climax Card is drawn, place all the cards drawn in the Waiting Room. Compare the Power of the two characters and change the card with more points to "rest" state and the losing card to "reverse" state. Players are free to repeat an attack with all Characters on their stage.
End Phase
Cards in the Climax area are sent to the Waiting Room. If there are eight or more cards in the player's hand, they must select and send cards to the Waiting Room until they have seven or less. All effects that were activated during the turn will end if they have the phrase "until end of turn" in their text.
Leveling System
Players that have 7 cards in their Clock Area level up by 1. When this happens, the player selects any 1 card from the top 7 cards in their Clock Area, places it in the Level Area, and discards the remaining 6 to the Waiting Room. All additional cards past the aforementioned top 7 (the 8th and beyond, before discarding) remain on the Clock Area unless the conditions for a subsequent Level Up are met. Note that outside Level 0 Characters and Event cards, most cards cannot be placed unless their level matches the players and their color matches one card in the player's Level or Clock Area. i.e, a Red Level 3 Character can only be placed on the Stage if the player has reached Level 3 and has at least one red card in their Level or Clock Area.
List of Cards
-
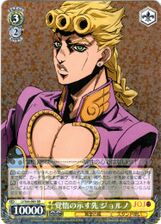
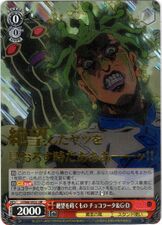
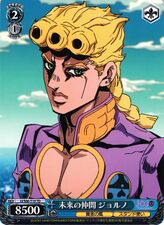
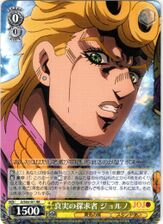 Seeker of Truth, Giorno
 -
 Seeker of Truth, Giorno (Super Special)
 -
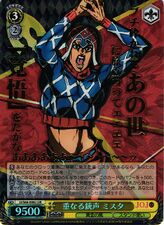
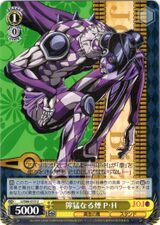
 Path Within the Darkness, Mista
 -
 Path Within the Darkness, Mista (Special)
 -
 The Path Ahead, Giorno
 -
 The Path Ahead, Giorno (Special)
 -
 Final Form, Gold Experience Requiem
 -
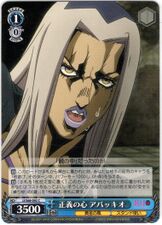
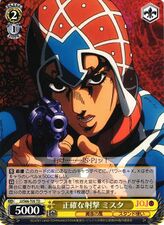
 Embodiment of Justice, Giorno
 -
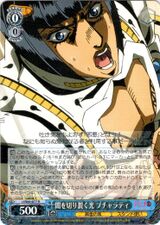
 Simmering Fury, Fugo
 -
 Simmering Fury, Fugo (Special)
 -
 The One Chosen by Fate, Giorno
 -
 The One Chosen by Fate, Giorno (JoJo Rare)
 -
 Heavy Gunshots, Mista
 -
 Heavy Gunshots, Mista (JoJo Rare)
 -
 Angry Lunatic Tendencies, Fugo
 -
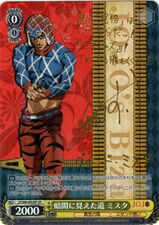
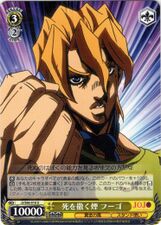
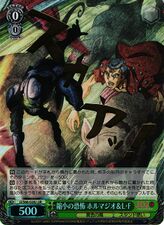
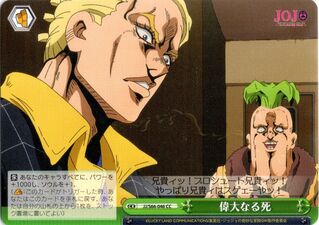
 Closing in on Death, Mista
 -
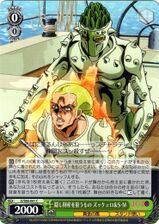
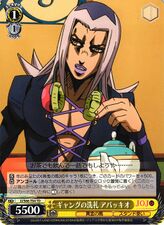
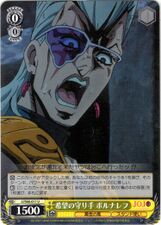 Harbinger of Hope, Polnareff
 -
 Harbinger of Hope, Polnareff (JoJo Rare)
 -
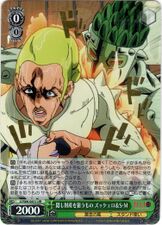
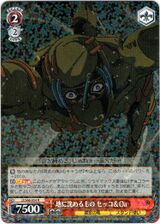
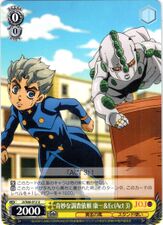 Bizarre Investigation Request, Koichi & Echoes ACT3
 -
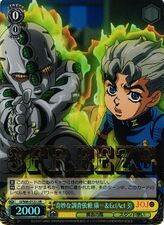 Bizarre Investigation Request, Koichi & Echoes ACT3 (JoJo Rare)
 -
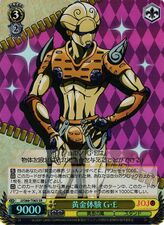
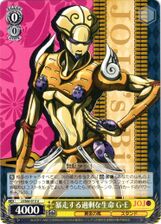 Abundance of Life, Gold Experience
 -
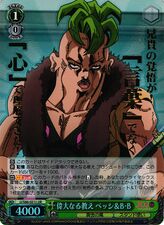
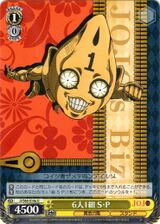 6 Together as 1, Sex Pistols
 -
 6 Together as 1, Sex Pistols
 -
 6 Together as 1, Sex Pistols
 -
 6 Together as 1, Sex Pistols
 -
 6 Together as 1, Sex Pistols
 -
 6 Together as 1, Sex Pistols
 -
 Purple Haze
 -
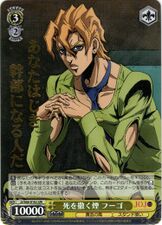
 Haze of Death, Fugo
 -
 Haze of Death, Fugo (JoJo Rare)
 -
 Silent Dance, Chariot Requiem
 -
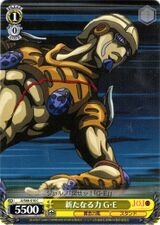 A New Power, Gold Experience
 -
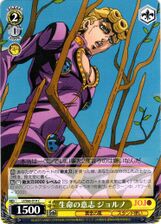 Determination of Life, Giorno
 -
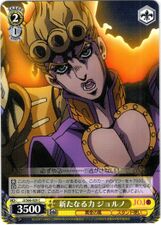 A New Power, Giorno
 -
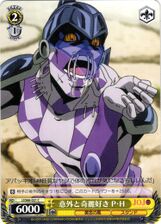 Unexpected Clean Freak, Purple Haze
 -
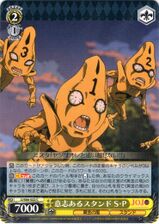 Determined Stand, Sex Pistols
 -
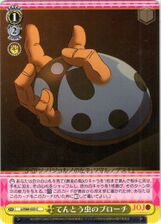 Ladybug Brooch
 -
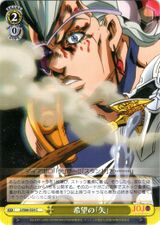 The "Arrow" of Hope
 -
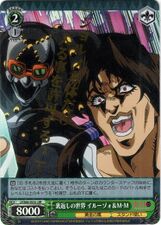
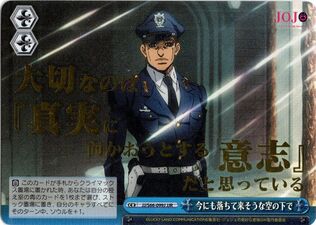
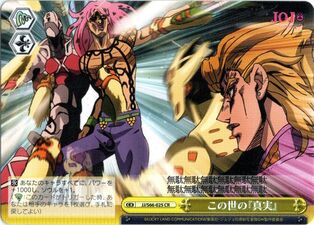 The World's "Truth"
 -
 The World's "Truth" (JoJo Rare)
 -
 "The Path" to Resolution
 -
 "The Path" to Resolution (JoJo Rare)
 -
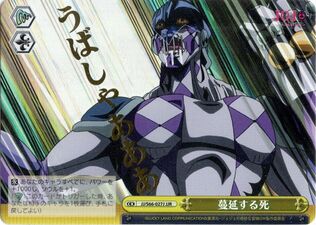
 Rampant Death
 -
 Rampant Death (JoJo Rare)
 -
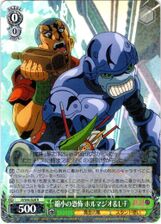 Fear of Shrinking, Formaggio & Little Feet
 -
 Fear of Shrinking, Formaggio & Little Feet (JoJo Rare)
 -
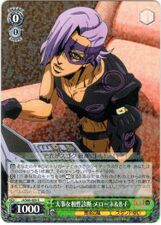 Crucial Compatibility Check, Melone & Baby Face
 -
 Crucial Compatibility Check, Melone & Baby Face (JoJo Rare)
 -
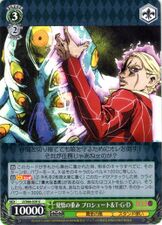
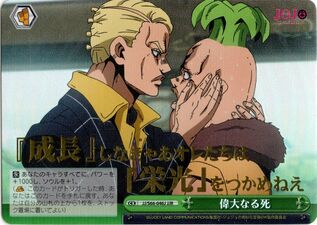
 Greatful Teachings, Prosciutto
 -
 Greatful Teachings, Prosciutto (JoJo Rare)
 -
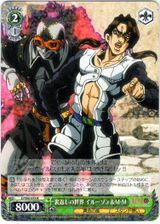
 Greatful Teachings, Pesci & Beach Boy
 -
 Greatful Teachings, Pesci & Beach Boy (JoJo Rare)
 -
 Freezing World, Ghiaccio & White Album
 -
 Freezing World, Ghiaccio & White Album (JoJo Rare)
 -
 Flipped World, Illuso & Man in the Mirror
 -
 Flipped World, Illuso & Man in the Mirror (JoJo Rare)
 -
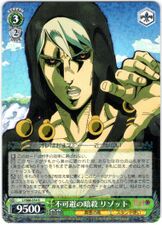 Unavoidable Assassination, Risotto
 -
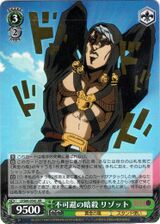 Unavoidable Assassination, Risotto (JoJo Rare)
 -
 Man in the Mirror, Illuso
 -
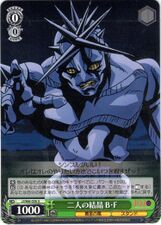 Conception of the Two, Baby Face
 -
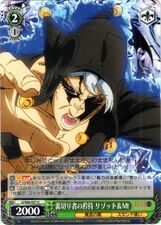 A Traitor's Dignity, Risotto & Metallica
 -
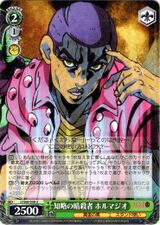 Resourceful Assassin, Formaggio
 -
 Significance of Resolution, Prosciutto & The Grateful Dead
 -
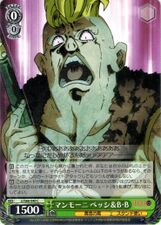 Mammoni, Pesci & Beach Boy
 -
 Targeting the Hidden Treasure, Zucchero & Soft Machine
 -
 Targeting the Hidden Treasure, Zucchero & Soft Machine (JoJo Rare)
 -
 Targeting the Hidden Treasure, Sale & Kraft Work
 -
 Targeting the Hidden Treasure, Sale & Kraft Work (JoJo Rare)
 -
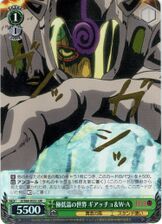
 Ghiaccio & White Album Gently Weeps
 -
 The Disappearance of Sorbet and Gelato
 -
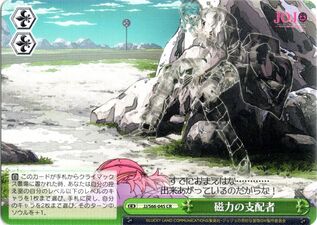 Controller of Magnetism
 -
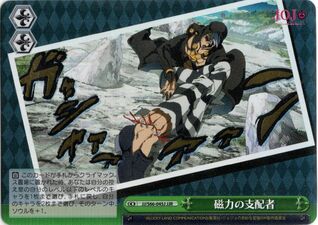 Controller of Magnetism (JoJo Rare)
 -
 The Grateful Dead
 -
 The Grateful Dead (JoJo Rare)
 -
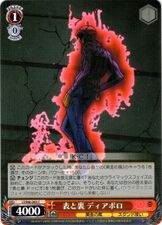
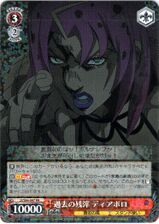 Remnant of the Past, Diavolo
 -
 Remnant of the Past, Diavolo (Secret)
 -
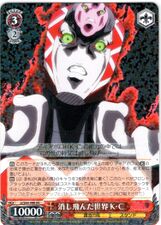 Erased World, King Crimson
 -
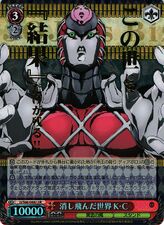 Erased World, King Crimson (JoJo Rare)
 -
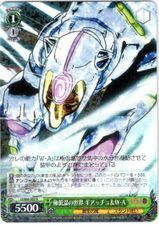
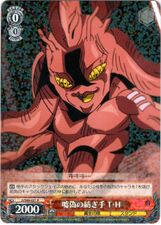
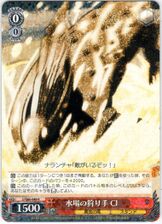 Predator of the Waters, Clash
 -
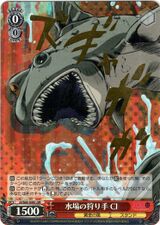 Predator of the Waters, Clash (JoJo Rare)
 -
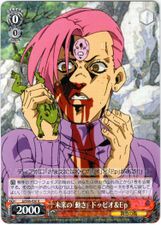 "Movements" in the Future, Doppio & Epitaph
 -
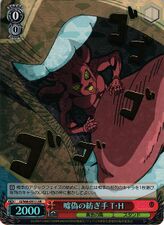
 Spinner of Lies, Talking Head
 -
 Spinner of Lies, Talking Head (JoJo Rare)
 -
 Sowing Seeds of Despair, Cioccolata & Green Day
 -
 Sowing Seeds of Despair, Cioccolata & Green Day (JoJo Rare)
 -
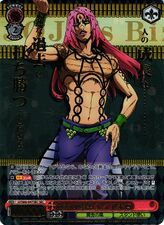
 Pride of a King, Diavolo
 -
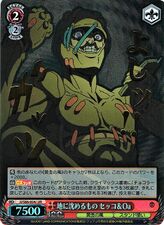
 He Who Sinks Into the Ground, Secco & Oasis
 -
 He Who Sinks Into the Ground, Secco & Oasis (JoJo Rare)
 -
 Tyrant Residing in Jail, Polpo
 -
 10 Hours Ago, Pericolo
 -
 Harmonized Teamwork, Tizzano
 -
 Harmonized Teamwork, Squalo
 -
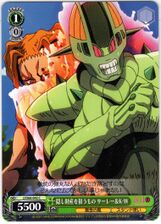
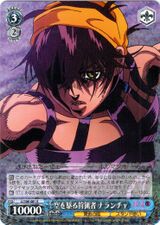
 Restless Pursuer, Notorious B.I.G
 -
 Restless Pursuer, Notorious B.I.G (JoJo Rare)
 -
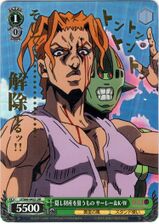
 Leaky-Eye Luca
 -
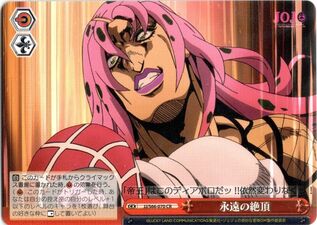
 Eternal Climax, King Crimson
 -
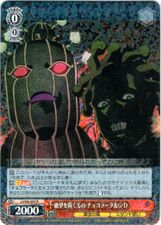
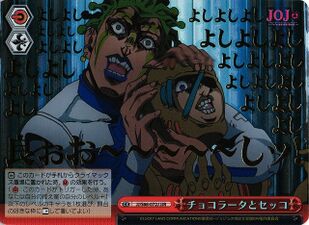
 Treat Time, Cioccolata
 -
 Split Personality, Diavolo
 -
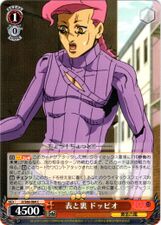 Split Personality, Doppio
 -
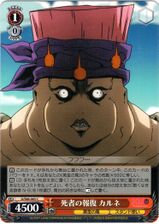 Revenge of the Dead, Carne
 -
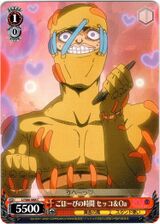 Treat Time, Secco & Oasis
 -
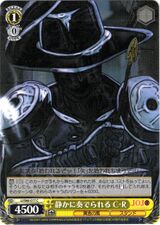
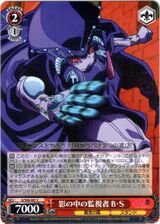 Observer From the Shadows, Black Sabbath
 -
 Observer From the Shadows, Black Sabbath (JoJo Rare)
 -
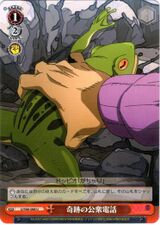 Miraculous Public Telephone
 -
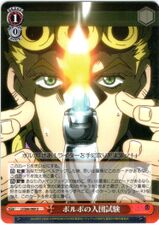 Polpo's Entry Test
 -
 Eternal Climax
 -
 Eternal Climax (JoJo Rare)
 -
 10 Seconds Into the Future
 -
 10 Seconds Into the Future (JoJo Rare)
 -
 Cioccolata and Secco
 -
 Cioccolata and Secco (JoJo Rare)
 -
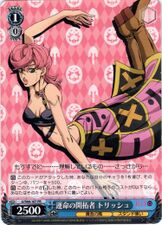
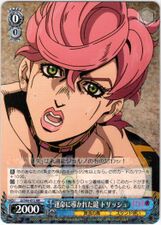 Guiding Fate, Trish
 -
 Noble Resolutions, Bucciarati
 -
 Noble Resolutions, Bucciarati (Special)
 -
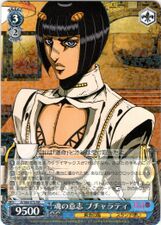 Soul's Will, Bucciarati
 -
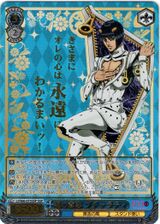 Soul's Will, Bucciarati (Super Special)
 -
 Replaying the Past, Abbacchio
 -
 Replaying the Past, Abbacchio (Special)
 -
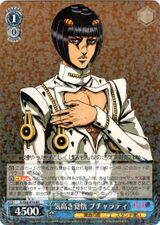
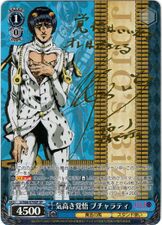
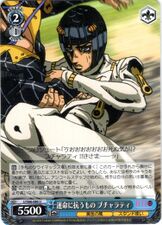
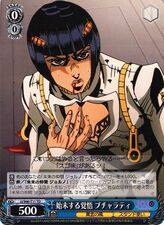
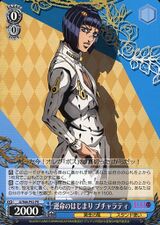
 Beacon Dispelling the Darkness, Bucciarati
 -
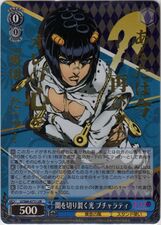 Beacon Dispelling the Darkness, Bucciarati (JoJo Rare)
 -
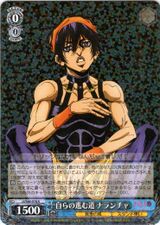 Choosing His Own Path, Narancia
 -
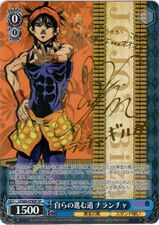 Choosing His Own Path, Narancia (Special)
 -
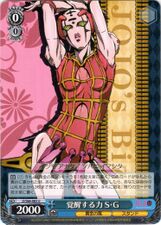
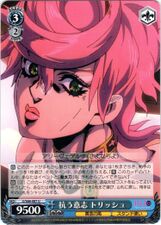
 Awakened Power, Trish
 -
 Awakened Power, Trish (JoJo Rare)
 -
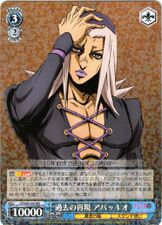
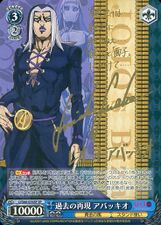
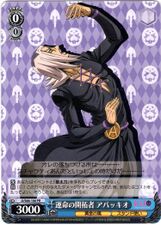
 Pursuer of Information, Abbacchio
 -
 Pursuer of Information, Abbacchio (JoJo Rare)
 -
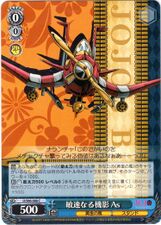
 Aerial Hunter, Narancia
 -
 Aerial Hunter, Narancia (JoJo Rare)
 -
 Determination to Uncover Truth, Moody Blues
 -
 Awakened Power, Spice Girl
 -
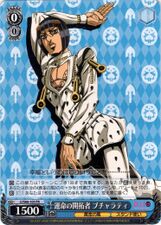
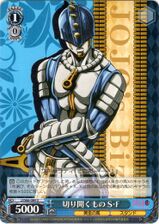 The One Who Opens, Sticky Fingers
 -
 Indestructible Flexibility, Spice Girl
 -
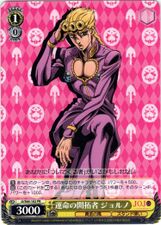
 Rebelling Against Fate, Bucciarati
 -
 Rebelling, Trish
 -
 Agile Aeroplane, Aerosmith
 -
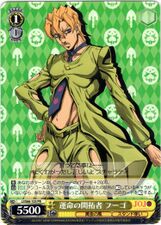
 The Right Path, Bucciarati
 -
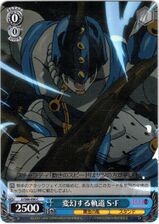 Transforming Path, Sticky Fingers
 -
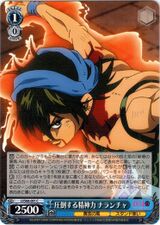 Overwhelming Mental Strength, Narancia
 -
 Heart of Justice, Abbacchio
 -
 Destructive Tempest, Aerosmith
 -
 Playback Investigation, Moody Blues
 -
 "Key" to the Safe "Vehicle"
 -
 Room in the Turtle
 -
 The Sound of Farewell
 -
 The Sound of Farewell (JoJo Rare)
 -
 Determination to Awaken
 -
 Determination to Awaken (JoJo Rare)
 -
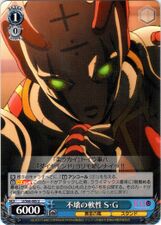
 Under the Falling Sky
 -
 Under the Falling Sky (JoJo Rare)
 -
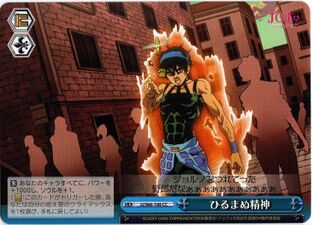 Unflinching Spirit
 -
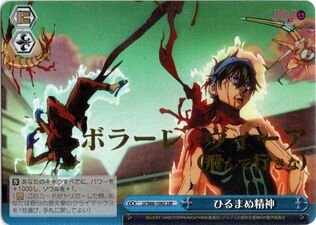 Unflinching Spirit (JoJo Rare)
 -
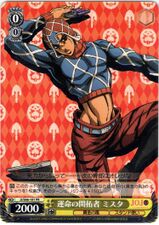 Pioneer of Fate, Mista (Promo)
 -
 Pioneer of Fate, Giorno(Promo)
 -
 Pioneer of Fate, Fugo (Promo)
 -
 Pioneer of Fate, Narancia (Promo)
 -
 Pioneer of Fate, Bucciarati (Promo)
 -
 Pioneer of Fate, Abbacchio (Promo)
 -
 Pioneer of Fate, Trish (Promo)


-
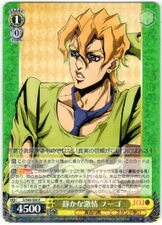
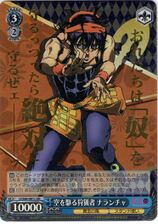
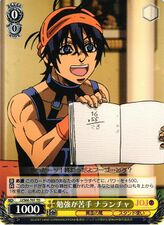 Bad at Studying, Narancia
 -
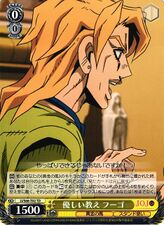 Kind Teacher, Fugo
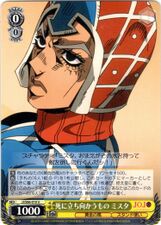
 -
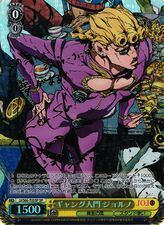
 Gang Newcomer, Giorno
 -
 Gang Newcomer, Giorno (Special)
 -
 Hazing the Newcomer, Abbacchio
 -
 Accurate Shot, Mista
 -
 Gold Experience
 -
 Gold Experience (Super Rare)
 -
 Golden Intentions, Giorno
 -
 Golden Intentions, Giorno (Super Rare)
 -
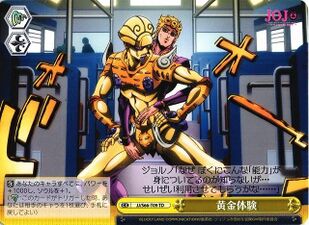
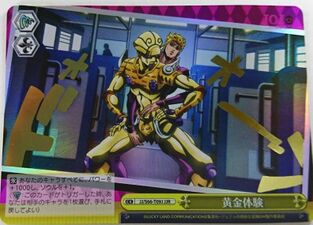
 Overflowing Life Force
 -
 Gold Experience
 -
 Gold Experience (JoJo Rare)
 -
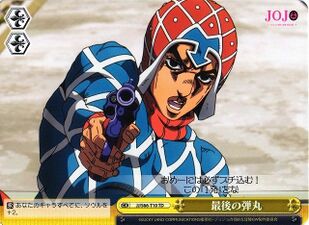 Last Bullet
 -
 Readiness to Die, Bucciarati
 -
 Interest in the Newcomer, Abbacchio
 -
 Icebreaker, Mista
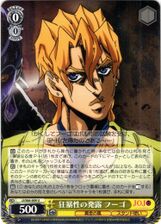
 -
 Sudden Fury, Fugo
 -
 Sticky Fingers
 -
 Sticky Fingers (JoJo Rare)
 -
 Pure and Innocent, Narancia
 -
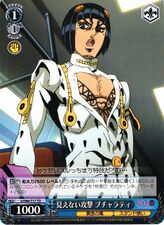 Unseen Attack, Bucciarati
 -
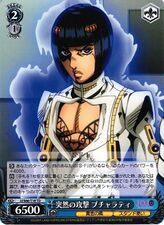 Sudden Attack, Bucciarati
 -
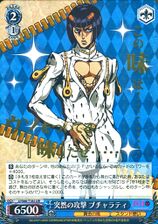 Sudden Attack, Bucciarati (JoJo Rare)
 -
 Future Comrade, Giorno
 -
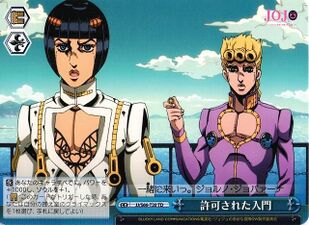 Permitted to Join
 -
 Carrying on the Bloodline, Giorno (Promo)
 -
 Beginning of Fate, Bucciarati (Promo)
 -
 Golden Dream, Giorno & Bucciarati (Promo)


Other


Gallery
-
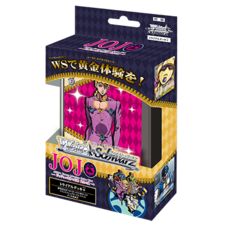 Trial Deck
 -
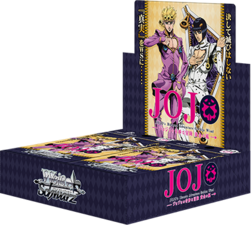 Booster Pack Box
 -
 Announcement Promo #1
 -
 Announcement Promo #2
 -
 Announcement Promo #1
 -
 Announcement Promo #2
 -
 List of cards signed Stardust Crusaders
 -
 List of cards signed Stone Ocean
 -
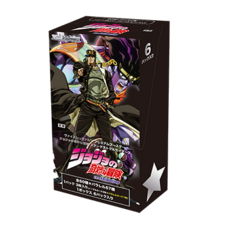 Premium Booster Box
 -
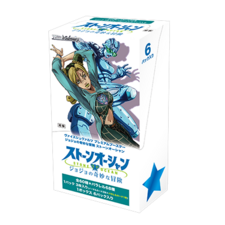 Premium Booster Box


Trivia
- Trial decks have a chance of containing a signed card by the voice cast. Parallel cards are randomly sealed into decks, and every deck contains two shiny cards. In addition, every deck has a chance to contain one of the following: [RRR] Rare cards with special embossing (4 types) and [SP] Sign card of voice cast (1 type).
