

Bug-Eaten
Jump to navigation
Jump to search
Bug-Eaten (虫喰い, Mushikui) is a minor antagonist featured in the fourth part of JoJo's Bizarre Adventure, Diamond is Unbreakable, specifically in the "Let's Go Hunting!" story arc.
 Manga Appearances
 Anime Appearances


Bug-Eaten is a rat nicknamed by Jotaro. It and its companion were made into Stand users by Akira Otoishi, acquiring both the same sniping Stand, Ratt. Jotaro Kujo and Josuke Higashikata hunt him down before it can procreate and make a swarm of rat Stand users.
Appearance
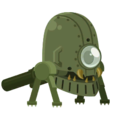
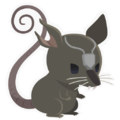
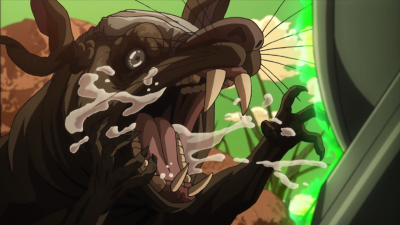
Bug-Eaten is a brown rat approximately 20 cm (7.9 in)[1] long. It possesses a strange protuberance on the forehead as well as an abnormally large nose. Its right ear has been chewed out in a fight, earning it its nickname.
Personality
Bug-Eaten is aggressive and cunning, being on the offensive against Jotaro and Josuke. Despite being a rat, acquiring the Stand made it confident enough to take on humans and kill to eat them as a result. It is also intelligent enough to commit basic hunting tricks and use sniping tactics like frequently switching position or rebound its darts against obstacles to hit from blind angles.
Abilities
Main article: Ratt
Ratt is a rifle like Stand enabling Bug-Eaten to shoot corrosive darts which can melt anything they touch.
History
Background
While Akira Otoishi had Keicho Nijimura's Arrow in his possession, he tested its powers by using it on two rats living in the farmlands surrounding Morioh. The arrow pierced the rats, granting them both the Stand Ratt. Thanks to their power, the pair of rats took dominance among the local rat population, melding their rival rodents together. They also attacked a couple of old farmers, melding their flesh together and stuffing them in the fridge for preservation. They make a nest in a drainage pipe.
Believing that only one rat exists, Jotaro and Josuke go hunting for it for damage control after Jotaro questions the defeated Otoishi.
Diamond is Unbreakable
Josuke and Jotaro separately encounter a rat each inside of the old farmers' house. While Josuke defeats the first rat, the second rat, that Jotaro dubs "Bug-Eaten", shoots Jotaro with Ratt's dart and escape. Jotaro uses Star Platinum to catch the dart but it causes his arm to melt, informing Jotaro as to how Ratt's power works.
Bug-Eaten crosses the field, while continuous gnawing the plants and relieving itself, which allows Jotaro and Josuke to follow him. The rat passes by the drainage pipe and avoids Jotaro's traps. Taking a trap with it, Bug-Eaten performs a cunning plan. By walking up to the middle of a dale surrounded on both sides by rocky slopes then backtracking, and finally putting a mouse trap inside of a bush, it prepares to bait the duo into an unfavorable position. Soon enough, Jotaro and Josuke walk into the middle of the trap. Josuke inadvertently grabs the mouse traps and it shuts on his hand, allowing Bug-Eaten to shoot a dart. However, Star Platinum stops time and cuts off the infected part.
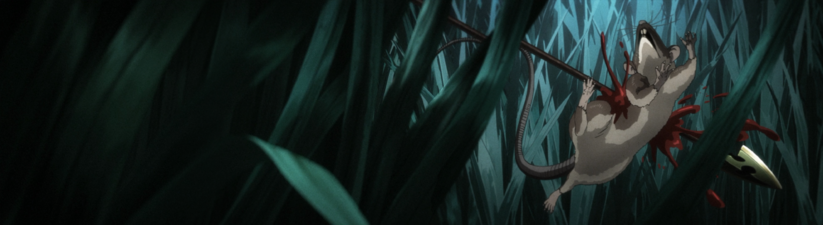
The duo now knows roughly where Bug-Eaten is. Jotaro gives Josuke his rifle bullets and walks up the slope to force Bug-Eaten to shoot. Although he uses Star Platinum to stop time, Bug-Eaten then uses rebounds on a rock to strike Jotaro even if he avoids the first shots. Josuke shoots a first bullet, which catches the attention of Bug-Eaten. The Rat instinctively looks Josuke's way, making itself an easier target. Thus Crazy Diamond is able to shoot a rifle bullet right through Bug-Eaten, killing the rat.
Chapters / Episodes
Chapters in order of appearance
- Chapter 327: Let's Go Hunting!, Part 3 (Mentioned only)
- Chapter 328: Let's Go Hunting!, Part 4
- Chapter 329: Let's Go Hunting!, Part 5 (Death)
- Chapter 412: Cheap Trick, Part 1 (Mentioned only)
Episodes in order of appearance
- Diamond is Unbreakable Episode 16: Let's Go Hunting! (Death)
Video Games
JoJo's Pitter-Patter Pop! (Android/iOS)
Bug-Eaten
Poison-Firing Artillery ver.


Rarity: 

Max Power: 1080
Favorite Gift and Voiced Gift Reactions:


Skill: Ratt

Replaces the panels in the bottom left with Bug-Eaten panels and creates 1 Box panel in the bottom middle
Skill Lv 1
# of Replaced Panels: 2
Cooldown: 85
Cooldown: 85
Skill Lv 2
# of Replaced Panels: 6
Cooldown: 85
Cooldown: 85
Skill Lv 3
# of Replaced Panels: 6
Cooldown: 80
Cooldown: 80
Skill Lv 4
# of Replaced Panels: 9
Cooldown: 80
Cooldown: 80
Skill Lv 5
# of Replaced Panels: 9
Cooldown: 75
Cooldown: 75
Gallery


Bug-Eaten being pierced by the Arrow
Bug-Eaten dies after being shot by Josuke.
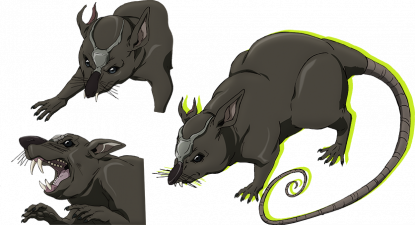
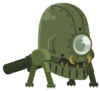
Key art of Bug-Eaten.


