User:FTR/HFTF Sprites: Difference between revisions
mNo edit summary |
|||
| (23 intermediate revisions by 2 users not shown) | |||
| Line 12: | Line 12: | ||
|tab7=HFTF Sprites |
|tab7=HFTF Sprites |
||
|tab8=HFTF Page Testing |
|tab8=HFTF Page Testing |
||
}} |
|||
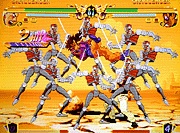
[[File:Venture Alessi 6.png|400px]][[File:Venture Avdol 6.png|400px]][[File:Venture Chaka 6.png|400px]][[File:Venture Devo 6.png|400px]][[File:Venture DIO 6.png|400px]][[File:Venture Iggy 6.png|400px]][[File:Venture Kakyoin 6.png|400px]][[File:Venture Midler 6.png|400px]][[File:Venture Polnareff 6.png|400px]][[File:Venture Shadow DIO 6.png|400px]] |
|||
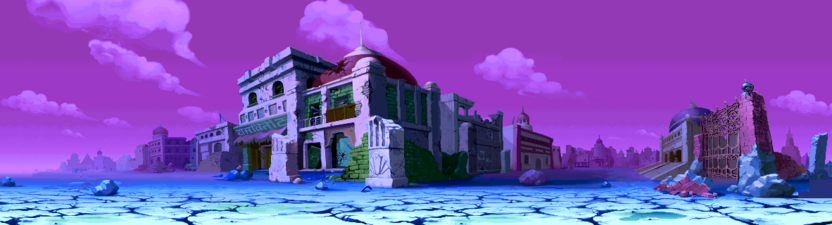
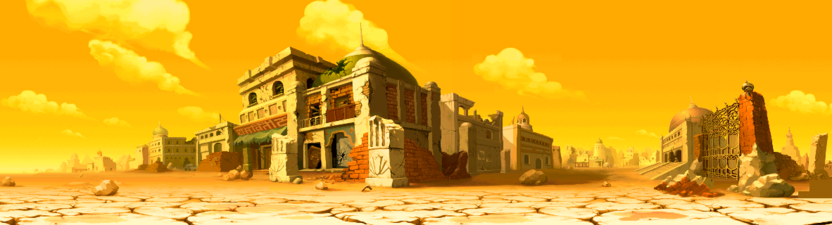
[[File:HFTF Story Mode Map.gif|1000px|center]] |
|||
{{Box3|Title=MAP LEGEND|bg={{Color|SDC3}}|bg2={{Color|SDC2}} |
|||
|align=center| |
|||
{{MapBox|bg=SDC|bg2=SDC2 |
|||
|Marker=1 |
|||
|Name={{White2|Minor Locations#New Tokyo Airport|Narita New Tokyo International Airport}} |
|||
|Image=SCMarker1.png |
|||
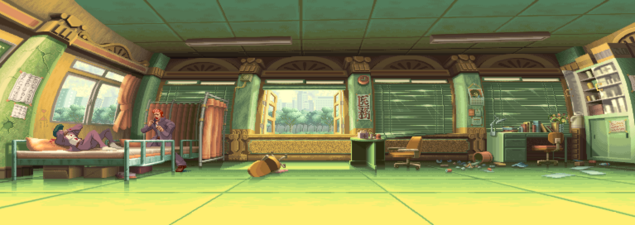
|Desc=Hearing that something is wrong with his grandson Jotaro, Joseph flies to Japan for his daughter Holy. |
|||
}} |
|||
}} |
}} |
||
GOALS: |
GOALS: |
||
| Line 40: | Line 51: | ||
The younger Joseph's moveset is based primarily around his clackers, alongside a few gadgets from ''Battle Tendency''. Young Joseph is a fairly simple rushdown character, with good zoning tools. Though he lacks a Stand, Joseph has a lot of exceptional pressure tools in his kit, and very simple combos. Young Joseph's main gimmick are his Clacker Boomerangs, his primary offensive and zoning tool. He is also able to run instead of dash. |
The younger Joseph's moveset is based primarily around his clackers, alongside a few gadgets from ''Battle Tendency''. Young Joseph is a fairly simple rushdown character, with good zoning tools. Though he lacks a Stand, Joseph has a lot of exceptional pressure tools in his kit, and very simple combos. Young Joseph's main gimmick are his Clacker Boomerangs, his primary offensive and zoning tool. He is also able to run instead of dash. |
||
==Normals== |
==Normals== |
||
{{ |
{{Tech2|Part=HFTF |
||
|Name = Standing Light {{HFInput|L}} |
|Name = Standing Light {{HFInput|L}} |
||
|Romaji = |
|Romaji = |
||
| Line 46: | Line 57: | ||
|Caption = '''MID''' / '''AIR-UNBLOCKABLE''' / '''SPECIAL-SUPER CANCELLABLE''' |
|Caption = '''MID''' / '''AIR-UNBLOCKABLE''' / '''SPECIAL-SUPER CANCELLABLE''' |
||
|Desc = Normal jab, combos into his other standing normals. |
|Desc = Normal jab, combos into his other standing normals. |
||
|MoveData = True |
|||
|Startup = 5 |
|||
|Active = 2 |
|||
|Recovery = 14 |
|||
|Hit = <span style="color:green;">+7</span> |
|||
|Block = <span style="color:green;">+5</span> |
|||
|Pushblock = <span style="color:green;">+2</span> |
|||
|Damage = 4 |
|||
|SDamage = 2 |
|||
}} |
}} |
||
{{Tech2|Part=HFTF |
|||
{{Table |
|||
|c1=Startup |
|||
|c1width=3% |
|||
|c2=Active |
|||
|c2width=3% |
|||
|c3=Recovery |
|||
|c3width=3% |
|||
|c4=Hit Advantage |
|||
|c4width=3% |
|||
|c5=Block Advantage |
|||
|c5width=3% |
|||
|c6=Pushblock Advantage |
|||
|c6width=3% |
|||
|c7=Damage |
|||
|c7width=3% |
|||
|c8=Damage (Stand) |
|||
|c8width=3% |
|||
|r1= 5 |
|||
|r1c2= 2 |
|||
|r1c3= 14 |
|||
|r1c4=<span style="color:green;">+7</span> |
|||
|r1c5=<span style="color:green;">+5</span> |
|||
|r1c6=<span style="color:green;">+2</span> |
|||
|r1c7= 4 |
|||
|r1c8= 2 |
|||
}} |
|||
{{Tech|Part=HFTF |
|||
|Name = Standing Medium {{HFInput|M}} |
|Name = Standing Medium {{HFInput|M}} |
||
|Romaji = |
|Romaji = |
||
| Line 79: | Line 73: | ||
|Caption = '''MID''' / '''AIR-UNBLOCKABLE''' / '''SPECIAL-SUPER CANCELLABLE''' |
|Caption = '''MID''' / '''AIR-UNBLOCKABLE''' / '''SPECIAL-SUPER CANCELLABLE''' |
||
|Desc = |
|Desc = |
||
|MoveData = True |
|||
|Startup = 5 |
|||
|Active = 2 |
|||
|Recovery = 25 |
|||
|Hit = <span style="color:green;">+1</span> |
|||
|Block = <span style="color:red;">-1</span> |
|||
|Pushblock = <span style="color:red;">-9</span> |
|||
|Damage = 8 |
|||
|SDamage = 4 |
|||
}} |
}} |
||
{{Tech2|Part=HFTF |
|||
{{Table |
|||
|c1=Startup |
|||
|c1width=3% |
|||
|c2=Active |
|||
|c2width=3% |
|||
|c3=Recovery |
|||
|c3width=3% |
|||
|c4=Hit Advantage |
|||
|c4width=3% |
|||
|c5=Block Advantage |
|||
|c5width=3% |
|||
|c6=Pushblock Advantage |
|||
|c6width=3% |
|||
|c7=Damage |
|||
|c7width=3% |
|||
|c8=Damage (Stand) |
|||
|c8width=3% |
|||
|r1= 5 |
|||
|r1c2= 2 |
|||
|r1c3= 25 |
|||
|r1c4=<span style="color:green;">+1</span> |
|||
|r1c5=<span style="color:red;">-1</span> |
|||
|r1c6=<span style="color:red;">-9</span> |
|||
|r1c7= 8 |
|||
|r1c8= 4 |
|||
}} |
|||
{{Tech|Part=HFTF |
|||
|Name = Standing Heavy {{HFInput|H}} |
|Name = Standing Heavy {{HFInput|H}} |
||
|Romaji = |
|Romaji = |
||
| Line 112: | Line 89: | ||
|Caption = '''MID''' / '''AIR-UNBLOCKABLE''' / '''SPECIAL-SUPER CANCELLABLE''' |
|Caption = '''MID''' / '''AIR-UNBLOCKABLE''' / '''SPECIAL-SUPER CANCELLABLE''' |
||
|Desc = |
|Desc = |
||
|MoveData = True |
|||
|Startup = 7 |
|||
|Active = 4 |
|||
|Recovery = 29 |
|||
|Hit = 0 |
|||
|Block = <span style="color:red;">-2</span> |
|||
|Pushblock = <span style="color:red;">-15</span> |
|||
|Damage = 13 |
|||
|SDamage = 6 |
|||
}} |
}} |
||
{{Tech2|Part=HFTF |
|||
{{Table |
|||
|c1=Startup |
|||
|c1width=3% |
|||
|c2=Active |
|||
|c2width=3% |
|||
|c3=Recovery |
|||
|c3width=3% |
|||
|c4=Hit Advantage |
|||
|c4width=3% |
|||
|c5=Block Advantage |
|||
|c5width=3% |
|||
|c6=Pushblock Advantage |
|||
|c6width=3% |
|||
|c7=Damage |
|||
|c7width=3% |
|||
|c8=Damage (Stand) |
|||
|c8width=3% |
|||
|r1= 7 |
|||
|r1c2= 4 |
|||
|r1c3= 29 |
|||
|r1c4= 0 |
|||
|r1c5=<span style="color:red;">-2</span> |
|||
|r1c6=<span style="color:red;">-15</span> |
|||
|r1c7= 13 |
|||
|r1c8= 6 |
|||
}} |
|||
{{Tech|Part=HFTF |
|||
|Name = Crouching Light {{HFInput|Down}} + {{HFInput|L}} |
|Name = Crouching Light {{HFInput|Down}} + {{HFInput|L}} |
||
|Romaji = |
|Romaji = |
||
| Line 145: | Line 105: | ||
|Caption = '''MID''' / '''AIR-UNBLOCKABLE''' / '''SPECIAL-SUPER CANCELLABLE''' |
|Caption = '''MID''' / '''AIR-UNBLOCKABLE''' / '''SPECIAL-SUPER CANCELLABLE''' |
||
|Desc = Not a low for some reason. Super quick and and super plus, important combo starter. |
|Desc = Not a low for some reason. Super quick and and super plus, important combo starter. |
||
|MoveData = True |
|||
|Startup = 5 |
|||
|Active = 2 |
|||
|Recovery = 9 |
|||
|Hit = <span style="color:green;">+12</span> |
|||
|Block = <span style="color:green;">+10</span> |
|||
|Pushblock = <span style="color:green;">+7</span> |
|||
|Damage = 4 |
|||
|SDamage = 2 |
|||
}} |
}} |
||
{{Tech2|Part=HFTF |
|||
{{Table |
|||
|c1=Startup |
|||
|c1width=3% |
|||
|c2=Active |
|||
|c2width=3% |
|||
|c3=Recovery |
|||
|c3width=3% |
|||
|c4=Hit Advantage |
|||
|c4width=3% |
|||
|c5=Block Advantage |
|||
|c5width=3% |
|||
|c6=Pushblock Advantage |
|||
|c6width=3% |
|||
|c7=Damage |
|||
|c7width=3% |
|||
|c8=Damage (Stand) |
|||
|c8width=3% |
|||
|r1= 5 |
|||
|r1c2= 2 |
|||
|r1c3= 9 |
|||
|r1c4=<span style="color:green;">+12</span> |
|||
|r1c5=<span style="color:green;">+10</span> |
|||
|r1c6=<span style="color:green;">+7</span> |
|||
|r1c7= 4 |
|||
|r1c8= 2 |
|||
}} |
|||
{{Tech|Part=HFTF |
|||
|Name = Crouching Medium {{HFInput|Down}} + {{HFInput|M}} |
|Name = Crouching Medium {{HFInput|Down}} + {{HFInput|M}} |
||
|Romaji = |
|Romaji = |
||
| Line 178: | Line 121: | ||
|Caption = '''LOW''' / '''AIR-UNBLOCKABLE''' / '''SPECIAL-SUPER CANCELLABLE''' |
|Caption = '''LOW''' / '''AIR-UNBLOCKABLE''' / '''SPECIAL-SUPER CANCELLABLE''' |
||
|Desc = |
|Desc = |
||
|MoveData = True |
|||
|Startup = 4 |
|||
|Active = 2 |
|||
|Recovery = 19 |
|||
|Hit = <span style="color:green;">+6</span> |
|||
|Block = <span style="color:green;">+4</span> |
|||
|Pushblock = <span style="color:red;">-4</span> |
|||
|Damage = 8 |
|||
|SDamage = 4 |
|||
}} |
}} |
||
{{Tech2|Part=HFTF |
|||
{{Table |
|||
|c1=Startup |
|||
|c1width=3% |
|||
|c2=Active |
|||
|c2width=3% |
|||
|c3=Recovery |
|||
|c3width=3% |
|||
|c4=Hit Advantage |
|||
|c4width=3% |
|||
|c5=Block Advantage |
|||
|c5width=3% |
|||
|c6=Pushblock Advantage |
|||
|c6width=3% |
|||
|c7=Damage |
|||
|c7width=3% |
|||
|c8=Damage (Stand) |
|||
|c8width=3% |
|||
|r1= 4 |
|||
|r1c2= 2 |
|||
|r1c3= 19 |
|||
|r1c4=<span style="color:green;">+6</span> |
|||
|r1c5=<span style="color:green;">+4</span> |
|||
|r1c6=<span style="color:red;">-4</span> |
|||
|r1c7= 8 |
|||
|r1c8= 4 |
|||
}} |
|||
{{Tech|Part=HFTF |
|||
|Name = Crouching Heavy {{HFInput|Down}} + {{HFInput|H}} |
|Name = Crouching Heavy {{HFInput|Down}} + {{HFInput|H}} |
||
|Romaji = |
|Romaji = |
||
| Line 211: | Line 137: | ||
|Caption = '''MID''' / '''AIR-UNBLOCKABLE''' / '''SPECIAL-SUPER CANCELLABLE''' |
|Caption = '''MID''' / '''AIR-UNBLOCKABLE''' / '''SPECIAL-SUPER CANCELLABLE''' |
||
|Desc = |
|Desc = |
||
|MoveData = True |
|||
|Startup = 8 |
|||
|Active = 3 |
|||
|Recovery = 23 |
|||
|Hit = <span style="color:green;">+6</span> |
|||
|Block = <span style="color:green;">+4</span> |
|||
|Pushblock = <span style="color:red;">-9</span> |
|||
|Damage = 13 |
|||
|SDamage = 6 |
|||
}} |
}} |
||
{{Tech2|Part=HFTF |
|||
{{Table |
|||
|c1=Startup |
|||
|c1width=3% |
|||
|c2=Active |
|||
|c2width=3% |
|||
|c3=Recovery |
|||
|c3width=3% |
|||
|c4=Hit Advantage |
|||
|c4width=3% |
|||
|c5=Block Advantage |
|||
|c5width=3% |
|||
|c6=Pushblock Advantage |
|||
|c6width=3% |
|||
|c7=Damage |
|||
|c7width=3% |
|||
|c8=Damage (Stand) |
|||
|c8width=3% |
|||
|r1= 8 |
|||
|r1c2= 3 |
|||
|r1c3= 23 |
|||
|r1c4=<span style="color:green;">+6</span> |
|||
|r1c5=<span style="color:green;">+4</span> |
|||
|r1c6=<span style="color:red;">-9</span> |
|||
|r1c7= 13 |
|||
|r1c8= 6 |
|||
}} |
|||
{{Tech|Part=HFTF |
|||
|Name = Jumping Light {{HFInput|Up}} + {{HFInput|L}} |
|Name = Jumping Light {{HFInput|Up}} + {{HFInput|L}} |
||
|Romaji = |
|Romaji = |
||
| Line 244: | Line 153: | ||
|Caption = '''OVERHEAD''' |
|Caption = '''OVERHEAD''' |
||
|Desc = |
|Desc = |
||
|MoveData = True |
|||
|Startup= 5 |
|||
|Active= 12 |
|||
|Hit=<span style="color:green;">12</span> |
|||
|Block=<span style="color:green;">+10</span> |
|||
|Pushblock=<span style="color:green;">+7</span> |
|||
|Damage= 5 |
|||
|SDamage= 2 |
|||
}} |
}} |
||
{{Tech2|Part=HFTF |
|||
{{Table |
|||
|c1=Startup |
|||
|c1width=3% |
|||
|c2=Active |
|||
|c2width=3% |
|||
|c3=Hit Advantage |
|||
|c3width=3% |
|||
|c4=Block Advantage |
|||
|c4width=3% |
|||
|c5=Pushblock Advantage |
|||
|c5width=3% |
|||
|c6=Damage |
|||
|c6width=3% |
|||
|c7=Damage (Stand) |
|||
|c7width=3% |
|||
|r1= 5 |
|||
|r1c2= 12 |
|||
|r1c3=<span style="color:green;">12</span> |
|||
|r1c4=<span style="color:green;">+10</span> |
|||
|r1c5=<span style="color:green;">+7</span> |
|||
|r1c6= 5 |
|||
|r1c7= 2 |
|||
}} |
|||
{{Tech|Part=HFTF |
|||
|Name = Jumping Medium {{HFInput|Up}} + {{HFInput|M}} |
|Name = Jumping Medium {{HFInput|Up}} + {{HFInput|M}} |
||
|Romaji = |
|Romaji = |
||
| Line 274: | Line 168: | ||
|Caption = '''OVERHEAD''' |
|Caption = '''OVERHEAD''' |
||
|Desc = Slightly slower than the light version. |
|Desc = Slightly slower than the light version. |
||
|MoveData = True |
|||
|Startup= 7 |
|||
|Active= 8 |
|||
|Hit=<span style="color:green;">12</span> |
|||
|Block=<span style="color:green;">+10</span> |
|||
|Pusblock=<span style="color:green;">+7</span> |
|||
|Damage= 10 |
|||
|SDamage= 5 |
|||
}} |
}} |
||
{{Tech2|Part=HFTF |
|||
{{Table |
|||
|c1=Startup |
|||
|c1width=3% |
|||
|c2=Active |
|||
|c2width=3% |
|||
|c3=Hit Advantage |
|||
|c3width=3% |
|||
|c4=Block Advantage |
|||
|c4width=3% |
|||
|c5=Pushblock Advantage |
|||
|c5width=3% |
|||
|c6=Damage |
|||
|c6width=3% |
|||
|c7=Damage (Stand) |
|||
|c7width=3% |
|||
|r1= 7 |
|||
|r1c2= 8 |
|||
|r1c3=<span style="color:green;">12</span> |
|||
|r1c4=<span style="color:green;">+10</span> |
|||
|r1c5=<span style="color:green;">+7</span> |
|||
|r1c6= 10 |
|||
|r1c7= 5 |
|||
}} |
|||
{{Tech|Part=HFTF |
|||
|Name = Jumping Heavy {{HFInput|Up}} + {{HFInput|H}} |
|Name = Jumping Heavy {{HFInput|Up}} + {{HFInput|H}} |
||
|Romaji = |
|Romaji = |
||
| Line 304: | Line 183: | ||
|Caption = '''OVERHEAD''' |
|Caption = '''OVERHEAD''' |
||
|Desc = |
|Desc = |
||
|MoveData = True |
|||
|Startup= 9 |
|||
|Active= Active until Joseph lands |
|||
|Hit=<span style="color:green;">+12</span> |
|||
|Block=<span style="color:green;">+10</span> |
|||
|Pushblock=<span style="color:green;">+7</span> |
|||
|Damage= 14 |
|||
|SDamage= 7 |
|||
}} |
}} |
||
{{Table |
|||
|c1=Startup |
|||
|c1width=3% |
|||
|c2=Active |
|||
|c2width=3% |
|||
|c3=Recovery |
|||
|c3width=3% |
|||
|c4=Hit Advantage |
|||
|c4width=3% |
|||
|c5=Block Advantage |
|||
|c5width=3% |
|||
|c6=Pushblock Advantage |
|||
|c6width=3% |
|||
|c7=Damage |
|||
|c7width=3% |
|||
|c8=Damage (Stand) |
|||
|c8width=3% |
|||
|r1= 9 |
|||
|r1c2= Active until Joseph lands |
|||
|r1c3= 23 |
|||
|r1c4=<span style="color:green;">+12</span> |
|||
|r1c5=<span style="color:green;">+10</span> |
|||
|r1c6=<span style="color:green;">+7</span> |
|||
|r1c7= 14 |
|||
|r1c8= 7 |
|||
}} |
}} |
||
==Command Normals== |
==Command Normals== |
||
{{Tech|Part=HFTF |
{{Tech|Part=HFTF |
||
| Line 356: | Line 219: | ||
|c8=Damage (Stand) |
|c8=Damage (Stand) |
||
|c8width=3% |
|c8width=3% |
||
| |
|Startup= 14 |
||
| |
|Active= 3 |
||
| |
|Recovery= 29 |
||
| |
|Hit=<span style="color:red;">-9</span> |
||
| |
|Block=<span style="color:red;">-11</span> |
||
| |
|Pushblock=<span style="color:red;">-24</span> |
||
| |
|Damage= 9 |
||
| |
|SDamage= 4 |
||
}} |
}} |
||
{{Tech|Part=HFTF |
{{Tech|Part=HFTF |
||
| Line 389: | Line 252: | ||
|c8=Damage (Stand) |
|c8=Damage (Stand) |
||
|c8width=3% |
|c8width=3% |
||
| |
|Startup= 4 |
||
| |
|Active= 17 |
||
| |
|Recovery= 19 |
||
| |
|Hit=<span style="color:red;">-8</span> |
||
| |
|Block=<span style="color:red;">-10</span> |
||
| |
|Pushblock=<span style="color:red;">-18</span> |
||
| |
|Damage= 6 |
||
| |
|SDamage= 3 |
||
}} |
}} |
||
{{Tech|Part=HFTF |
{{Tech|Part=HFTF |
||
| Line 422: | Line 285: | ||
|c8=Damage (Stand) |
|c8=Damage (Stand) |
||
|c8width=3% |
|c8width=3% |
||
| |
|Startup= 8 |
||
| |
|Active= 21 |
||
| |
|Recovery= 24 |
||
| |
|Hit=<span style="color:green;">Knockdown</span> |
||
| |
|Block=<span style="color:red;">-14</span> |
||
| |
|Pushblock=<span style="color:red;">-27</span> |
||
| |
|Damage= 10 |
||
| |
|SDamage= 5 |
||
}} |
}} |
||
==Dashing Normals== |
==Dashing Normals== |
||
| Line 436: | Line 299: | ||
|Romaji = |
|Romaji = |
||
|MImage = HFTF Joseph Forward Heavy.png |
|MImage = HFTF Joseph Forward Heavy.png |
||
|Caption = |
|Caption = '''OVERHEAD''' |
||
|Desc = |
|Desc = |
||
}} |
}} |
||
{{Table |
{{Table |
||
|bg=#437CAF |
|||
|bg2=#437CAF |
|||
|c1=Startup |
|c1=Startup |
||
|c1width=3% |
|c1width=3% |
||
| Line 458: | Line 319: | ||
|c8=Damage (Stand) |
|c8=Damage (Stand) |
||
|c8width=3% |
|c8width=3% |
||
| |
|Startup= 14 |
||
| |
|Active= 3 |
||
| |
|Recovery= 35 |
||
|Hit= Launch |
|||
|r1c4=<span style="color:green;">+7</span> |
|||
| |
|Block=<span style="color:red;">-17</span> |
||
| |
|Pushblock=<span style="color:red;">-22</span> |
||
| |
|Damage= 10 |
||
| |
|SDamage= 5 |
||
}} |
|||
{{Table |
|||
|bg=#D4BA50 |
|||
|bg2=#E2DB74 |
|||
|c1=Startup |
|||
|c1width=3% |
|||
|c2=Active |
|||
|c2width=3% |
|||
|c3=Recovery |
|||
|c3width=3% |
|||
|c4=Hit Advantage |
|||
|c4width=3% |
|||
|c5=Block Advantage |
|||
|c5width=3% |
|||
|c6=Pushblock Advantage |
|||
|c6width=3% |
|||
|c7=Damage |
|||
|c7width=3% |
|||
|c8=Damage (Stand) |
|||
|c8width=3% |
|||
|r1= 5 |
|||
|r1c2= 2 |
|||
|r1c3= 14 |
|||
|r1c4=<span style="color:green;">+7</span> |
|||
|r1c5=<span style="color:green;">+5</span> |
|||
|r1c6=<span style="color:green;">+2</span> |
|||
|r1c7= 4 |
|||
|r1c8= 2 |
|||
}} |
|||
{{Table |
|||
|bg=#AD3838 |
|||
|bg2=#78A4CD |
|||
|c1=Startup |
|||
|c1width=3% |
|||
|c2=Active |
|||
|c2width=3% |
|||
|c3=Recovery |
|||
|c3width=3% |
|||
|c4=Hit Advantage |
|||
|c4width=3% |
|||
|c5=Block Advantage |
|||
|c5width=3% |
|||
|c6=Pushblock Advantage |
|||
|c6width=3% |
|||
|c7=Damage |
|||
|c7width=3% |
|||
|c8=Damage (Stand) |
|||
|c8width=3% |
|||
|r1= 5 |
|||
|r1c2= 2 |
|||
|r1c3= 14 |
|||
|r1c4=<span style="color:green;">+7</span> |
|||
|r1c5=<span style="color:green;">+5</span> |
|||
|r1c6=<span style="color:green;">+2</span> |
|||
|r1c7= 4 |
|||
|r1c8= 2 |
|||
}} |
}} |
||
{{Tech|Part=HFTF |
{{Tech|Part=HFTF |
||
| Line 527: | Line 332: | ||
|Romaji = |
|Romaji = |
||
|MImage = HFTF Joseph Slide.png |
|MImage = HFTF Joseph Slide.png |
||
|Caption = '''LOW |
|Caption = '''LOW''' / '''SPECIAL-SUPER CANCELLABLE''' |
||
|Desc = |
|Desc = |
||
}} |
}} |
||
| Line 547: | Line 352: | ||
|c8=Damage (Stand) |
|c8=Damage (Stand) |
||
|c8width=3% |
|c8width=3% |
||
| |
|Startup= 4 |
||
| |
|Active= 25 |
||
| |
|Recovery= 17 |
||
| |
|Hit=<span style="color:red;">-19</span> |
||
| |
|Block=<span style="color:red;">-21</span> |
||
| |
|Pushblock=<span style="color:red;">-24</span> |
||
| |
|Damage= 10 |
||
| |
|SDamage= 5 |
||
}} |
}} |
||
{{Tech|Part=HFTF |
{{Tech|Part=HFTF |
||
| Line 560: | Line 365: | ||
|Romaji = |
|Romaji = |
||
|MImage = HFTF Joseph Slide.png |
|MImage = HFTF Joseph Slide.png |
||
|Caption = '''LOW |
|Caption = '''LOW''' / '''SPECIAL-SUPER CANCELLABLE''' |
||
|Desc = |
|Desc = |
||
}} |
}} |
||
| Line 580: | Line 385: | ||
|c8=Damage (Stand) |
|c8=Damage (Stand) |
||
|c8width=3% |
|c8width=3% |
||
| |
|Startup= 4 |
||
| |
|Active= 25 |
||
| |
|Recovery= 21 |
||
|Hit= Launch |
|||
|r1c4=<span style="color:green;">+7</span> |
|||
| |
|Block=<span style="color:red;">-15</span> |
||
| |
|Pushblock=<span style="color:red;">-28</span> |
||
| |
|Damage= 10 |
||
| |
|SDamage= 5 |
||
}} |
}} |
||
==Clackers== |
==Clackers== |
||
{{Tech|Part=HFTF |
{{Tech|Part=HFTF |
||
|Name |
|Name = Clackers {{HFInput|S}} |
||
|Romaji |
|Romaji = |
||
|MImage |
|MImage = HFTF Joseph Clackers.png |
||
|Caption |
|Caption = '''MID''' / '''AIR-UNBLOCKABLE''' |
||
|Desc |
|Desc = |
||
}} |
}} |
||
{{Table |
{{Table |
||
| Line 614: | Line 420: | ||
|c8=Damage (Stand) |
|c8=Damage (Stand) |
||
|c8width=3% |
|c8width=3% |
||
| |
|Startup= 18 |
||
| |
|Active= 9 |
||
| |
|Recovery= 38 |
||
| |
|Hit=<span style="color:red;">-3</span> |
||
| |
|Block=<span style="color:red;">-14</span> |
||
| |
|Pushblock=<span style="color:red;">-14</span> |
||
| |
|Damage= 13 |
||
| |
|SDamage= 20 |
||
}} |
}} |
||
{{Tech|Part=HFTF |
{{Tech|Part=HFTF |
||
| Line 627: | Line 433: | ||
|Romaji = |
|Romaji = |
||
|MImage = HFTF Joseph Forward Clackers.png |
|MImage = HFTF Joseph Forward Clackers.png |
||
|Caption = '''MID''' / '''AIR-UNBLOCKABLE''' |
|Caption = '''MID''' / '''AIR-UNBLOCKABLE''' |
||
|Desc = |
|Desc = |
||
}} |
}} |
||
| Line 647: | Line 453: | ||
|c8=Damage (Stand) |
|c8=Damage (Stand) |
||
|c8width=3% |
|c8width=3% |
||
| |
|Startup= 10 |
||
| |
|Active= 6 |
||
| |
|Recovery= 25 |
||
|Hit= Launch |
|||
|r1c4=<span style="color:green;">+7</span> |
|||
| |
|Block=<span style="color:red;">-6</span> |
||
| |
|Pushblock=<span style="color:red;">-6</span> |
||
| |
|Damage= 12 |
||
|SDamage= Stand Crash |
|||
|r1c8= 2 |
|||
}} |
}} |
||
{{Tech|Part=HFTF |
{{Tech|Part=HFTF |
||
| Line 660: | Line 466: | ||
|Romaji = |
|Romaji = |
||
|MImage = HFTF Joseph Crouching Clackers.png |
|MImage = HFTF Joseph Crouching Clackers.png |
||
|Caption = '''LOW''' |
|Caption = '''LOW''' |
||
|Desc = |
|Desc = |
||
}} |
}} |
||
| Line 680: | Line 486: | ||
|c8=Damage (Stand) |
|c8=Damage (Stand) |
||
|c8width=3% |
|c8width=3% |
||
| |
|Startup= 18 |
||
| |
|Active= 3 |
||
| |
|Recovery= 17 |
||
|Hit= Knockdown |
|||
|r1c4=<span style="color:green;">+7</span> |
|||
| |
|Block=<span style="color:green;">+8</span> |
||
| |
|Pushblock=<span style="color:green;">+5</span> |
||
| |
|Damage= 4 |
||
| |
|SDamage= 2 |
||
}} |
}} |
||
{{Tech|Part=HFTF |
{{Tech|Part=HFTF |
||
| Line 693: | Line 499: | ||
|Romaji = |
|Romaji = |
||
|MImage = HFTF Joseph Jumping Clackers.png |
|MImage = HFTF Joseph Jumping Clackers.png |
||
|Caption = |
|Caption = '''OVERHEAD''' |
||
|Desc = |
|Desc = |
||
}} |
}} |
||
| Line 701: | Line 507: | ||
|c2=Active |
|c2=Active |
||
|c2width=3% |
|c2width=3% |
||
|c3= |
|c3=Hit Advantage |
||
|c3width=3% |
|c3width=3% |
||
|c4= |
|c4=Block Advantage |
||
|c4width=3% |
|c4width=3% |
||
|c5= |
|c5=Pushblock Advantage |
||
|c5width=3% |
|c5width=3% |
||
|c6=Damage |
|||
|c6=Pushblock Advantage |
|||
|c6width=3% |
|c6width=3% |
||
|c7=Damage |
|c7=Damage (Stand) |
||
|c7width=3% |
|c7width=3% |
||
|Startup= 8 |
|||
|c8=Damage (Stand) |
|||
|Active= 10 |
|||
|c8width=3% |
|||
|Recovery=<span style="color:green;">+11</span> |
|||
|r1= 5 |
|||
|Hit=<span style="color:green;">+6</span> |
|||
|r1c2= 2 |
|||
|Block=<span style="color:green;">+13</span> |
|||
|r1c3= 14 |
|||
|Pushblock= 12 |
|||
|r1c4=<span style="color:green;">+7</span> |
|||
|SDamage= 14 |
|||
|r1c5=<span style="color:green;">+5</span> |
|||
|r1c6=<span style="color:green;">+2</span> |
|||
|r1c7= 4 |
|||
|r1c8= 2 |
|||
}} |
}} |
||
{{Tech|Part=HFTF |
{{Tech|Part=HFTF |
||
| Line 746: | Line 549: | ||
|c8=Damage (Stand) |
|c8=Damage (Stand) |
||
|c8width=3% |
|c8width=3% |
||
| |
|Startup= 10 |
||
| |
|Active= 12 |
||
| |
|Recovery= 45 |
||
| |
|Hit=<span style="color:red;">-3</span> |
||
| |
|Block=<span style="color:red;">-11</span> |
||
| |
|Pushblock=<span style="color:red;">-14</span> |
||
| |
|Damage= 14 |
||
| |
|SDamage= 23 |
||
}} |
}} |
||
==Throw== |
==Throw== |
||
| Line 760: | Line 563: | ||
|MImage = HFTF Joseph Throw.png |
|MImage = HFTF Joseph Throw.png |
||
|Desc = |
|Desc = |
||
}} |
|||
==Special Moves== |
|||
{{Tech|Part=HFTF |
|||
|Name = Turquoise Blue Overdrive |
|||
|JPN = {{Ruby|青縁波紋疾走|ターコイズブルーオーバードライブ}} |
|||
|Romaji = Tākoizu Burū Ōbādoraibu |
|||
|Input ={{HFInput|QCF}} + {{HFInput|A}} |
|||
|MImage = HFTF Joseph Overdrive Light.png |
|||
|AImage = HFTF Joseph Overdrive Medium.png |
|||
|Caption = '''MID''' |
|||
|Desc = |
|||
}} |
}} |
||
{{Table |
{{Table |
||
|c1=Damage |
|||
|bg=#437CAF |
|||
|bg2=#78A4CD |
|||
|c1=Startup |
|||
|c1width=3% |
|c1width=3% |
||
|Startup= 12 |
|||
|c2=Active |
|||
|c2width=3% |
|||
|c3=Recovery |
|||
|c3width=3% |
|||
|c4=Hit Advantage |
|||
|c4width=3% |
|||
|c5=Block Advantage |
|||
|c5width=3% |
|||
|c6=Pushblock Advantage |
|||
|c6width=3% |
|||
|c7=Damage |
|||
|c7width=3% |
|||
|c8=Damage (Stand) |
|||
|c8width=3% |
|||
|r1= 12 |
|||
|r1c2= 2 |
|||
|r1c3= 23 |
|||
|r1c4=<span style="color:green;">+5</span> |
|||
|r1c5=<span style="color:green;">+3</span> |
|||
|r1c6=<span style="color:red;">-23</span> |
|||
|r1c7= 15 |
|||
|r1c8= 30 |
|||
}} |
}} |
||
==Guard Cancel== |
|||
{{Table |
|||
{{Tech|Part=HFTF |
|||
|bg=#D4BA50 |
|||
|Name = Guard Cancel {{HFInput|DP}} + {{HFInput|A}} (While blocking) |
|||
|bg2=#E2DB74 |
|||
|MImage = HFTF Joseph Hamon Soda.png |
|||
|c1=Startup |
|||
|Caption = '''MID''' / '''AIR-UNBLOCKABLE''' |
|||
|c1width=3% |
|||
|Desc = |
|||
|c2=Active |
|||
|c2width=3% |
|||
|c3=Recovery |
|||
|c3width=3% |
|||
|c4=Hit Advantage |
|||
|c4width=3% |
|||
|c5=Block Advantage |
|||
|c5width=3% |
|||
|c6=Pushblock Advantage |
|||
|c6width=3% |
|||
|c7=Damage |
|||
|c7width=3% |
|||
|c8=Damage (Stand) |
|||
|c8width=3% |
|||
|r1= 12 |
|||
|r1c2= 4 |
|||
|r1c3= 25 |
|||
|r1c4=<span style="color:green;">+3</span> |
|||
|r1c5=<span style="color:green;">+1</span> |
|||
|r1c6=<span style="color:red;">-25</span> |
|||
|r1c7= 15 |
|||
|r1c8= 30 |
|||
}} |
}} |
||
{{Table |
{{Table |
||
|c1= Hit Advantage |
|||
|bg=#AD3838 |
|||
|bg2=#DA4F4F |
|||
|c1=Startup |
|||
|c1width=3% |
|c1width=3% |
||
|c2= |
|c2= Damage |
||
|c2width=3% |
|c2width=3% |
||
|c3= Damage (Stand) |
|||
|c3=Recovery |
|||
|c3width=3% |
|c3width=3% |
||
|Startup= Launch |
|||
|c4=Hit Advantage |
|||
|Active= 8 |
|||
|c4width=3% |
|||
|Recovery= 4 |
|||
|c5=Block Advantage |
|||
|c5width=3% |
|||
|c6=Pushblock Advantage |
|||
|c6width=3% |
|||
|c7=Damage |
|||
|c7width=3% |
|||
|c8=Damage (Stand) |
|||
|c8width=3% |
|||
|r1= 37 |
|||
|r1c2= 8 |
|||
|r1c3= 12 |
|||
|r1c4= Wall-Bounce |
|||
|r1c5=<span style="color:green;">+22</span> |
|||
|r1c6=<span style="color:green;">+3</span> |
|||
|r1c7= 20 |
|||
|r1c8= 40 |
|||
}} |
}} |
||
==Special Moves== |
|||
{{Tech|Part=HFTF |
{{Tech|Part=HFTF |
||
|Name = |
|Name = Turquoise Blue Overdrive |
||
|JPN = {{Ruby|青縁波紋疾走|ターコイズブルーオーバードライブ}} |
|||
|MImage = HFTF Joseph Overdrive Heavy.png |
|||
|Romaji = Tākoizu Burū Ōbādoraibu |
|||
|Input ={{HFInput|QCF}} + {{HFInput|A}} |
|||
|MImage = HFTF Joseph Overdrive Light.png |
|||
|AImage = HFTF Joseph Overdrive Medium.png |
|||
|3Image = HFTF Joseph Overdrive Heavy.png |
|||
|Image1 = Light |
|||
|Image2 = Medium |
|||
|Image3 = Heavy |
|||
|Caption = '''MID''' |
|Caption = '''MID''' |
||
|Desc = |
|Desc = |
||
| Line 881: | Line 621: | ||
|c8=Damage (Stand) |
|c8=Damage (Stand) |
||
|c8width=3% |
|c8width=3% |
||
| |
|Startup= 12 |
||
| |
|Active= 2 |
||
| |
|Recovery= 23 |
||
| |
|Hit=<span style="color:green;">+5</span> |
||
| |
|Block=<span style="color:green;">+3</span> |
||
| |
|Pushblock=<span style="color:red;">-23</span> |
||
| |
|Damage= 15 |
||
| |
|SDamage= 30 |
||
}} |
}} |
||
{{Table |
{{Table |
||
| Line 909: | Line 649: | ||
|c8=Damage (Stand) |
|c8=Damage (Stand) |
||
|c8width=3% |
|c8width=3% |
||
| |
|Startup= 12 |
||
| |
|Active= 4 |
||
| |
|Recovery= 25 |
||
| |
|Hit=<span style="color:green;">+3</span> |
||
| |
|Block=<span style="color:green;">+1</span> |
||
| |
|Pushblock=<span style="color:red;">-25</span> |
||
| |
|Damage= 15 |
||
| |
|SDamage= 30 |
||
}} |
}} |
||
{{Table |
{{Table |
||
| Line 937: | Line 677: | ||
|c8=Damage (Stand) |
|c8=Damage (Stand) |
||
|c8width=3% |
|c8width=3% |
||
| |
|Startup= 37 |
||
| |
|Active= 8 |
||
| |
|Recovery= 12 |
||
|Hit= Wall-Bounce |
|||
|r1c4=<span style="color:green;">+7</span> |
|||
| |
|Block=<span style="color:green;">+22</span> |
||
| |
|Pushblock=<span style="color:green;">+3</span> |
||
| |
|Damage= 20 |
||
| |
|SDamage= 40 |
||
}} |
}} |
||
{{Tech|Part=HFTF |
{{Tech|Part=HFTF |
||
|Name = Hamon Soda |
|Name = Hamon Soda |
||
|JPN = {{Ruby|波|は}}{{Ruby|紋|もん}}コーラー |
|||
|Input = {{HFInput|DP}} + {{HFInput|A}} |
|||
|MImage = HFTF Joseph Hamon Soda.png |
|MImage = HFTF Joseph Hamon Soda.png |
||
|Caption = '''MID''' / '''AIR-UNBLOCKABLE''' |
|Caption = '''MID''' / '''AIR-UNBLOCKABLE''' |
||
| Line 971: | Line 713: | ||
|c8=Damage (Stand) |
|c8=Damage (Stand) |
||
|c8width=3% |
|c8width=3% |
||
| |
|Startup= 8 |
||
| |
|Active= 4 |
||
| |
|Recovery= 26 |
||
| |
|Hit=<span style="color:green;">Launch</span> |
||
| |
|Block=<span style="color:red;">-5</span> |
||
| |
|Pushblock=<span style="color:red;">-13</span> |
||
| |
|Damage= 8 |
||
| |
|SDamage= 4 |
||
}} |
}} |
||
{{Table |
{{Table |
||
| Line 999: | Line 741: | ||
|c8=Damage (Stand) |
|c8=Damage (Stand) |
||
|c8width=3% |
|c8width=3% |
||
| |
|Startup= 14 |
||
| |
|Active= 4 |
||
| |
|Recovery= 26 |
||
| |
|Hit=<span style="color:green;">Launch</span> |
||
| |
|Block=<span style="color:red;">-5</span> |
||
| |
|Pushblock=<span style="color:red;">-13</span> |
||
| |
|Damage= 10 |
||
| |
|SDamage= 5 |
||
}} |
}} |
||
{{Table |
{{Table |
||
| Line 1,027: | Line 769: | ||
|c8=Damage (Stand) |
|c8=Damage (Stand) |
||
|c8width=3% |
|c8width=3% |
||
| |
|Startup= 21 |
||
| |
|Active= 4 |
||
| |
|Recovery= 26 |
||
| |
|Hit=<span style="color:green;">Launch</span> |
||
| |
|Block=<span style="color:red;">-5</span> |
||
| |
|Pushblock=<span style="color:red;">-13</span> |
||
| |
|Damage= 12 |
||
| |
|SDamage= 6 |
||
}} |
}} |
||
{{Tech|Part=HFTF |
{{Tech|Part=HFTF |
||
| Line 1,059: | Line 801: | ||
|c8=Damage (Stand) |
|c8=Damage (Stand) |
||
|c8width=3% |
|c8width=3% |
||
| |
|Startup= 12 |
||
| |
|Active= 8 |
||
| |
|Recovery= 29 |
||
| |
|Hit=<span style="color:green;">+5</span> |
||
| |
|Block=<span style="color:green;">+3</span> |
||
| |
|Pushblock=<span style="color:red;">-23</span> |
||
| |
|Damage= 9 |
||
| |
|SDamage= 14 |
||
}} |
}} |
||
{{Tech|Part=HFTF |
{{Tech|Part=HFTF |
||
| Line 1,091: | Line 833: | ||
|c8=Damage (Stand) |
|c8=Damage (Stand) |
||
|c8width=3% |
|c8width=3% |
||
| |
|Startup= 7 |
||
| |
|Active= 9 |
||
| |
|Recovery= 46 |
||
| |
|Hit=<span style="color:red;">-19</span> |
||
| |
|Block=<span style="color:red;">-22</span> |
||
| |
|Pushblock=<span style="color:red;">-19</span> |
||
| |
|Damage= 9 |
||
| |
|SDamage= 14 |
||
}} |
}} |
||
{{Tech|Part=HFTF |
{{Tech|Part=HFTF |
||
| Line 1,121: | Line 863: | ||
|c7=Damage (Stand) |
|c7=Damage (Stand) |
||
|c7width=3% |
|c7width=3% |
||
| |
|Startup= 25 |
||
| |
|Active= Acive until Joseph lands |
||
| |
|Recovery=<span style="color:green;">+3</span> |
||
| |
|Hit=<span style="color:red;">-5</span> |
||
| |
|Block=<span style="color:red;">-1</span> |
||
| |
|Pushblock= 13 |
||
| |
|Damage= Stand Crash |
||
}} |
}} |
||
{{Tech|Part=HFTF |
{{Tech|Part=HFTF |
||
| Line 1,152: | Line 894: | ||
|c8=Damage (Stand) |
|c8=Damage (Stand) |
||
|c8width=3% |
|c8width=3% |
||
| |
|Startup= 8 |
||
| |
|Active= 6 |
||
| |
|Recovery= 34 |
||
| |
|Hit= Launch |
||
| |
|Block=<span style="color:red;">-18</span> |
||
| |
|Pushblock=<span style="color:red;">-11</span> |
||
| |
|Damage= 12 |
||
| |
|SDamage= Stand Crash |
||
}} |
}} |
||
{{Tech|Part=HFTF |
{{Tech|Part=HFTF |
||
| Line 1,184: | Line 926: | ||
|c8=Damage (Stand) |
|c8=Damage (Stand) |
||
|c8width=3% |
|c8width=3% |
||
| |
|Startup= 22 |
||
| |
|Active= 4 |
||
| |
|Recovery= 17 |
||
| |
|Hit= Knockdown |
||
| |
|Block=<span style="color:green;">+7</span> |
||
| |
|Pushblock=<span style="color:green;">+6</span> |
||
| |
|Damage= 11 |
||
| |
|SDamage= 4 |
||
}} |
}} |
||
{{Tech|Part=HFTF |
{{Tech|Part=HFTF |
||
|Name = Iron Bowgun |
|Name = Iron Bowgun |
||
|JPN = アイアンボーガン |
|JPN = アイアンボーガン |
||
|Input = {{HFInput|HCB}} + {{HFInput|A}} |
|Input = {{HFInput|HCB}} + {{HFInput|A}} |
||
|MImage = HFTF Joseph Crossbow Light.png |
|MImage = HFTF Joseph Crossbow Light.png |
||
|AImage = HFTF Joseph Crossbow Medium.png |
|AImage = HFTF Joseph Crossbow Medium.png |
||
|3Image = HFTF Joseph Crossbow Heavy.png |
|||
|Image1 = Light |
|||
|Image2 = Medium |
|||
|Image3 = Heavy |
|||
|Caption = '''MID''' / '''AIR-UNBLOCKABLE (Heavy)''' |
|Caption = '''MID''' / '''AIR-UNBLOCKABLE (Heavy)''' |
||
|Desc = |
|Desc = |
||
| Line 1,217: | Line 963: | ||
|c6=Damage (Stand) |
|c6=Damage (Stand) |
||
|c6width=3% |
|c6width=3% |
||
| |
|Startup= 19 |
||
| |
|Active=<span style="color:red;">-16</span> |
||
| |
|Recovery=<span style="color:red;">-23</span> |
||
| |
|Hit=<span style="color:red;">-21</span> |
||
| |
|Block= 10 |
||
| |
|Pushblock= 20 |
||
}} |
}} |
||
{{Table |
{{Table |
||
| Line 1,239: | Line 985: | ||
|c6=Damage (Stand) |
|c6=Damage (Stand) |
||
|c6width=3% |
|c6width=3% |
||
| |
|Startup= 19 |
||
| |
|Active=<span style="color:red;">-16</span> |
||
| |
|Recovery=<span style="color:red;">-23</span> |
||
| |
|Hit=<span style="color:red;">-21</span> |
||
| |
|Block= 11 |
||
| |
|Pushblock= 22 |
||
}} |
}} |
||
{{Table |
{{Table |
||
| Line 1,261: | Line 1,007: | ||
|c6=Damage (Stand) |
|c6=Damage (Stand) |
||
|c6width=3% |
|c6width=3% |
||
| |
|Startup= 156 (Times it takes for the ball to come around) |
||
| |
|Active=<span style="color:green;">+26</span> |
||
| |
|Recovery=<span style="color:green;">+13</span> |
||
| |
|Hit=<span style="color:green;">+16</span> |
||
| |
|Block= 11 |
||
| |
|Pushblock= 24 |
||
}} |
|||
{{Tech|Part=HFTF |
|||
|Name = Clackers {{HFInput|S}} |
|||
|MImage = HFTF Joseph Crossbow Heavy.png |
|||
|Caption = '''MID''' / '''AIR-UNBLOCKABLE''' |
|||
|Desc = |
|||
}} |
|||
{{Table |
|||
|bg=#AD3838 |
|||
|bg2=#DA4F4F |
|||
|c1=Startup |
|||
|c1width=3% |
|||
|c2=Hit Advantage |
|||
|c2width=3% |
|||
|c3=Block Advantage |
|||
|c3width=3% |
|||
|c4=Pushblock Advantage |
|||
|c4width=3% |
|||
|c5=Damage |
|||
|c5width=3% |
|||
|c6=Damage (Stand) |
|||
|c6width=3% |
|||
|r1= 156 (Times it takes for the ball to come around) |
|||
|r1c2=<span style="color:green;">+26</span> |
|||
|r1c3=<span style="color:green;">+13</span> |
|||
|r1c4=<span style="color:green;">+16</span> |
|||
|r1c5= 11 |
|||
|r1c6= 24 |
|||
}} |
|||
{{Tech|Part=HFTF |
|||
|Name = Clacker Boomerang {{HFInput|QCF}} + {{HFInput|S}} |
|||
|MImage = Clacker Boomerang 1.png |
|||
|AImage = Clacker Boomerang 2.png |
|||
|Caption = '''MID''' |
|||
|Desc = |
|||
|Gallery = [[File:Clacker Boomerang 3.png]] |
|||
}} |
|||
{{Table |
|||
|c1=Startup |
|||
|c1width=3% |
|||
|c2=Recovery |
|||
|c2width=3% |
|||
|c3=Hit Advantage |
|||
|c3width=3% |
|||
|c4=Block Advantage |
|||
|c4width=3% |
|||
|c5=Pushblock Advantage |
|||
|c5width=3% |
|||
|c6=Damage |
|||
|c6width=3% |
|||
|c7=Damage (Stand) |
|||
|c7width=3% |
|||
|r1= 32 |
|||
|r1c2= 15 |
|||
|r1c3=<span style="color:green;">+13/+27</span> |
|||
|r1c4=<span style="color:green;">+11/+25</span> |
|||
|r1c5=<span style="color:green;">+3/+16</span> |
|||
|r1c6= 12 |
|||
|r1c7= 24 |
|||
}} |
}} |
||
==Super Moves== |
==Super Moves== |
||
{{Tech|Part=HFTF |
{{Tech|Part=HFTF |
||
|Name = |
|Name = Unforgettable Memories |
||
|JPN = {{Ruby|忘|わす}}れぬ{{Ruby|想|おも}}い |
|||
|Input = {{HFInput|QCF}} + {{HFInput|A2}} |
|||
|MImage = HFTF Joseph Caesar!.png |
|MImage = HFTF Joseph Caesar!.png |
||
|AImage = HFTF Joseph Caesar! (2).png |
|AImage = HFTF Joseph Caesar! (2).png |
||
|Image1 = 1 |
|||
|Image2 = 2 |
|||
|Caption = '''MID''' |
|Caption = '''MID''' |
||
|Desc = |
|Desc = |
||
| Line 1,350: | Line 1,042: | ||
|c7=Damage |
|c7=Damage |
||
|c7width=3% |
|c7width=3% |
||
| |
|Startup= 8 |
||
| |
|Active= 4 |
||
| |
|Recovery= 46 |
||
| |
|Hit= Knockdown |
||
| |
|Block=<span style="color:red;">-17</span> |
||
| |
|Pushblock=<span style="color:red;">-15</span> |
||
| |
|Damage= 43 |
||
}} |
}} |
||
{{Tech|Part=HFTF |
{{Tech|Part=HFTF |
||
|Name = |
|Name = Hamon Beat! Red Stone of Aja! |
||
|JPN = {{Ruby|波|は}}{{Ruby|紋|もん}}ビート! エイジャの{{Ruby|赤|せき}}{{Ruby|石|せき}}! |
|||
|Input = {{HFInput|QCB}} + {{HFInput|A2}} |
|||
|MImage = HFTF Joseph Hamon Beat.png |
|MImage = HFTF Joseph Hamon Beat.png |
||
|Caption = |
|Caption = |
||
| Line 1,375: | Line 1,069: | ||
|c5=Damage |
|c5=Damage |
||
|c5width=3% |
|c5width=3% |
||
| |
|Startup= 67 |
||
| |
|Active= 8 |
||
| |
|Recovery= 46 |
||
| |
|Hit= Knockdown |
||
| |
|Block= 56 |
||
}} |
}} |
||
}} |
}} |
||
| Line 1,425: | Line 1,119: | ||
|c1=A |
|c1=A |
||
|c1width=3% |
|c1width=3% |
||
| |
|Startup=[[File:FTRTEST.png|250px]] |
||
}} |
}} |
||
{{CBox|Title=|Center|bg=HFTF3|bg2=HFTF2| |
{{CBox|Title=|Center|bg=HFTF3|bg2=HFTF2| |
||
| Line 1,436: | Line 1,130: | ||
|c1=A |
|c1=A |
||
|c1width=3% |
|c1width=3% |
||
| |
|Startup=[[File:FTRTEST4.png|250px]] |
||
}} |
}} |
||
|Stage 2| |
|Stage 2| |
||
| Line 1,442: | Line 1,136: | ||
|c1=A |
|c1=A |
||
|c1width=3% |
|c1width=3% |
||
| |
|Startup=[[File:FTRTEST3.png|250px]] |
||
}} |
}} |
||
|Stage 3| |
|Stage 3| |
||
| Line 1,448: | Line 1,142: | ||
|c1=A |
|c1=A |
||
|c1width=3% |
|c1width=3% |
||
| |
|Startup=[[File:FTRTEST2.png|250px]] |
||
}} |
}} |
||
|Transparent| |
|Transparent| |
||
| Line 1,454: | Line 1,148: | ||
|c1=A |
|c1=A |
||
|c1width=3% |
|c1width=3% |
||
| |
|Startup=[[File:FTRTEST5.png|250px]] |
||
}} |
}} |
||
|Transparent| |
|Transparent| |
||
| Line 1,460: | Line 1,154: | ||
|c1=A |
|c1=A |
||
|c1width=3% |
|c1width=3% |
||
| |
|Startup=[[File:FTRTEST6.png|250px]] |
||
}} |
}} |
||
}} |
}} |
||
| Line 1,802: | Line 1,496: | ||
}} |
}} |
||
}} |
}} |
||
{{Tech|Part=HFTF |
|||
|Name = Standing Light {{HFInput|L}} |
|||
|Romaji = |
|||
|MImage = Chk.gif |
|||
|Caption = '''MID''' / '''AIR-UNBLOCKABLE''' / '''SPECIAL-SUPER CANCELLABLE''' |
|||
|Desc = Normal jab, combos into his other standing normals. |
|||
}} |
|||
{{Table |
|||
|c1=Startup |
|||
|c1width=3% |
|||
|c2=Active |
|||
|c2width=3% |
|||
|c3=Recovery |
|||
|c3width=3% |
|||
|c4=Hit Advantage |
|||
|c4width=3% |
|||
|c5=Block Advantage |
|||
|c5width=3% |
|||
|c6=Pushblock Advantage |
|||
|c6width=3% |
|||
|c7=Damage |
|||
|c7width=3% |
|||
|c8=Damage (Stand) |
|||
|c8width=3% |
|||
|r1= 5 |
|||
|r1c2= 2 |
|||
|r1c3= 14 |
|||
|r1c4=<span style="color:green;">+7</span> |
|||
|r1c5=<span style="color:green;">+5</span> |
|||
|r1c6=<span style="color:green;">+2</span> |
|||
|r1c7= 4 |
|||
|r1c8= 2 |
|||
}} |
|||
[[File:HFTF Chaka Jumping Heavy.png|400px]][[File:HFTF Chaka Crouching Heavy.png|400px]][[File:HFTF Chaka Medium.png|400px]][[File:HFTF Chaka Jumping Light & Medium.png|400px]][[File:HFTF Chaka Heavy.png|400px]][[File:HFTF Chaka Crouching Light.png|400px]][[File:HFTF Chaka Light.png|400px]] |
|||
Revision as of 03:13, 27 July 2024
| HFTF Sprites |


|
| Hearing that something is wrong with his grandson Jotaro, Joseph flies to Japan for his daughter Holy. |
GOALS:
- New nicer looking palette & story template.
- Simple & Detailed movelists.
Command List & Gameplay


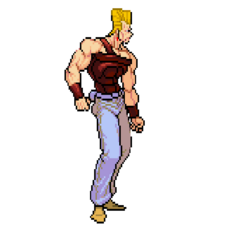
The younger Joseph's moveset is based primarily around his clackers, alongside a few gadgets from Battle Tendency. Young Joseph is a fairly simple rushdown character, with good zoning tools. Though he lacks a Stand, Joseph has a lot of exceptional pressure tools in his kit, and very simple combos. Young Joseph's main gimmick are his Clacker Boomerangs, his primary offensive and zoning tool. He is also able to run instead of dash.
Normals
Command Normals

| Startup | Active | Recovery | Hit Advantage | Block Advantage | Pushblock Advantage | Damage | Damage (Stand) |
|---|

| Startup | Active | Recovery | Hit Advantage | Block Advantage | Pushblock Advantage | Damage | Damage (Stand) |
|---|
| Startup | Active | Recovery | Hit Advantage | Block Advantage | Pushblock Advantage | Damage | Damage (Stand) |
|---|
Dashing Normals
| Startup | Active | Recovery | Hit Advantage | Block Advantage | Pushblock Advantage | Damage | Damage (Stand) |
|---|
| Startup | Active | Recovery | Hit Advantage | Block Advantage | Pushblock Advantage | Damage | Damage (Stand) |
|---|
| Startup | Active | Recovery | Hit Advantage | Block Advantage | Pushblock Advantage | Damage | Damage (Stand) |
|---|
Clackers

| Startup | Active | Recovery | Hit Advantage | Block Advantage | Pushblock Advantage | Damage | Damage (Stand) |
|---|

| Startup | Active | Recovery | Hit Advantage | Block Advantage | Pushblock Advantage | Damage | Damage (Stand) |
|---|

| Startup | Active | Recovery | Hit Advantage | Block Advantage | Pushblock Advantage | Damage | Damage (Stand) |
|---|

| Startup | Active | Hit Advantage | Block Advantage | Pushblock Advantage | Damage | Damage (Stand)
|
|---|

| Startup | Active | Recovery | Hit Advantage | Block Advantage | Pushblock Advantage | Damage | Damage (Stand) |
|---|
Throw

| Damage
|
|---|
Guard Cancel

| Hit Advantage | Damage | Damage (Stand)
|
|---|
Special Moves


| Startup | Active | Recovery | Hit Advantage | Block Advantage | Pushblock Advantage | Damage | Damage (Stand) |
|---|
| Startup | Active | Recovery | Hit Advantage | Block Advantage | Pushblock Advantage | Damage | Damage (Stand) |
|---|
| Startup | Active | Recovery | Hit Advantage | Block Advantage | Pushblock Advantage | Damage | Damage (Stand) |
|---|
| Startup | Active | Recovery | Hit Advantage | Block Advantage | Pushblock Advantage | Damage | Damage (Stand) |
|---|
| Startup | Active | Recovery | Hit Advantage | Block Advantage | Pushblock Advantage | Damage | Damage (Stand) |
|---|
| Startup | Active | Recovery | Hit Advantage | Block Advantage | Pushblock Advantage | Damage | Damage (Stand) |
|---|

| Startup | Active | Recovery | Hit Advantage | Block Advantage | Pushblock Advantage | Damage | Damage (Stand) |
|---|

| Startup | Active | Recovery | Hit Advantage | Block Advantage | Pushblock Advantage | Damage | Damage (Stand) |
|---|

| Startup | Active | Hit Advantage | Block Advantage | Pushblock Advantage | Damage | Damage (Stand)
|
|---|

| Startup | Active | Recovery | Hit Advantage | Block Advantage | Pushblock Advantage | Damage | Damage (Stand) |
|---|

| Startup | Active | Recovery | Hit Advantage | Block Advantage | Pushblock Advantage | Damage | Damage (Stand) |
|---|


| Startup | Hit Advantage | Block Advantage | Pushblock Advantage | Damage | Damage (Stand)
|
|---|
| Startup | Hit Advantage | Block Advantage | Pushblock Advantage | Damage | Damage (Stand)
|
|---|
| Startup | Hit Advantage | Block Advantage | Pushblock Advantage | Damage | Damage (Stand)
|
|---|
Super Moves

.png)
| Startup | Active | Recovery | Hit Advantage | Block Advantage | Pushblock Advantage | Damage
|
|---|

| Startup | Active | Recovery | Hit Advantage | Damage
|
|---|
}}

 +
+  : Chaka will perform a sweep.
- +
 : Chaka will perform an overhead slash.
 - +
 : Chaka will slash upwards.


| A
|
|---|
{{CBox|Title=|Center|bg=HFTF3|bg2=HFTF2|


| A
|
|---|
| A
|
|---|
| A
|
|---|
| A
|
|---|
| A
|
|---|
Challenge Mode

In Challenge Mode, Joseph Joestar will appear at the end of a run to commentate on your performance. These comments are based on your accumulated points and level.
- “Those kinds of techniques won't do you any good! (それぐらいのテクニックでは無駄じゃな!)”
- “You have a lot to learn. Why don't you go see Lisa Lisa? (まだまだ修行がたりんのぉ、リサリサの所へ行かんか?)”
- “Your guard needs a bit of work. (ガードが甘いのぉ)”
- “Make sure to use your special moves! (必殺技は確実に出せ!)”
- “And now you say, "Surely I'm stronger than that!" (お前は「オレはもっと強いハズ」という!)”
- “You've got battle experience... but you're still not ready. (戦いの年季が…まだまだ甘いのぉ)”
- “Be careful when your Stand Gauge gets low, or else your guard will break! (スタンドゲージが少ないときは要注意じゃ!ガードが崩されるぞ)”
- “Use your Advancing Guard if things get too rough! (ピンチにはアドバンシングガードじゃ)”
- “You should try to chain your moves together! (連続技をねらうのじゃ!)”
- “It's not just technique: the art of the bluff is important, too. (技だけじゃない、ハッタリも大事じゃな)”
- “When the enemy's in the air, that's your chance to strike! (敵が空中にいるときがチャンスじゃ)”
- “Attack as soon as you get the chance! (チャンスには一気に攻めろ)”
- “Defeat your opponent as fast as you can! (素早く相手を倒せ!)”
- “Try to KO with a Super Combo! (スパコンKOを狙うのじゃ)”
- “Make good use of your dash attack! (ダッシュ攻撃をうまく使え!)”
- “Use your forward dodge if you need to get close to the opponent! (回り込みで敵のふところへもぐりこむのじゃ)”
- “You can use four different neutral attacks with the control stick! Use your upward neutral attack for a chance to strike back! (レバーで4種類の受身を使い分けろ レバー上受身は反撃のチャンスじゃ!)”
- “Use your Guard Cancel against single attacks! (単発攻撃にはガードキャンセルをうまく使え!)”
- “Rack up those Hit Combos with Tandem Attacks! (タンデムアタックでヒットコンボを稼げ!)”
- “A short jump after a dash will allow you to pull off a quick yet powerful strike! (ダッシュからの小ジャンプは素早く強力な攻撃が可能になるのじゃ!)”
- “It seems your strength hasn't fully recovered yet. (体力を回復させているようじゃまだまだじゃの)”
- “Well, now! You're one talented Stand user! (ほぉ、なかなかのスタンド使いじゃ)”
- “You're even better than I thought! (こやつ、結構やりおるわい!)”
- “That power! You haven't put on the stone mask, have you? You couldn't have! (その強さ!?まさか、石仮面を使っている…わけないのう!)”
- “I fought a certain Santana a long time ago, but your power rivals even his! (おぬし…昔、戦ったサンタナにも匹敵する強さじゃッ!)”
- “Breathe in for ten minutes, then out for ten minutes! Kooooooohhh... (息を10分間吸いつづけ、10分間吐き続けるのじゃ コォォォォォォォォォォォォォッ!!)”
- “You're at Kars's level now—you're the strongest in the world! (おぬし…もはやカーズのレベル(地上最強)じゃ!)”
Other Ports
SEGA Dreamcast
Both Heritage for the Future and its earlier revision would later be ported to the Sega Dreamcast under the former's title, allowing the player to choose which revision they want to play. A special edition of the Dreamcast version named JoJo's Bizarre Adventure: Heritage for the Future for Matching Service added an online mode to the game, which has since become defunct.
The Dreamcast port features a few new modes, along with more options to existing ones like selecting difficulty in Story Mode or handicaps for Versus Mode.
The SEGA Dreamcast port contains the following new game modes:


JoJo's Bizarre Adventure HD Ver. (PSN/XBLA)
In 2012, Heritage for the Future was ported to Xbox Live Arcade and PlayStation Network with upscaled graphics and online play, as JoJo's Bizarre Adventure HD Ver., though this version was delisted in 2014.[1]


.jpg)


Expand/Collapse All
-

-

-

-

-

-

-

-
-

-
-

-

-

-

-

-

-

-

-

-

-

-

-

-

-

-
-

-

-

-

-
-
-
-
-
-

-
-
-

-
-
-

-
-
-

-

-
-

-
-
-
-
-
-

-
-
-
-

-
-
-

-

-

-

-
-

-
-
-
-
-
-
-
-
-
-
-
-

-
-
-
-
-

-

-

-

-

-

-

-

-

-

-

-

-
-
-

-

-

-

-

-

-

-

-

-

-
-

-
-
-
-
-
-
-

-
-
 New Kakyoin: Super K.O
 -
 Osiris Chip (Game Over)
 -
 Hol and Boingo: Super K.O
 -
 Osiris Chip (Game Over)
 -
 Khan: Super K.O
 -
 Osiris Chip (Game Over)
 -
 Rubber Soul: Super K.O
 -
Osiris Chip (Game Over)
-
 Vanilla Ice's Intro
 -
 Vanilla Ice's Intro Ending
 -
 Vanilla Ice: Super K.O
 -
 Osiris Chip (Game Over)
 -
 Promo art by Bengus
 -
 Pet Shop: Super K.O
 -
 Osiris Chip (Game Over)
 -
 Anubis Polnareff: Super K.O
 -
 Osiris Chip (Game Over)
 -
 Hol Horse's Lighter Intro
 -
 Hol Horse's Emperor Ender
 -
Hol Horse: Super K.O
-
Osiris Chip (Game Over)
-
 Cutscene
 -
 Super K.O
 -
 Osiris Chip (Game Over)
 -
 Title screen
 -
 Bloody Summoning (Before Attack)
 -
 Bloody Summoning (Draining Blood)
 -
 Super K.O
 -
 Osiris Chip (Game Over)
 -
 Unused kanji for 'dog' found in the game's data
 -
 Title Screen
 -
 Super K.O
 -
 Osiris Chip (Game Over)
 -
 Character Select Comic
 -
-
-
-
-
-
-
-
-

-

-

-
-
-
-
-
-
-

-


.png)
2.png)


Normal jab, combos into his other standing normals.
| Startup | Active | Recovery | Hit Advantage | Block Advantage | Pushblock Advantage | Damage | Damage (Stand) |
|---|---|---|---|---|---|---|---|
| 5 | 2 | 14 | +7 | +5 | +2 | 4 | 2 |


