How to Stitch Anime Shots
if you've been to the wiki's episode articles, you've probably seen how the gallery section contains images that don't look like the normal 16:9 screenshot. The reason for that is because they are what are commonly referred to as "stitches". But what even is a "stitch"?
A "stitch" is a term used for when a person combines several screenshots of a panning shot in an anime and stitches them together (hence the name) to form one larger image.
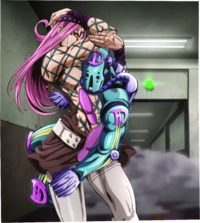
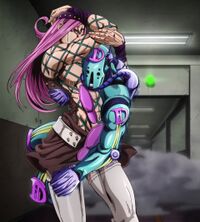
Often times, they form a pretty cool looking image, so you might want to learn how to make them yourself. This guide should help you figure that out. I'll describe two pretty easy methods to do them, one automatic and one manual with pros and cons to each method. I'll be stitching the infamous Anasui pose from episode 15 of Stone Ocean as an example.
Method A - Automatic
Step 1. Download and install the following pieces of software:
avidemux - For extracting frames from the episode - https://sourceforge.net/projects/avidemux/
Microsoft ICE (Image Composite Editor) - For stitching the frames together - https://web.archive.org/web/20180724063025/https://download.microsoft.com/download/7/3/9/73918E0B-C146-40FA-B18C-EADF03FEC4BA/ICE-2.0.3-for-64-bit-Windows.msi
Step 2. Open avidemux.
Step 3. Click "file" in the top left, then "open". From there select the video file of the episode, in my case, its "Episode 15 - Ultra Security House Unit.mkv".
Step 4. After waiting a few moments for the episode to load, go to the exact moment you want to stitch using the timeline at the bottom of the screen. To be more precise, use the two arrows next to the Play button to go frame by frame. You must be accurate and go to the very start of the shot to stitch the entire shot.
Step 5. When you're at the start of the shot, click the button that looks like "-A-", it will start a selection from that exact frame.
Step 6. Play and stop at the exact frame where the shot ends, use the same navigation method as described in step 4.
Step 7. When you're at the end of the shot, click the button that looks like "-B", it will cut your selection on the frame you're paused on.
Step 8. If done right, you've selected the frames that compose the shot. Now, go to "File" again, "Save as Image" and then "Save Selection as JPEG".
Step 9. Pick where you wish to save all the frames you just picked, I recommend creating a special folder for them since you wouldn't want to clog something like your Downloads folder with 150 images, would ya?
Step 10. After a few moments, it'll save all the images and you'll get a pop up saying something like "[number] images saved."
Step 11. Close avidemux and open Microsoft ICE.
Step 12. Click "New Panorama from Images".
Step 13. There'll be a pop up asking you to select files, go to where you saved all the frames and pick all of them. (I personally just click Ctrl + A on my keyboard to select all files in a folder if its saved in its own unique folder, but you do you.)
Step 14 . Simply hit "Next" at the top right, no need to touch any of the settings.
Step 15. Wait. This bit takes a pretty long time (5-10 minutes usually) so you can go make yourself a warm cup of coffee or hot chocolate or go watch a Youtube video.
Step 16. After waiting a while, you'll be presented with the stitched image, hooray! Just click "Next" twice.
Step 17. When you reach the export tab, pick "PNG image" under "File Format" and check the box that says "Include alpha channel" to keep any blank areas transparent.
Step 18. Click "Export to disk" and select where you want the image to be saved.
Step 19. Dojyaaa~~n! You've succesfully stitched a frame automatically!
Method B - Manual
Step 1. Open the video file for the episode in VLC media player (Which if you somehow don't have, just download it online), in my case, its "Episode 15 - Ultra Security House Unit.mkv".
Step 2. Go to a moment right *before* the shot you want to stitch, and click "E" on your keyboard to go to the next frame, keep going until you reach the first frame of the shot.
Step 3. Under "Video" on the VLC toolbar, click "Take Snapshot", this will screenshot the frame in perfect quality. It usually defaults to saving in your computer's Pictures folder.
Step 4. Play for a few moments and take a few more snapshots showing more of the shot, but keep a small area where it would overlap with the previous snapshot. This will be important in a bit.
Step 5. After you took all the snapshots you need, open up an image editing software with layer support. I personally use Adobe Photoshop, but I think paint.net should work too. The following explanation will be for Photoshop, but you should be able to figure it out on your own in the image editing software of your choice.
Step 6. Open up the different snapshots you took.
Step 7. Extend the canvas of the first snapshot in the direction of where the shot pans, in my case, towards the top.
Step 8. Copy the second snapshot and paste it onto the first one as a new layer.
Step 9. Drag and move it around until the area that overlaps between the two matches, I usually set the top image to be at 60% opacity to see where they match.
Step 10 . After matching the two, use the eraser tool with minimum hardness (so its soft and fades between the two images instead of having a clear "seam" between the two) and delete the area where you can clearly see the two images connect. Make sure NOT to delete too much off the top so there are no random holes in the stitch.
Step 11. Do this again with all the following images, in my case its just three.
Step 12. Crop any empty space so that only the stitched snapshots remain.
Step 13. Save the image as a PNG.
Step 14. Dojyaaa~~n! You've succesfully stitched a frame manually!
Pros & Cons
Automatic:
Pros: As the name suggests, its an automatic process which only needs you to provide the images and the program does the rest. It also allows for more challenging shots where the frame moves around in a complicated manner to be done with ease.
Cons: The time you need to wait for the stitching to be done automatically is kind of annoying and sometimes the program messes up and doesn't stitch something correctly (It usually does though).
Manual:
Pros: Its really fast to do since you only really need to screenshot a few frames and put them on top of one another in a matching order. Also gives you a lot more control over how you want the stitch to be done.
Cons: For a beginner it can be slightly challenging to perfecting the way the images match and its annoying to do for more complicated shots.
Neither method is perfect or "the correct one" to choose, its really up to you. If you have zero experience editing images, the automatic one is easier but it takes longer to do. If you already have experience editing images, the manual one is fast and pretty fun to do.


